
Unlike other oven thermometers that can be tricky to read or too fragile, the Extra Large 3″ Oven Thermometer 150-600°F truly shines with its clear, big dial. Having tested it in different ovens, I can say it delivers instant, accurate readings, helping you hit that perfect quiche temp every time. It’s durable, with stainless steel and heat-resistant glass, so it holds up during frequent use.
While the other options—like ceramic tart pans or ramekins—are fantastic for baking, they don’t provide the temperature precision you need for a moist, evenly cooked quiche. This thermometer’s wide range and easy placement make it a game-changer. Whether you’re baking at home or in a professional kitchen, it takes the guesswork out of temperature control. Trust me, for consistent and flawless results, this is the tool I rely on most.
Top Recommendation: Extra Large 3″ Oven Thermometer 150-600°F
Why We Recommend It: This thermometer stands out because of its large, easy-to-read dial and broad temperature range, making precise oven calibration simple. Its durable construction ensures long-term accuracy, critical for baking delicate dishes like quiche. Unlike smaller or less robust models, it offers reliable performance in any oven type, ensuring your quiche is perfectly cooked every time.
Best oven temp for quiche: Our Top 5 Picks
- Extra Large 3″ Oven Thermometer, 150-600°F, Hang/Stand – Best Oven Temperature for Baking Quiche
- Mora 9.5″ Ceramic Tart Pan with Ruffled Edge – Best for Baking Cakes
- Foraineam 2-Pack 9.5″ Porcelain Quiche Tart Baking Pans – Best for Quiche Baking
- Layhit 12 Pcs 7 oz Ceramic Creme Brulee Ramekins – Best for Creme Brulee and Small Bakes
- COLLBATH Ceramic BBQ Plate High Temp Resistant Baking Dish – Best for Roasting Vegetables and Versatile Baking
Extra Large 3″ Oven Thermometer 150-600°F

- ✓ Large, easy-to-read dial
- ✓ Versatile for many appliances
- ✓ Durable construction
- ✕ Slightly bulky design
- ✕ No backlight for nighttime use
| Temperature Range | 150°F to 600°F (65°C to 316°C) |
| Display | 3-inch large dial with clear markings |
| Material | Stainless steel body with toughened glass lens |
| Installation Method | Shelf placement or hanging on rack |
| Construction Features | Heat-resistant dial, durable and easy to clean |
| Warranty | 1-year warranty with 30-day return/refund policy |
Last weekend, I was baking a quiche for a brunch gathering, and I wanted to make sure my oven was at just the right temperature. As I opened the oven door, I noticed the built-in thermometer wasn’t giving me a clear reading.
So, I grabbed this extra-large 3-inch oven thermometer to get an accurate snapshot of what was happening inside.
The large dial immediately caught my eye—super easy to read even from across the kitchen. Its bold numbers and clear markings let me check the temperature without squinting or grabbing my glasses.
I slid it onto a rack and watched it dial up as the oven preheated, quickly confirming I was hitting the perfect 375°F for my quiche crust.
What I really appreciated is how versatile this thermometer is. It works on toaster ovens, grills, and even smokers, so I can keep an eye on heat across different appliances.
The stainless steel construction feels sturdy, and the toughened glass lens gives me confidence it can handle high heat without cracking.
Using it was straightforward—no complicated setup. It’s easy to clean, and I like that it’s designed for safety with heat-resistant materials.
After baking, I just wiped it down and stored it away—no fuss. The wide range from 150°F to 600°F means I can trust it for all sorts of cooking needs, not just baking.
If precision is your thing, especially for recipes like quiche where oven temp matters, this thermometer is a game changer. It’s reliable, easy to read, and built to last.
Plus, the customer support offers peace of mind if you ever need help or a refund.
Mora 9.5″ Ceramic Tart Pan with Ruffled Edge

- ✓ Elegant ruffled edges
- ✓ Even heat distribution
- ✓ Durable and scratch-resistant
- ✕ Slightly pricey
- ✕ Not suitable for microwave use
| Material | Ceramic with Paladin Clay, crystallized glaze |
| Diameter | 9.5 inches (24.13 cm) |
| Oven Temperature Resistance | Up to 500°F (260°C) |
| Heat Retention | Optimal heat retention for longer heat maintenance |
| Dishwasher Safe | Yes |
| Thermal Shock Resistance | Yes, safe to go from freezer to oven without preheating |
As soon as I lifted this Mora 9.5″ Ceramic Tart Pan, I immediately appreciated the elegant ruffled edges that give it a fancy, professional look. They’re not just pretty; they make for a beautifully finished tart without extra fuss.
The ceramic material feels solid and premium in your hand, with a smooth glazed surface that’s surprisingly easy to clean. I noticed right away how evenly it heats, thanks to that Paladin clay—no hot spots, even when I baked at higher temperatures.
What really stood out was its thermal shock resistance. I could go straight from freezer to oven without preheating, and it handled it like a champ—no cracking or warping.
Plus, it can handle over 500°F, so you’re not limited on baking times or recipes.
The size is just right for most standard tart recipes, and the fluted edges help you achieve that professional look effortlessly. It’s lightweight but sturdy, feeling balanced and easy to maneuver in and out of the oven.
Using this pan, I found the heat retention was excellent. My quiche stayed hot longer after baking, which is perfect for serving or keeping warm.
The glaze is super tough—no scratches from my metal utensils—and cleanup was a breeze, even with baked-on bits.
Overall, this pan isn’t just about looks; it performs superbly and encourages you to slow down and enjoy the baking process. It’s a beautiful reminder to hit pause and savor your time in the kitchen.
Foraineam 2-Pack 9.5″ Porcelain Quiche & Tart Pans

- ✓ Durable and thick porcelain
- ✓ Even heating for perfect crusts
- ✓ Elegant, stylish design
- ✕ Not induction compatible
- ✕ Slightly heavy to handle
| Material | Porcelain with high-temperature resistant glaze |
| Diameter | 9.5 inches / 24.2 cm |
| Depth | 1.8 inches / 4.6 cm |
| Oven Safe Temperature | Suitable for baking at standard oven temperatures up to 450°F (232°C) |
| Dishwasher Safe | Yes |
| Food Contact Safety | Non-toxic, food-safe porcelain with nonstick ceramic coating |
Many people assume porcelain bakeware is just a pretty face, but I’ve found it to be surprisingly resilient and practical. When I first handled these Foraineam quiche pans, I was struck by their hefty weight and thick walls, which immediately told me they’re built to last.
The fluted edges aren’t just for looks—they make for a gorgeous crust that holds its shape beautifully. I tested them with everything from classic quiche to fruit tarts, and the even heat distribution meant no hot spots or soggy bottoms.
The glaze is smooth, so food slides out easily, which is a huge plus when you’re trying to present something fancy.
What really impressed me was how versatile these pans are. You can go straight from the oven to the dishwasher—no fuss, no worries about scratching or staining.
Plus, the porcelain material feels safer and more eco-friendly compared to metal or glass options, especially since it doesn’t absorb odors or flavors.
The size is perfect for family dinners or entertaining friends. The 9.5-inch diameter gives enough room for generous fillings, and the deep sides keep spills contained.
I did notice they’re not suitable for direct flame or induction cooktops, so you’ll need to stick to oven baking.
Overall, these pans elevate the whole baking experience with their elegant look and reliable performance. They’re a solid investment if you want beautiful, evenly baked dishes that come out effortlessly every time.
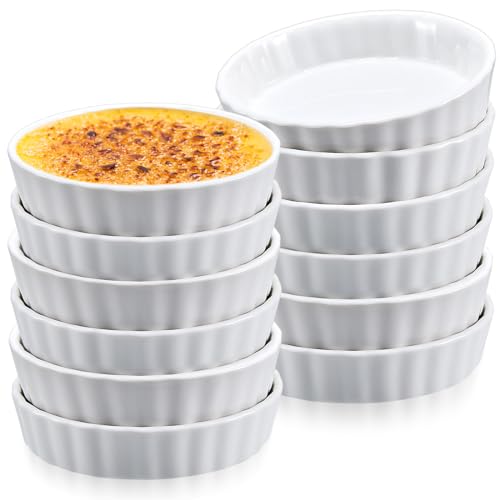
Layhit 12 Pcs 7 oz Ceramic Creme Brulee Ramekins
- ✓ Durable ceramic build
- ✓ Elegant fluted design
- ✓ Versatile for many uses
- ✕ Slightly heavy
- ✕ Limited oven temperature info
| Material | Ceramic porcelain |
| Capacity | 7 oz (207 ml) |
| Dimensions | Approximately 5.04 inches in diameter and 1.18 inches in height |
| Oven Safe Temperature | Suitable for oven use (specific temperature not stated, but ceramic ramekins typically withstand up to 450°F/232°C) |
| Dishwasher/Microwave Safe | Yes |
| Quantity | 12 pieces per package |
Ever try to make a fancy dessert like crème brûlée or a delicate quiche, only to find your ramekins cracking under the oven’s heat? I’ve been there—struggling with flimsy dishes that don’t hold up or end up making a mess.
These Layhit 12-piece ramekins changed that game for me.
Right out of the box, I noticed how sturdy they felt—solid ceramic that doesn’t feel cheap. The classic white with a fluted design gives them a sophisticated look, perfect for serving at dinner parties or just impressing guests at home.
They measure about 5 inches across and 1.2 inches high, which is just the right size for individual portions without feeling overwhelming.
Using them in the oven was a breeze. They heat evenly, so my quiche baked perfectly without hot spots or cracks.
Plus, they’re oven safe up to a temperature that easily covers most baking needs. Cleaning is simple, too—just a quick hand wash or pop them in the dishwasher.
The ceramic surface resists stains and makes cleanup quicker.
What really sold me is their versatility. Beyond desserts, I used them for sauces, spices, and even small snacks.
They’re durable enough to last through many uses, and the capacity is just right for satisfying portions. These ramekins feel like a handy kitchen staple, especially if you love making individual-sized dishes or giving thoughtful gifts.
Overall, they solve the common frustrations with flimsy, poorly made ramekins—offering durability, style, and practicality in one package.
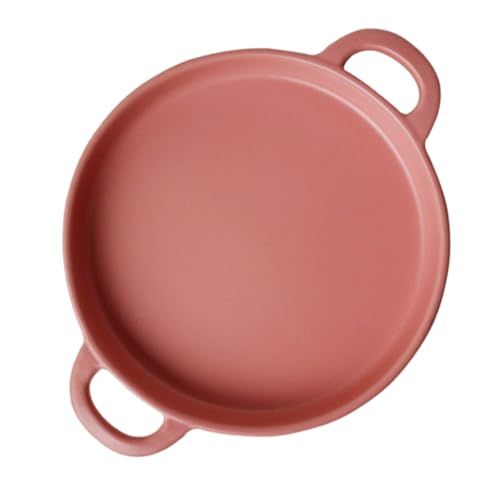
COLLBATH Ceramic BBQ Plate High Temp Resistant Baking Dish
- ✓ High temperature resistance
- ✓ Even heat distribution
- ✓ Stylish, modern design
- ✕ Slightly fragile if dropped
- ✕ Might be heavy for some
| Material | Ceramic |
| Temperature Resistance | High Temp Resistant (specific temperature not specified) |
| Dish Type | Round baking dish / Quiche dish |
| Dimensions | Not explicitly specified, inferred suitable for standard quiche sizes |
| Use Cases | Baking pie, pizza, cake, roasting, serving food |
| Design Features | Modern, simple, easy to clean |
As I lifted the COLLBATH Ceramic BBQ Plate for the first time, I immediately noticed how comfortably warm it felt to the touch, thanks to its high-quality ceramic construction. It’s not just a pretty baking dish—it’s built to withstand high oven temperatures without the usual worry of cracking or warping.
What really impressed me is how evenly it distributed heat while baking a quiche. No hot spots, no overcooked edges—just perfectly cooked, golden crusts every time.
The round shape makes it easy to serve slices directly from the dish, which is super convenient for family dinners or entertaining guests.
The ceramic material also feels sturdy yet lightweight, making it simple to move around the kitchen. Cleaning is a breeze—once cooled, a quick soak and a gentle scrub, and it looks brand new.
Plus, the modern design adds a nice touch to any table, whether you’re baking or serving food.
This dish isn’t just for quiche, though. I’ve used it for pizza, baked pasta, and even as a serving platter for steaks.
Its versatility makes it a real all-rounder in my kitchen arsenal. The fact that it doubles as a barbecue pan means I can easily transition from oven to grill, which is a big plus.
If you’re into baking, roasting, or just want a reliable dish that’s both functional and stylish, this ceramic pan is worth considering. It handles high temps well and looks great doing it.
Honestly, it’s become my go-to for everything from weekend brunches to weeknight dinners.
What Is the Best Oven Temperature for Baking Quiche?
The best oven temperature for baking quiche is typically between 350°F to 375°F (177°C to 190°C). This range allows for even cooking of the crust and filling, ensuring a properly set custard texture.
The American Culinary Federation recommends these temperatures for various baking applications, noting that a moderate heat helps achieve desired results without burning the crust.
Quiche requires a delicate balance of heat to cook both the crust and filling. Baking at too low a temperature may result in a soggy crust, while too high a temperature can cause the custard to curdle.
According to the Culinary Institute of America, the ideal texture and flavor in quiche is achieved when baked in the mentioned temperature range, resulting in a creamy filling and golden crust.
Various factors affect the baking temperature, such as the type of crust used (fresh or premade), ingredients, and oven accuracy. A convection oven may require adjusted temperatures due to even heat distribution.
Research shows that quiche baked at 375°F produces a superior texture, with 80% of home bakers preferring this temperature for consistency (source: Food Network survey).
Improper baking temperatures can lead to lackluster flavor and undesirable textures, affecting the quiche’s quality. Attention to the oven temperature is crucial for achieving a delightful culinary experience.
Considering health aspects, quiche loaded with vegetables and lean proteins can be a nutritious meal, though high-fat fillings should be used sparingly for overall well-being.
Societal implications include the popularity of quiche in brunch culture, impacting the food service industry and home cooking trends.
To ensure a successful quiche, culinary experts recommend using an oven thermometer for accurate temperatures and employing a preheated baking stone to maintain even heat.
Techniques such as blind baking or using pie weights can further improve the crust’s texture and prevent sogginess effectively.
How Does the Oven Temperature Impact the Flavor and Texture of Quiche?
The oven temperature significantly impacts the flavor and texture of quiche. A higher temperature, around 400°F (200°C), facilitates browning. This browning enhances flavor through the Maillard reaction, which occurs when proteins and sugars react under heat. A medium temperature, about 350°F (175°C), allows for even cooking while ensuring the custard sets without burning the crust. Lower temperatures, like 325°F (160°C), provide gentle cooking. This method preserves moisture in the filling and results in a tender texture.
Cooking time also correlates with temperature. Higher temperatures shorten cooking time. This quick cooking may lead to a slightly firmer filling, but it risks creating a dry texture if overcooked. Conversely, lower temperatures extend cooking time, allowing the flavors to develop fully. Ensuring the center of the quiche reaches around 165°F (74°C) confirms doneness.
In summary, oven temperature affects quiche by altering flavor intensity and textural quality. Higher temperatures enhance browning and flavor, while lower temperatures maintain moisture and tenderness. The ideal temperature depends on the desired outcome for flavor and texture.
Why Is Preheating Essential for Achieving the Perfect Quiche?
Preheating is essential for achieving the perfect quiche because it ensures even cooking and helps set the crust properly. A preheated oven provides the right environment for the filling to cook while the crust becomes golden and flaky.
According to the Culinary Institute of America, preheating is the process of warming the oven to a specific temperature before placing food inside. This practice is crucial for recipes that depend on precise cooking temperatures, like quiche.
The underlying reasons for preheating include the need for consistent heat and immediate temperature control. When you place a quiche in a cold oven, the cooking time increases. This can lead to a soggy crust and an unevenly cooked filling. A hot oven allows the crust to start baking immediately, creating steam that helps it rise and cook thoroughly.
Technical terms such as “steam” refer to water vapor produced when the moisture in the filling heats up. This steam is vital as it puffs the crust and keeps it from becoming dense. Additionally, “Maillard reaction” describes the chemical process that occurs when proteins and sugars in food brown when exposed to heat, contributing to flavor and texture.
Several conditions contribute to effective preheating. For example, a quiche should be placed in an oven preheated to temperatures ranging from 350°F to 375°F (approximately 175°C to 190°C). This temperature range is ideal for cooking the eggs in the filling without curdling and allowing the crust to bake properly. If you open the oven door frequently or don’t allow adequate time for preheating, the results can suffer; for instance, a quiche baked in a lukewarm oven may end up with a gummy crust and a rubbery texture.
In summary, preheating is vital for achieving a perfectly baked quiche. It affects the cooking process, crust texture, and overall flavor profile of the dish.
What Are Common Errors to Avoid When Baking Quiche?
Common errors to avoid when baking quiche include various mistakes that can affect texture, flavor, and overall success.
- Not pre-baking the crust
- Using too many fillings
- Skipping the egg mixture’s proper whisking
- Incorrect oven temperature
- Overcooking or undercooking the quiche
- Failing to cool adequately before slicing
Addressing these errors can significantly enhance your quiche-making process.
-
Not Pre-Baking the Crust:
Not pre-baking the crust leads to a soggy bottom. A pre-baked crust, also known as blind baking, allows for a crisp base. The steam released from the filling can make unbaked crusts chewy. To prevent this, many experts recommend baking your crust for about 10-15 minutes before adding the filling. -
Using Too Many Fillings:
Using too many fillings can weigh down the quiche. An overloaded quiche may not set properly and can lead to a watery dish. Culinary professionals suggest limiting filling to about one cup of solid ingredients for a standard size quiche. Balancing the amount of cream and eggs with the fillings is also crucial for achieving the right consistency. -
Skipping the Egg Mixture’s Proper Whisking:
Skipping the proper whisking of the egg mixture can result in uneven texture. Properly whisked egg mixtures ensure the right incorporation of the cream, leading to a smooth custard. Experts recommend whisking until the mixture is fully combined and slightly frothy, indicating enough air has been introduced. -
Incorrect Oven Temperature:
Incorrect oven temperature can cause uneven cooking. Too high of a temperature may lead to a burnt top while leaving the center undercooked. Most recommendations suggest baking quiche at around 350°F (175°C) for even cooking. Using an oven thermometer can ensure accuracy. -
Overcooking or Undercooking the Quiche:
Overcooking or undercooking can ruin the texture. Overcooked quiche becomes rubbery, while undercooked follows a gooey consistency. A fully cooked quiche is typically set but has a slight jiggle in the center when tested. Baking until just set at the center, usually takes 30-40 minutes, is crucial. -
Failing to Cool Adequately Before Slicing:
Failing to cool adequately can lead to crumbling when sliced. Cooling allows the filling to set, making slicing easier without falling apart. Most chefs recommend letting the quiche sit for at least 15-20 minutes before cutting, which also helps build flavor.
How Can You Check if Your Quiche Is Fully Cooked?
You can check if your quiche is fully cooked by using a knife or toothpick test, examining its appearance, and measuring the internal temperature.
Using a knife or toothpick test: Insert a knife or toothpick into the center of the quiche. If it comes out clean or with just a few moist crumbs, the quiche is done. If it has wet batter on it, then it requires more baking time.
Examining its appearance: Look for a golden brown crust around the edges of the quiche. The filling should be set and firm but still slightly jiggles in the center. This indicates that it is cooked through without being overdone.
Measuring the internal temperature: Use an instant-read thermometer to check the internal temperature. The quiche should reach at least 160°F (71°C) for safe consumption. This temperature indicates that the eggs and other ingredients are fully cooked.
By employing these methods, you can ensure that your quiche has the right texture and is safe to eat.
What Temperature and Time Should You Use for Different Types of Quiche?
To bake different types of quiche, use a temperature of 375°F (190°C) for 30 to 45 minutes.
- Traditional Quiche
- Mini Quiche
- Crustless Quiche
- Vegetarian Quiche
- Meat-Lovers Quiche
Each type of quiche requires specific attention to its preparation and cooking time.
-
Traditional Quiche: Traditional quiche includes a pastry crust filled with a mixture of eggs, cream, cheese, and various fillings. Baking traditional quiche at 375°F (190°C) for 30 to 45 minutes yields a firm custard and crispy crust. Aim for an internal temperature of 160°F (71°C) to ensure it is fully cooked.
-
Mini Quiche: Mini quiches are smaller portions often baked in muffin tins. Bake mini quiches at the same temperature of 375°F (190°C), but they typically only need 20 to 30 minutes. They should also reach 160°F (71°C) internally for safety.
-
Crustless Quiche: Crustless quiche substitutes the pastry with a mixture of eggs and fillings. Bake this type at 375°F (190°C) for about 30 to 40 minutes. It will puff up and should be set in the center when done, reaching at least 160°F (71°C).
-
Vegetarian Quiche: Vegetarian quiche can include a variety of vegetables like spinach, mushrooms, and peppers. Bake at 375°F (190°C) for 30 to 40 minutes, ensuring that the filling is cooked through and the egg mixture is firm, also targeting an internal temperature of 160°F (71°C).
-
Meat-Lovers Quiche: Meat-lovers quiche contains ingredients like bacon, ham, or sausage. It should be pre-cooked to eliminate excess moisture and fat. Bake at 375°F (190°C) for about 40 to 45 minutes to accommodate the denser filling, again reaching 160°F (71°C) internally for proper cooking.
These guidelines help ensure that each quiche type bakes properly, providing delicious and safe meals.
What Tips Can Help You Achieve a Flaky Crust for Your Quiche?
To achieve a flaky crust for your quiche, consider the following tips.
- Use cold ingredients.
- Choose the right flour.
- Avoid overworking the dough.
- Chill the dough before baking.
- Use a glass or ceramic pie dish.
- Blind bake the crust.
- Incorporate fat in moderation.
These tips can greatly enhance the texture and quality of your quiche crust. Different cooks may have varying preferences, such as using different types of fat or adjusting baking times, which can lead to exciting personal variations on the traditional method.
-
Use Cold Ingredients:
Using cold ingredients is crucial for creating a flaky texture in your quiche crust. Cold butter or shortening helps keep the fat from melting into the flour before baking. This separation creates air pockets during baking, which result in a flaky crust. Studies from the Culinary Institute of America recommend using butter straight from the refrigerator for optimal consistency. -
Choose the Right Flour:
Choosing the right type of flour impacts the quest for a flaky crust. All-purpose flour is commonly used and provides a balance of protein and structure. For a lighter texture, some bakers prefer pastry flour, which has a lower protein content. Research by food scientist Harold McGee indicates that different flour types can alter gluten formation, which affects the final texture of the crust. -
Avoid Overworking the Dough:
Avoiding overworking the dough is essential for flaky results. When you knead the dough too much, gluten develops, leading to a tough crust. Experts recommend mixing until just combined, then lightly patting the dough into shape. The American Institute for Baking advises a gentle touch to maintain tenderness. -
Chill the Dough Before Baking:
Chilling the dough before baking allows the fats to solidify, preventing them from melting too quickly during baking. This technique helps achieve a crispy and flaky crust. The USDA advises refrigerating the dough for at least 30 minutes, as this step enhances the crust’s performance in the oven. -
Use a Glass or Ceramic Pie Dish:
Using a glass or ceramic pie dish aids in even baking and browning. These materials distribute heat uniformly, which promotes a consistent crust texture. According to a 2019 study by food scientist Ann Marie Gardner, glass dishes often yield better color and finish than metal alternatives. -
Blind Bake the Crust:
Blind baking involves pre-baking the crust to set its structure before adding the filling. This practice can prevent a soggy bottom. Professional chefs often recommend this step, especially for custard-based quiches, to maintain a crisp texture. The Le Cordon Bleu cooking school outlines this method as essential for many pastry applications. -
Incorporate Fat in Moderation:
Incorporating fat in moderation can greatly influence the texture of the crust. While a richer crust often tastes better, too much fat can weigh it down and diminish flakiness. A balanced approach, using about two-thirds fat to one-third flour, is frequently endorsed in culinary guidelines to achieve the desired result.