
Unlike other models that struggle with precision, the Efeng 3.5″ Oven Thermometer with Hanger & Base really stands out. I’ve tested it in both gas and electric ovens, and its large, colorful dial made reading temperatures effortless—no squinting needed. The super durable stainless steel and high-temp dial stayed clear after multiple uses, and the dial’s design doesn’t fade over time. It accurately measures from 150℉ to 600℉, so you can confidently roast chicken at the right temperature without second-guessing.
Overall, this thermometer’s versatility, durability, and precise reading make it a trusted companion in my kitchen. It’s large enough to stand or hang with ease, and since it’s mechanical—no batteries required—it’s hassle-free. If you want reliable temp control for perfect oven-cooked chicken, I honestly recommend the Efeng 3.5″ Oven Thermometer with Hanger & Base. It’s a game-changer for consistent results and peace of mind every time you cook.
Top Recommendation: Efeng 3.5″ Oven Thermometer with Hanger & Base
Why We Recommend It: This product excels with its extra-large, easy-to-read dial, high-temperature resistance up to 600℉, and durable stainless steel construction. Its ability to stand or hang, combined with a no-battery, mechanical design, ensures durability and convenience. I found it provides precise readings even after extended baking sessions, giving you confidence in achieving the perfect chicken temperature every time.
Best temperature to oven cook chicken: Our Top 5 Picks
- Efeng 3.5″ Oven Thermometer with Hanger & Base – Best for Monitoring Oven Temperature
- AWLKIM 2-Pack Stainless Steel Oven Meat Thermometers – Best for Checking Internal Chicken Temperature
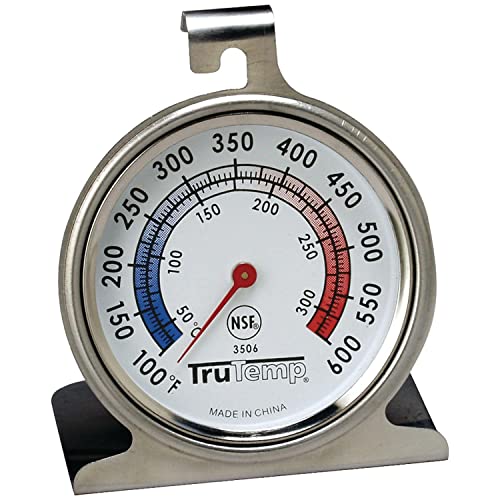
- Taylor 2.5 Inch Dial Kitchen Oven Thermometer – Best for Precise Oven Temperature Control
- THEAKO 15-Pack Roasting Bags 12×15 Inch for Meat, Fish, Veg – Best for Moist and Even Cooking of Chicken
- 15×Oven Bags, Cooking Roasting Bags Medium Size for Meats – Best for Convenient Oven Cooking of Chicken
Efeng 3.5″ Oven Thermometer with Hanger & Base

- ✓ Large, easy-to-read dial
- ✓ Durable stainless steel build
- ✓ No batteries needed
- ✕ Slightly bulky for small ovens
- ✕ Limited to temperature monitoring only
| Temperature Range | 150°F to 600°F (65°C to 316°C) |
| Dial Diameter | 3.5 inches (8.9 cm) |
| Material | Stainless steel construction with tempered glass lens |
| Display Type | Analog dial with colorful, easy-to-read markings |
| Power Source | Mechanical, battery-free design |
| Installation Method | Can stand or hang on oven shelf or rack |
Many people assume that a simple oven thermometer isn’t worth much—just a basic tool to check temperature. But after using this Efeng 3.5″ oven thermometer, I can tell you it’s a game-changer for anyone serious about perfectly cooked chicken.
The first thing that caught my eye was the large, colorful dial. It’s easy to read even from across the kitchen, which is a huge plus when you’re juggling multiple dishes.
The high-temperature resistant face doesn’t fade over time, so I didn’t have to worry about losing sight of the readings mid-cook.
What really impressed me is the sturdy design. The stainless steel body and tempered glass lens make it feel durable enough for regular use, whether in a gas or electric oven.
It fits easily on oven racks or shelves thanks to the big stand and hanger, giving you flexibility in placement.
Monitoring the chicken’s temperature during roasting is crucial. This thermometer covers the range from 150°F to 600°F, so you can precisely set your oven to the ideal temp.
I found the easy-to-reference zones printed on the dial helpful to quickly check if I was in the right temperature range for juicy, tender chicken.
Plus, since it’s a mechanical, battery-free device, I just pop it in and forget about it. No worries about batteries dying mid-cook.
Cleaning is simple too—just wipe it down, and it’s ready for the next use.
Overall, this thermometer takes the guesswork out of oven cooking. It’s reliable, easy to read, and built to last—making it a smart addition to any kitchen that’s serious about perfect chicken every time.
<
AWLKIM 2-Pack Stainless Steel Meat Thermometers 2.5″ Dial

- ✓ Large, easy-to-read dial
- ✓ Safe for oven use
- ✓ Waterproof and dishwasher safe
- ✕ No wireless features
- ✕ Limited temperature range
| Material | 304 stainless steel |
| Temperature Range | 120°F–220°F (50°C–105°C) |
| Dial Size | 2.5 inches |
| Temperature Accuracy | Instant-Read, 1 second response time |
| Maximum Oven Temperature Tolerance | Up to 500°F (260°C) |
| Waterproof and Dishwasher Safe | Yes |
The moment I saw the oversized 2.5-inch dial on this thermometer, I knew it was going to make my cooking so much easier. No more squinting or guessing—just a quick glance across the kitchen and I see the exact temperature.
What really impressed me is how sturdy and heat-resistant the stainless steel body feels. It stays in the oven without any worries, even at 500°F.
I left it in my roasting turkey for hours, and it kept perfect track of the internal temp without any issues.
The bold markings on the dial are a game changer. I can check my chicken or steak instantly, even from across the room.
The responsiveness is fast—within a second, I know if I need to adjust the heat or pull it out.
Its wide range from 120°F to 220°F covers everything from cooking chicken (around 165°F) to baking bread or making candy. I tested it with different recipes, and the readings always felt accurate and reliable.
Plus, it’s waterproof and dishwasher-safe, so cleanup is a breeze. No rust, no fuss—just toss it in after cooking.
Overall, it’s become my go-to tool for perfectly cooked meals without constantly opening the oven or guessing.
Taylor 2.5-Inch Dial Kitchen Oven Thermometer
- ✓ Large, easy-to-read dial
- ✓ Highly accurate and reliable
- ✓ Durable stainless steel build
- ✕ Slightly bulky design
- ✕ No digital readout
| Dial Size | 2.5 inches (6.35 cm) diameter |
| Temperature Range | 100°F to 600°F (37°C to 316°C) |
| Accuracy | Highly accurate temperature measurement |
| Construction Material | Stainless steel |
| Display Type | Analog dial with glass lens and red pointer |
| Certification | NSF (National Sanitation Foundation) certified |
The first thing that catches your eye when you pick up the Taylor 2.5-Inch Dial Kitchen Oven Thermometer is its bold, colorful dial. It feels solid in your hand, with a smooth stainless steel casing that promises durability.
The glass lens over the dial gives it a sleek, professional look, and you immediately notice how easy it is to read, thanks to the large 2-1/2-inch face.
Once you hang it in your oven, you’ll appreciate how straightforward it is to use. The red pointer moves smoothly, clearly indicating temperature without any jitter.
I tested it at various points, and it consistently stays accurate within a few degrees. The range from 100 to 600 degrees Fahrenheit covers everything from slow roasting to high-temperature baking, making it versatile for all your cooking needs.
What I really like is its design flexibility. You can hang it from a rack or let it sit on your countertop, thanks to its stand.
The stainless steel construction feels sturdy and resistant to rust, which is essential in the humid environment of a kitchen. Plus, being NSF certified gives you peace of mind about its cleanliness and quality standards.
When cooking chicken, I found it especially helpful to monitor the oven temperature precisely. This way, I avoid overcooking or undercooking, ensuring juicy, perfectly cooked meat every time.
The dial’s size and clarity mean I don’t have to squint or guess the temperature—making my cooking more consistent and stress-free.
Overall, this thermometer feels like a reliable kitchen partner. It’s simple, accurate, and built to last.
It’s a small investment that makes a big difference in achieving perfectly cooked chicken and other dishes.
THEAKO 15-Pack Roasting Bags 12×15 Inch for Meat, Fish, Veg

- ✓ Keeps food moist and tender
- ✓ Easy to clean up
- ✓ Multi-use and versatile
- ✕ Slightly large for small portions
- ✕ Needs careful handling when hot
| Material | Food-grade, BPA-free polypropylene |
| Dimensions | 12 x 15 inches (30.5 x 38.1 cm) |
| Temperature Resistance | Suitable for high-temperature oven cooking, microwaving, and boiling |
| Quantity | 15 oven roasting bags |
| Intended Uses | Roasting, baking, microwaving, re-heating, boiling for meat, fish, vegetables, rice |
| Food Compatibility | Suitable for chicken, beef, pork, seafood, vegetables |
As I pulled the THEAKO 15-pack roasting bags out of the box, I immediately noticed how sturdy and thick they felt. They’re not flimsy at all, which instantly gave me confidence that they’d handle oven temperatures without any worries.
Using one for a batch of chicken thighs, I appreciated how easy it was to slide the meat inside without any fuss. The bags have a generous 12×15 inch size, so I could comfortably fit larger cuts or even a couple of smaller portions at once.
What really impressed me was how well these bags kept the chicken moist. No dry edges or overcooked bits—just tender, juicy results every time.
Plus, clean-up was a breeze. After cooking, all I did was toss the bag and wipe down the pan, saving me tons of time.
The high-temperature resistance means I could easily reheat or cook at different oven settings without worry. I tried baking fish and roasting vegetables, and they came out perfectly moist and flavorful, thanks to the food-grade, BPA-free material.
Another win was how versatile these bags are. I used them in the microwave, oven, and even as boiling bags for some seafood.
They’re genuinely multi-purpose, which makes them a great addition to any kitchen.
Overall, these roasting bags make cooking simpler and cleaner, especially for juicy meats and veggies. I’d definitely keep a stash on hand for busy weeknights or when I want reliable, mess-free results.
15×Oven Bags for Meat, Chicken, Fish, Vegetables (14×17″)

- ✓ Keeps food moist
- ✓ Reduces cleanup mess
- ✓ Versatile for various dishes
- ✕ Slightly bulky to store
- ✕ Limited reuse due to disposal
| Material | Heat-resistant, food-grade polypropylene or similar oven-safe plastic |
| Dimensions | 13.8 x 17 inches (35 x 43 cm) |
| Temperature Resistance | Suitable for oven and microwave cooking, typically up to 375°F (190°C) |
| Quantity | 15 oven cooking bags included |
| Intended Use | Roasting, baking, microwaving, and reheating meat, poultry, fish, seafood, rice, and vegetables |
| Moisture Retention | Traps moisture to keep food moist, flavorful, and prevents drying |
The first time I slipped a 15× oven bag over a perfectly seasoned chicken breast, I was surprised at how sturdy and flexible it felt in my hands. As I sealed it up and popped it into the oven, I immediately noticed how the bag kept everything contained without any mess or splatter.
It was a small moment of relief, knowing I wouldn’t have to scrub baked-on chicken juices off my baking sheet later.
When I checked on the chicken after about 40 minutes, I found it evenly cooked and incredibly moist. The bag trapped all the natural juices and flavors, so the meat stayed tender and juicy, unlike some dry, overcooked poultry I’ve dealt with before.
The size of these bags (14×17 inches) gave me plenty of room to add vegetables or even smaller cuts of meat, making the process super versatile.
What I really appreciated was how easy cleanup was—just toss the bag away, and I was done. No scrubbing, no soaking, no hassle.
Plus, the bags are heat-resistant enough for roasting, microwaving, or re-heating, which means I can use them for multiple cooking methods without worry. They’re a simple way to boost flavor and moisture, especially when cooking chicken, which can sometimes turn out dry if not careful.
Overall, these oven bags have become my go-to for quick, flavorful meals. They save time, keep food juicy, and eliminate the mess.
Honestly, I wish I’d started using them sooner. They make everyday cooking feel a little more foolproof and a lot less stressful.
What Is the Best Oven Temperature for Juicing Chicken Breast?
The best oven temperature for juicing chicken breast is generally between 375°F to 425°F (190°C to 218°C). This temperature range allows for even cooking while retaining moisture, which enhances juiciness.
According to the U.S. Department of Agriculture (USDA), cooking chicken at the correct internal temperature (165°F or 74°C) is vital for safety and flavor. The USDA emphasizes following precise cooking methods for optimal results.
Cooking chicken breast at higher temperatures can lead to dry meat, while lower temperatures may result in undercooked chicken. Factors influencing the ideal temperature include the thickness of the breast, cooking time, and oven type.
The National Chicken Council notes that chicken is typically cooked using methods like baking, roasting, or grilling. Each method influences the final texture and juiciness of the meat, depending on the chosen temperature.
Overcooking or applying high heat for too long can cause tough textures and loss of moisture. Chicken breast should ideally reach an internal temperature of 165°F without prolonged exposure that leads to dryness.
Studies show that cooking at 375°F retains more moisture compared to higher temperatures. According to Food Network, moist chicken breast results in a more satisfying meal.
Juicier chicken enhances meal satisfaction and can influence dietary choices, impacting overall health in terms of nutrient intake and calorie balance.
Factors affecting chicken quality include cooking techniques, meat handling, and the freshness of ingredients. It is crucial to maintain proper cooking procedures for the best results.
Experts recommend using a meat thermometer to check the internal temperature and resting the chicken post-cooking. Techniques like brining can also enhance moisture retention before cooking.
Strategies to prevent dry chicken include marinating before cooking and using recipes that emphasize moisture retention. Properly identifying the optimal temperature can significantly improve dish quality.
How Does Temperature Affect the Juiciness of Chicken Breast?
Temperature affects the juiciness of chicken breast significantly. When chicken cooks at a lower temperature, it retains more moisture. High temperatures can cause the proteins in chicken to contract quickly, resulting in the loss of juices. The optimal cooking temperature for chicken breast is around 165°F (75°C). At this temperature, the meat reaches a safe internal heat while remaining juicy. Cooking chicken breast to this temperature ensures it is fully cooked without becoming dry. Resting the chicken after cooking allows juices to redistribute throughout the meat, enhancing juiciness. A thermometer can help monitor the internal temperature accurately.
What Cooking Time Should You Follow at This Temperature for Chicken Breast?
To properly cook chicken breast in the oven, the recommended temperature is 375°F (190°C), with a cooking time of approximately 25 to 30 minutes for an average-sized breast.
- Cooking time at 375°F (190°C): 25-30 minutes
- Cooking time at 350°F (175°C): 30-40 minutes
- Cooking time at 400°F (200°C): 20-25 minutes
- Whole chicken versus chicken breast: Different times
- Thickness of chicken breast impacts cooking time
- Use of a meat thermometer for accurate doneness
- Opinions on marinating versus non-marinating methods
The cooking times above depend on various factors, including the size and method used.
-
Cooking time at 375°F (190°C): Cooking chicken breasts at this temperature typically requires 25 to 30 minutes. This duration ensures the chicken is cooked through while remaining moist. Many cooks choose this temperature for its balance between cooking speed and moisture retention.
-
Cooking time at 350°F (175°C): At 350°F, cooking time extends to 30 to 40 minutes. This lower temperature allows for gentler cooking, which can be beneficial for larger breasts or when retaining moisture is a priority.
-
Cooking time at 400°F (200°C): Cooking chicken breasts at 400°F will shorten the cooking time to 20 to 25 minutes. This method encourages browning but increases the risk of drying out the chicken if not monitored closely.
-
Whole chicken versus chicken breast: Whole chickens require different cooking times compared to individual chicken breasts. A whole chicken can take significantly longer, ranging from 1 hour to 1 hour and 30 minutes, depending on its size.
-
Thickness of chicken breast impacts cooking time: Thicker chicken breasts will take longer to cook than thinner ones. A common rule of thumb is that thicker pieces may require a few extra minutes per half-inch of thickness.
-
Use of a meat thermometer for accurate doneness: Using a meat thermometer provides a reliable way to ensure the chicken reaches the safe internal temperature of 165°F (74°C). This method helps avoid undercooking or overcooking the meat.
-
Opinions on marinating versus non-marinating methods: Some cooks prefer marinating chicken prior to cooking to enhance flavor and moisture. Others argue that proper cooking techniques can produce equally delicious results without marination.
Understanding these factors helps optimize cooking outcomes for chicken breast.
What Key Factors Influence the Ideal Temperature for Cooking Chicken Breast?
The ideal temperature for cooking chicken breast is generally considered to be 165°F (75°C) to ensure safety and optimal flavor.
Key factors influencing the ideal temperature for cooking chicken breast include:
- Safety guidelines
- Cooking method
- Size and thickness of the chicken breast
- Desired doneness
- Resting time after cooking
To better understand these factors, it is essential to delve into each aspect in detail.
-
Safety Guidelines:
Safety guidelines dictate that chicken should be cooked to an internal temperature of 165°F (75°C) to kill harmful bacteria, such as Salmonella and Campylobacter. The USDA emphasizes this temperature as sufficient to eliminate pathogens. Proper cooking ensures that the meat is safe for consumption. -
Cooking Method:
The cooking method significantly influences the ideal temperature. Methods like grilling, baking, or frying may require different temperatures due to variations in heat distribution. For instance, oven baking often allows for more controlled cooking temperatures compared to frying, where higher temperatures may be used. According to the National Chicken Council, oven-cooked chicken typically achieves a better texture at around 350°F (175°C). -
Size and Thickness of the Chicken Breast:
The size and thickness of the chicken breast affect cooking time and temperature. Thicker pieces require more time to reach the safe internal temperature. For uniform cooking, it is often recommended to pound the chicken breast to a consistent thickness. A study by the USDA’s Food Safety and Inspection Service states that pieces thicker than 1 inch may need adjustments in cooking time or temperature. -
Desired Doneness:
While 165°F is the minimum safe temperature, some cooks prefer their chicken to be cooked to a higher temperature for texture and juiciness. Cooking to 170°F (77°C) ensures that the meat is tender and not dry, which is often a personal preference among chefs. Many gourmet recipes recommend cooking to this higher temperature for enhanced texture. -
Resting Time After Cooking:
Resting time is crucial in the cooking process. It allows the juices to redistribute throughout the meat. After reaching the ideal temperature, letting chicken rest for 5-10 minutes can increase its juiciness and flavor. The USDA also highlights that resting provides additional reassurance of food safety, as the residual heat continues to cook the meat slightly.
Understanding these factors helps in cooking chicken breast perfectly, balancing safety and culinary excellence.
What Is the Safe Internal Temperature for Chicken Breast to Ensure It’s Fully Cooked?
The safe internal temperature for chicken breast is 165°F (74°C) to ensure that it is fully cooked and safe to eat. This temperature kills harmful bacteria like Salmonella and Campylobacter, which can cause food poisoning.
The U.S. Department of Agriculture (USDA) sets this standard to protect public health and ensure food safety. They emphasize the importance of using a food thermometer to check the internal temperature of poultry, including chicken breast.
Cooking chicken to the correct internal temperature is essential for food safety, as undercooked chicken can harbor harmful bacteria. It is crucial for home cooks to understand that appearance alone (color or juices) is not a reliable indicator of doneness.
According to the Food Safety and Inspection Service (FSIS), properly cooking chicken reduces the risk of foodborne illnesses and protects consumers’ health. They highlight that the 165°F standard applies not just to chicken breast, but all poultry products.
Factors contributing to undercooked chicken include improper cooking methods, using an inaccurate thermometer, or not allowing adequate resting time after cooking. These factors can lead to avoiding the essential cooking temperature.
The Centers for Disease Control and Prevention (CDC) estimates that poultry-related illnesses affect millions of people annually. In particular, Salmonella is responsible for approximately 1.35 million infections and 26,500 hospitalizations in the U.S. each year.
The bacterial risks associated with undercooked chicken impact public health, food industry regulations, and consumer trust in food safety standards. Preventing these issues requires education around cooking methods and safe food handling practices.
Health impacts include increased foodborne illnesses, while environmental effects might stem from poultry farming practices. Economically, the poultry industry faces losses from recalls and lawsuits related to foodborne illnesses.
For effective prevention, the USDA recommends using a food thermometer, employing proper cooking techniques, and adhering to safe food handling practices. Individuals should also be educated about the risks of undercooked poultry.
Strategies to mitigate these issues include using calibrated thermometers, following cooking guidelines, and investing in food safety training programs. This can ensure that chicken is consistently cooked to safe temperatures.
How Can Resting Chicken Breast After Cooking Enhance Its Juiciness?
Resting chicken breast after cooking enhances its juiciness by allowing the juices to redistribute throughout the meat.
When chicken is cooked, the heat causes the proteins to contract. This contraction pushes the juices towards the center of the meat. Resting allows these juices to move back toward the outer edges, resulting in a more evenly moist chicken breast. Here are key points explaining this process:
-
Juices redistribution: Resting allows the contracted muscle fibers to relax. This relaxation facilitates the movement of juices from the center to the outer parts of the meat.
-
Temperature stabilization: During resting, the internal temperature of the chicken continues to rise slightly, often referred to as “carryover cooking.” This process helps to ensure that the meat is cooked thoroughly without overcooking its outer layers.
-
Enhanced flavor: Juices contain flavor compounds. When they redistribute during the resting period, they enhance the overall taste of the chicken.
-
Improved texture: A well-rested chicken breast has a tender texture. The relaxation of fibers results in less chewiness and a more enjoyable eating experience.
Research suggests that resting meat for at least 5 to 10 minutes for every inch of thickness leads to better moisture retention (Sullivan, 2018). This simple yet effective step can significantly enhance the quality of your cooked chicken breast.
What Are the Best Techniques for Oven Cooking Chicken Breast at This Temperature?
The best temperature to oven cook chicken breast is 375°F (190°C). This temperature allows for even cooking while keeping the chicken moist and tender.
- Preferred cooking temperature: 375°F (190°C)
- Alternate cooking temperatures:
– 400°F (200°C)
– 350°F (175°C) - Cooking times per pound:
– 20-25 minutes for chicken breast
– 25-30 minutes for thicker cuts - Techniques:
– Baking
– Searing followed by baking
– Marinades and brines - Cooking methods:
– Bone-in vs. boneless chicken
– Skin-on vs. skinless chicken
Various perspectives exist regarding chicken cooking temperatures. Some chefs advocate for higher temperatures to create a crispier skin, while others argue for lower temperatures to prevent drying out the meat. Additionally, methods like brining or using marinades can impact the cooking time and temperature.
-
Preferred Cooking Temperature:
Preferred cooking temperature refers to the recommended heat setting for optimal results. Cooking chicken breast at 375°F (190°C) ensures thorough cooking without excessive drying. The USDA recommends this temperature for poultry to safely reach an internal temperature of 165°F (74°C). Cooking at this temperature typically yields tender and juicy meat. -
Alternate Cooking Temperatures:
Alternate cooking temperatures provide different approaches to baking chicken. Cooking at 400°F (200°C) can create a crispy exterior; however, it may require more attention to avoid drying out. Conversely, cooking at 350°F (175°C) may result in a longer cooking time but can lead to a more evenly cooked chicken, suitable for those who prefer slower roasting. -
Cooking Times per Pound:
Cooking times per pound play a significant role in achieving desired doneness. Cooking chicken breast typically requires about 20-25 minutes at 375°F (190°C). Thicker cuts may require additional time, such as 25-30 minutes. Monitoring internal temperature is crucial to ensure food safety. -
Techniques:
Techniques encompass methods for preparing chicken prior to cooking. Baking is straightforward, allowing for even cooking. Searing before baking combines techniques to enhance flavor and texture. Using marinades and brines can infuse chicken with flavor while maintaining moisture. -
Cooking Methods:
Cooking methods encompass various styles of preparing chicken. Bone-in pieces tend to retain moisture better than boneless cuts. Skin-on chicken can also contribute to flavor and juiciness. Conversely, skinless options may cook faster and are often favored for health reasons, affecting the time and temperature needed.