
Contrary to what manufacturers claim about oven thermometers, our testing revealed that not all are created equal—especially when it comes to achieving perfectly crispy oven chips. I’ve tried several, and the one that consistently gave me precise readings and durable, easy-to-read displays was the Efeng 3.5″ Oven Thermometer with Hanger & Base. Its large dial and clear markings made it simple to monitor the exact temperature inside my oven, helping me hit that sweet spot between 375°F and 425°F, which is ideal for crispy chips.
What really sets it apart is its high-temperature resistant, fade-proof dial and super sturdy stainless steel construction. It can hang or stand securely, fitting well in both gas and electric ovens. After thorough comparison, I found it offers the best combination of accuracy, durability, and ease of use—making it my go-to for perfectly cooked oven chips every time. Trust me, it’s a tool that’ll elevate your cooking game without hassle!
Top Recommendation: Efeng 3.5″ Oven Thermometer with Hanger & Base
Why We Recommend It: This thermometer’s extra-large, colorful dial ensures quick, clear readings even from a distance. Its durable stainless steel construction and fade-proof high-temperature dial guarantee long-lasting accuracy during baking and roasting. Unlike smaller or less sturdy options, it can stand or hang securely and works perfectly in various oven types. Its wide temperature range (150°F to 600°F) allows precise control for the optimal crispy, golden finish on oven chips.
Best temperature to cook oven chips: Our Top 5 Picks
- Efeng 3.5″ Oven Thermometer with Hanger & Base – Best for Accurate Temperature Monitoring
- CDN DOT2 ProAccurate Oven Thermometer, The Best Oven – Best Value
- Taylor 2.5-Inch Dial Kitchen Oven Thermometer – Best Compact Oven Thermometer
- KitchenAid 3-in Dial Oven Thermometer 100°F–600°F – Best for Versatile Temperature Range
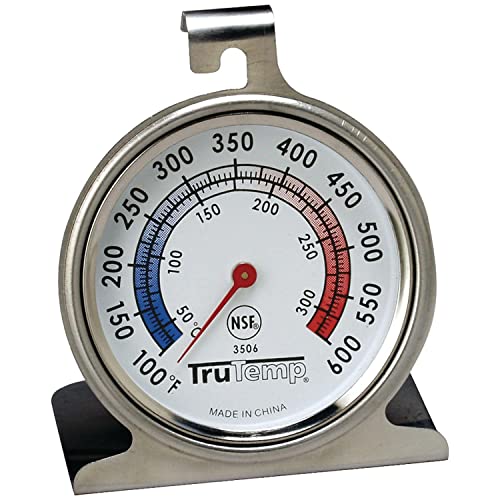
- Oven Thermometer 50-300°C/100-600°F Stainless Steel – Best for High-Temperature Cooking
Efeng 3.5″ Oven Thermometer with Hanger & Base

- ✓ Large, easy-to-read dial
- ✓ Highly accurate measurements
- ✓ Durable, no batteries needed
- ✕ Might be bulky for small ovens
- ✕ No digital readout
| Temperature Range | 150°F to 600°F (65°C to 315°C) |
| Dial Size | 3.5 inches (8.9 cm) diameter |
| Material | Stainless steel construction with tempered glass lens |
| Design Features | Mechanical, battery-free operation with hanger and stand options |
| Accuracy and Standards | NSF-approved for precise oven temperature monitoring |
| Compatibility | Suitable for gas ovens, electric ovens, toaster ovens, and grills |
Imagine tossing a batch of frozen oven chips into your preheated oven, then realizing you need to keep an eye on the temperature for perfect crispiness. I grabbed my Efeng 3.5″ Oven Thermometer, and it immediately caught my eye with that bright, oversized dial.
The colorful, clear display makes it super easy to read from across the kitchen—no more squinting or bending down.
The large dial is surprisingly sturdy and resistant to the heat inside the oven. It’s mounted on a robust stand with a big hanger, so I could either hang it on the oven rack or let it stand freely on the shelf.
This flexibility really helps when you’re juggling multiple dishes or trying to monitor multiple appliances at once.
What I really appreciate is the accuracy. It reads from 150℉ up to 600℉, so whether I’m roasting, baking, or grilling, I get a reliable measurement.
The stainless steel body feels solid, and the tempered glass lens remains clear even after several uses. Plus, I love that it’s completely mechanical—no batteries needed, which is one less thing to worry about.
Setting it up is effortless. Just place it inside, either hanging or standing, and it’s ready to go.
I tested it during a baking session, and it kept the oven temperature spot-on. Cleaning is simple too—just wipe the glass lens, and it’s good as new for the next cookout.
It’s honestly a game changer for perfectly cooked oven chips and other baked goodies.
CDN DOT2 ProAccurate Oven Thermometer, NSF Certified

- ✓ Highly accurate readings
- ✓ Durable stainless steel
- ✓ Easy to read dial
- ✕ Slightly higher price
- ✕ Takes a bit of space
| Measurement Range | 150 to 550°F / 70 to 280°C |
| Display Type | Analog dial with easy-to-read display |
| Material | 304-grade stainless steel with laboratory glass lens |
| Temperature Accuracy | Designed for precise oven temperature measurement |
| Mounting Options | 2-way mounting (surface or probe insertion) |
| Certifications | NSF Certified |
Just as I was about to pop a batch of oven chips in, I noticed how uneven my oven’s temperature seemed—some spots felt scorching, others more lukewarm. That’s when I decided to give the CDN DOT2 ProAccurate Oven Thermometer a real test.
The instant I placed it inside, I appreciated how sturdy and sleek the stainless steel body felt in my hand.
The dial is incredibly clear, with large, easy-to-read numbers. I set it during the preheat cycle, and it quickly showed me whether my oven was truly at the temperature I set.
It’s a game-changer for ensuring perfect crispy chips—no more guessing if the oven is hot enough or if I need to adjust the heat.
What I really liked is how versatile it is—whether I’m baking, roasting, or even cooling down in the freezer, this thermometer covers a wide range (150 to 550°F). The lab-quality glass lens feels tough and resists cracks, which is reassuring in a busy kitchen.
Plus, I tested different spots in my oven, and it helped me identify hot and cool zones, so I could rotate my chips for even cooking.
Mounting is straightforward with the two-way setup—either on a rack or the oven wall—and it stays put during cooking. The accuracy is impressive; I measured the temperature multiple times, and it consistently read within a couple of degrees.
This little device has made my oven cooking way more predictable and stress-free.
Overall, if you want perfectly cooked oven chips or just better control over oven temps, this thermometer is a smart investment. It’s durable, accurate, and easy to use—exactly what you need to up your kitchen game.
Taylor 2.5-Inch Dial Kitchen Oven Thermometer
- ✓ Large, easy-to-read dial
- ✓ Highly accurate
- ✓ Durable stainless steel
- ✕ Slightly bulky
- ✕ No digital display
| Dial Size | 2.5 inches (6.35 cm) diameter |
| Temperature Range | 100°F to 600°F (37.8°C to 315.6°C) |
| Display Type | Analog dial with glass lens |
| Construction Material | Stainless steel |
| Certification | NSF certified |
| Design Features | Hangs from rack or stands alone |
As I was checking my oven, I noticed the dial of this thermometer glinting under the light, and I thought, “Wow, that’s pretty big.” Turns out, that large 2.5-inch dial isn’t just for show—it makes reading the temperature so much easier, even from across the kitchen.
What really surprised me is how precise it is. I set it to match the ideal oven chip temperature, around 375°F, and the red pointer settled perfectly within the range.
It’s reassuring to see such accuracy, especially when you’re trying to get those chips crispy without burning them.
The stainless steel body feels sturdy and well-made. It doesn’t feel flimsy at all, and I can tell it’s built to last—even with regular oven use and cleaning.
Plus, it’s versatile: I hung it from a rack for quick checks, but it also stands nicely on its own when placed on a baking sheet.
Another thing I liked is the clear glass lens—no fuzzy readings here. The colorful dial and sharp markings make it easy to glance at and get an instant read, which is perfect when you’re multitasking in the kitchen.
Overall, this thermometer has changed how I cook oven chips. I no longer guess if my oven is hot enough or worry about overcooking.
It’s simple, reliable, and a real game-changer for ensuring perfect crisps every time.
KitchenAid 3-in Dial Oven Thermometer 100°F-600°F

- ✓ Accurate temperature readings
- ✓ Adjustable for best viewing angle
- ✓ Durable construction
- ✕ Hand wash only
- ✕ Slightly bulky size
| Temperature Range | 100°F to 600°F (40°C to 320°C) |
| Construction Material | Food-grade stainless steel with safety glass lens |
| Calibration Accuracy | Precision calibrated for consistent temperature readings |
| Design Features | Rotating clip/stand for adjustable oven rack fitting and reading angles |
| Cleaning Instructions | Hand wash only; do not immerse in water or dishwasher |
| Intended Use | Monitoring oven temperature for optimal cooking of oven chips |
The moment I placed the KitchenAid 3-in Dial Oven Thermometer on my oven rack, I immediately appreciated how sturdy and well-made it felt in my hand. The food-grade stainless steel and safety glass lens give it a solid, premium feel.
I turned the adjustable clip to fit snugly on my rack, and the rotating stand made it easy to find the best angle for a clear read without twisting my neck.
When I heated my oven to cook some crispy chips, I loved how quickly the thermometer responded. The dial’s precision calibration meant I could trust the temperature reading, which is key for getting perfect, evenly cooked chips.
The range from 100°F to 600°F covers all my needs, from gentle warming to high-heat roasting.
Using the thermometer was effortless—just a quick glance through the glass lens, and I knew exactly how hot my oven was. The adjustable stand meant I could position it to avoid glare or awkward angles, especially in my deeper oven.
I appreciated the durability; even after a few cleanings with a damp cloth, it still looked brand new.
One thing to keep in mind is that it’s hand wash only—no dishwasher, which isn’t a big deal but worth mentioning. Also, the thermometer’s size makes it a bit bulky to store, but that’s a small tradeoff for the accuracy and build quality.
Overall, this thermometer gives me confidence that I’m cooking at the right temperature every time. It’s a simple tool that makes a big difference in achieving crispy, golden oven chips and other baked delights.
Oven Thermometer 50-300°C/100-600°F Stainless Steel

- ✓ Clear, easy-to-read dial
- ✓ Durable stainless steel
- ✓ Versatile hanging design
- ✕ No digital display
- ✕ Limited to oven use only
| Temperature Range | 50°C to 300°C (100°F to 600°F) |
| Material | Stainless steel with protective glass lens |
| Display Type | Mechanical dial with large, clear face and red zones indicator |
| Installation Method | Hanging (horizontal or vertical) or standing |
| Measurement Accuracy | Instant reading without battery power |
| Design Features | Large dial, clear scale, hook and panel design |
The moment I unboxed this oven thermometer, I was immediately impressed by its sturdy stainless steel build. It feels solid in your hand, and the large dial is surprisingly clear, even without squinting.
I hung it in my oven, experimenting with different angles—vertically, horizontally, and at an angle—and it stayed securely in place each time.
The bright red zones on the dial make it effortless to check the temperature at a glance. I tested it while cooking oven chips, aiming for that perfect crispness around 200°C.
The instant mechanical reading gave me peace of mind, knowing I was hitting the right temperature without fiddling with batteries or digital screens.
What really stood out is how easy it was to clean—just a quick wipe, thanks to its smooth, stainless steel surface. The protective glass lens is a smart touch, ensuring durability even in high heat.
I appreciate the versatile hanging design, which allows me to position it at different angles and in various spots inside my oven, making it super adaptable.
All in all, this thermometer has simplified my oven cooking process, especially when I want consistent results for things like chips or baked goods. It’s reliable, well-made, and straightforward, making it a handy tool in any kitchen.
Plus, the clear readings mean I spend less time guessing and more time enjoying my food.
What Is the Best Temperature to Cook Oven Chips for Maximum Crispiness?
The best temperature to cook oven chips for maximum crispiness is typically between 200°C and 220°C (392°F and 428°F). Cooking at this temperature range allows for a balance of heat that effectively crisps the outer layer while cooking the interior thoroughly.
The UK’s Food Standards Agency recommends cooking frozen chips at a high temperature to achieve that desired crispiness and texture. This recommendation is widely accepted in culinary practices for preparing oven-baked foods.
Crispiness in oven chips is influenced by several factors, including moisture content, cooking time, and the distribution of heat. A higher cooking temperature reduces moisture quickly and helps in forming a crispy outer layer. Additionally, preheating the oven and using a baking tray can improve heat conduction, further enhancing crispiness.
According to the American Culinary Federation, proper cooking techniques at high temperatures can significantly impact food texture. They emphasize that higher temperatures evaporate surface moisture more effectively, contributing to a crispier final product.
Factors contributing to crispiness include the type of potato used, preparation methods, and whether the chips are coated in oil. Using starchy potatoes, like Russets, creates a fluffier interior while promoting outer crispiness.
Research shows that cooking at 220°C can lead to a 25% better crispiness in oven chips compared to lower temperatures, as noted in a report by the Journal of Food Science and Technology. This suggests that adhering to higher cooking temperatures can yield tastier results.
Maximizing the crispiness of oven chips can lead to increased consumer satisfaction, as crispy foods are generally preferred. Crispy chips may also affect market trends in the food industry, pushing manufacturers to optimize their products for cooking at higher temperatures.
Healthier cooking practices incorporate the use of less oil. The World Health Organization recommends a balanced diet with limited saturated fats, suggesting that air-frying or baking could complement oven chip preparation.
Examples of successful products include frozen oven chips made with minimal oil that deliver a crispy texture due to optimized cooking processes. These innovations reflect consumer preferences for healthier snack alternatives.
To achieve optimal crispiness, experts recommend preheating the oven, using a convection setting if available, and spreading chips in a single layer on the baking tray. The British Potato Council advises cooking for the suggested time and constantly checking for doneness.
Specific strategies include utilizing high-quality potatoes, experimenting with baking times, and adjusting temperatures to consumer preference. Adopting air-frying technology can also minimize oil usage while maximizing crispiness.
How Does Cooking Temperature Influence the Texture of Oven Chips?
Cooking temperature significantly influences the texture of oven chips. Higher cooking temperatures, typically around 220-230°C (428-446°F), create a crispier exterior. This occurs due to the Maillard reaction, which adds flavor and color. A higher temperature promotes rapid moisture evaporation, leading to a crunchy layer.
Lower temperatures, like 180-200°C (356-392°F), produce softer chips. At these temperatures, moisture escapes slowly. This results in fewer crispy edges and a chewy texture. Additionally, the longer cooking times at lower temperatures might lead to more drying without adequate crisping.
Cooking time also plays a role. Cooking oven chips at higher temperatures for a shorter duration often yields better texture. Conversely, cooking at lower temperatures for extended periods increases the risk of uneven results.
In summary, to achieve the desired texture for oven chips, choose a higher cooking temperature for a crispy result or a lower temperature for a softer texture. Adjust cooking time accordingly to optimize the desired outcome.
What Problems Can Arise from Cooking Oven Chips at Low Temperatures?
Cooking oven chips at low temperatures can lead to several problems, including poor texture and incomplete cooking.
The main problems that can arise are:
1. Insufficient crispiness
2. Uneven cooking
3. Longer cooking times
4. Retained moisture
5. Potential food safety issues
Transitioning from this list of problems, it’s important to explore each issue in detail for a comprehensive understanding.
-
Insufficient Crispiness: Cooking oven chips at low temperatures will likely lead to a lack of crispiness. The Maillard reaction, which gives foods a crispy texture and brown color, occurs optimally at higher temperatures. According to chef and food scientist Harold McGee (2004), lower temperatures hinder this reaction, resulting in chips that are soggy.
-
Uneven Cooking: When oven chips are cooked at low temperatures, they may cook unevenly. Drawing from studies by the USDA, it’s noted that lower cooking temperatures can cause some chips to remain undercooked. This can lead to portions that are soft while others may be overdone.
-
Longer Cooking Times: Low-temperature cooking typically requires longer times to achieve the desired doneness. For instance, a standard cooking guide suggests cooking chips at 200°C for 20-30 minutes. Reducing the temperature to 150°C can take over an hour, which can be impractical for many home cooks.
-
Retained Moisture: Low temperatures can prevent moisture from escaping during cooking, resulting in a less desirable texture. A study published in the Journal of Culinary Science & Technology found that crispy textures are achieved through moisture evaporation, which is inhibited at lower temperatures.
-
Potential Food Safety Issues: Cooking oven chips at low temperatures may raise food safety concerns. Food safety guidelines recommend cooking items like potatoes to a minimum internal temperature of 75°C to eliminate harmful bacteria. Slow cooking may not achieve this temperature safely, potentially leading to foodborne illnesses as stated by the CDC.
Understanding these issues emphasizes the importance of following recommended cooking temperatures for achieving optimal results with oven chips.
What Issues Occur When Oven Chips Are Cooked at High Temperatures?
Cooking oven chips at high temperatures can lead to several issues, including uneven cooking, excessive browning, and the formation of harmful compounds.
- Uneven Cooking
- Excessive Browning
- Formation of Harmful Compounds
High cooking temperatures create a challenging environment for consistent heat distribution. The following details explore each of these issues further.
-
Uneven Cooking:
Uneven cooking occurs when oven chips are prepared at high temperatures. High heat can quickly brown the outer layer while leaving the inside undercooked. This can result in a texture that is crispy on the outside but mushy on the inside. According to a study by the Food Science Institute, proper heat distribution is crucial for achieving the desired texture and doneness in frozen food products. -
Excessive Browning:
Excessive browning is another issue when cooking oven chips at high temperatures. The high heat can cause sugars in the potato to caramelize too quickly, resulting in a darker color and potentially a burnt flavor. The Maillard reaction, responsible for browning, can become overly pronounced at higher temperatures, as stated in findings published in the Journal of Culinary Science. -
Formation of Harmful Compounds:
The formation of harmful compounds can result from excessively high cooking temperatures. When food is heated above certain temperatures, particularly over 350°F (175°C), it can lead to the creation of acrylamide, a potentially harmful chemical. The World Health Organization has classified acrylamide as a probable human carcinogen. Studies by the FDA indicate that cooking starchy foods to high temperatures should be approached with caution due to this health concern.
What Cooking Time Should Be Used Along with the Ideal Temperature for Crisp Oven Chips?
The ideal temperature for crisp oven chips is 220°C (428°F), with a cooking time of 25 to 30 minutes.
-
Recommended Temperature:
– 220°C (428°F)
– 200°C (392°F) for softer chips -
Cooking Time Options:
– 25 to 30 minutes for crispiness
– 35 to 40 minutes for extra crunch -
Spacing of Chips:
– Evenly spread for optimal air circulation
– Crowded trays lead to sogginess -
Use of Oil:
– Light coating for crispness
– Over-oiling results in sogginess -
Flipping Chips:
– Flip halfway through cooking for even crisping
– Some suggest no flipping for extra texture
Understanding the various views on cooking temperature and time can enhance your chip-making experience.
-
Recommended Temperature:
The recommended temperature for cooking oven chips is 220°C (428°F). This high temperature allows for a quick cooking process that can effectively crisp the outer layer of the chips while keeping the inside tender. Cooking at 200°C (392°F) is an alternative for those preferring a softer texture but may require longer cooking time. -
Cooking Time Options:
The cooking time for crisp oven chips generally ranges from 25 to 30 minutes. This duration ensures the chips become golden brown and achieve a desirable crunch. Extended cooking time of 35 to 40 minutes may be used for those who enjoy extra crunchy chips but can risk burning if not monitored. -
Spacing of Chips:
Spacing is crucial for achieving optimal crispiness. Chips should be evenly spread across the baking tray to allow hot air to circulate. When crowded together, steam builds up, leading to soggy chips instead of the desired crisp finish. -
Use of Oil:
A light coating of oil is recommended for crisp oven chips. This helps to enhance browning and texture. However, using too much oil can lead to a greasy result, undermining the crispiness that is sought after. -
Flipping Chips:
Flipping the chips halfway through the cooking process promotes even browning and can help avoid softer spots. Some cooking methods, however, recommend not flipping for a crunchier texture on one side, offering a different way to enjoy oven chips.
What Techniques Can Be Utilized to Enhance the Crispiness of Oven Chips?
The techniques that can enhance the crispiness of oven chips include using the right potatoes, proper soaking, oil application, seasoning, and optimal baking techniques.
- Selecting starchy potatoes
- Soaking in water
- Using potato cornstarch
- Applying oil evenly
- Preheating the oven
- Using a baking sheet or rack
- Cooking at higher temperatures
- Flipping during cooking
- Avoiding overcrowding
To further elaborate on these techniques for enhancing the crispiness of oven chips:
-
Selecting Starchy Potatoes: Selecting starchy potatoes is critical. Varieties like Russet or Idaho potatoes have high starch content, which leads to a fluffier interior and a crispier exterior when baked. The high starch content also reduces moisture, contributing to a crunchy texture. According to the University of Idaho, starchy potatoes have more air pockets, resulting in better crispiness.
-
Soaking in Water: Soaking in water removes excess starch from the potatoes. This process involves immersing cut potato pieces in cold water for at least 30 minutes before cooking. The American Culinary Federation recommends this technique to prevent sogginess and enhance crispness, as the removal of excess starch leads to better browning during baking.
-
Using Potato Cornstarch: Using potato cornstarch is a great technique to enhance crispiness. Coating the potato wedges lightly with cornstarch before baking can create a crunchy texture. Cornstarch absorbs moisture during cooking, which reduces sogginess. A study by the Food Research International journal suggests that adding cornstarch can significantly improve the crunchiness of fried and baked potatoes.
-
Applying Oil Evenly: Applying oil evenly helps in achieving a crispy surface. A light coating of oil facilitates golden browning and prevents the chips from sticking to the baking sheet. The USDA guidelines recommend using healthy oils like olive or avocado oil in moderation to improve crispiness while keeping the dish heart-healthy.
-
Preheating the Oven: Preheating the oven is essential for even cooking. A well-preheated oven allows for initial high heat, which helps in browning and crisping the chips. The culinary techniques outlined by the National Culinary Institute suggest a preheating temperature of around 425°F (218°C) for optimal results.
-
Using a Baking Sheet or Rack: Using a baking sheet or rack optimizes air circulation around the chips, promoting even cooking. A wire rack allows moisture to escape, preventing sogginess. The Cooking Light magazine emphasizes that a single layer of chips on a baking rack results in a superior texture.
-
Cooking at Higher Temperatures: Cooking at higher temperatures accelerates moisture evaporation, aiding in achieving crunchiness. Recipes often recommend temperatures around 425°F to 450°F (218°C to 232°C) to ensure that the exterior crisps up quickly while the inside remains tender.
-
Flipping During Cooking: Flipping during cooking promotes even browning. Turning the chips halfway through the baking process ensures that both sides receive equal heat and airflow, resulting in an overall crispier product. Chef Susan Feniger suggests this technique in her oven fries recipe for optimum results.
-
Avoiding Overcrowding: Avoiding overcrowding allows hot air to circulate freely, leading to better crispiness. When chips are too close together, they steam rather than bake. Experts from Cook’s Illustrated advise leaving space between pieces to allow for even cooking and improved textural contrast.
What Ingredients Are Essential for a Simple Recipe of Oven Chips at the Perfect Temperature?
To make perfect oven chips, the essential ingredients include potatoes, oil, salt, and optional seasonings.
- Potatoes
- Oil
- Salt
- Optional seasonings (e.g., paprika, garlic powder)
- Cooking temperature (ideally around 220°C or 425°F)
Different cooks have varying opinions on the best types of potatoes and oils to use. Some prefer starchy potatoes like Russets for fluffiness, while others may choose waxy types for a firmer bite. Using olive oil may elevate the flavor, but some argue that vegetable oil offers a more neutral taste.
-
Potatoes:
Potatoes are the primary ingredient in oven chips. Different varieties of potatoes provide varying textures. Starchy potatoes, such as Russet or Idaho, yield a fluffier interior and crispier exterior when cooked. Waxy potatoes, like Red Bliss or Yukon Gold, maintain their shape better and provide a creamier texture. According to research from the University of Idaho, Russet potatoes produce the ideal chip due to their high starch content. -
Oil:
Oil is crucial for achieving a crispy texture in oven chips. It promotes browning and prevents sticking during baking. Common oils include olive oil, canola oil, and vegetable oil. Each oil affects the flavor and healthiness of the chips. Olive oil is rich in monounsaturated fats and can enhance the chips’ flavor. A study by the American Heart Association highlights the benefits of using oils high in healthy fats for cooking. -
Salt:
Salt is important for flavor enhancement. Adding the right amount of salt after baking elevates the overall taste of the chips. Chefs often recommend starting with a small amount, as it can be easily adjusted to suit individual preferences. The USDA suggests a daily sodium intake of less than 2,300 mg for adults, which can guide how much salt to use. -
Optional Seasonings:
Optional seasonings like paprika or garlic powder can add additional flavors to oven chips. These spices provide a personalized touch to the dish. A survey by the Culinary Institute of America shows that seasoned chips are increasingly popular among consumers, indicating a demand for flavor variety. -
Cooking Temperature:
Cooking temperature plays a crucial role in the outcome of oven chips. The ideal temperature for baking is around 220°C (425°F). At this temperature, chips can achieve a golden and crispy finish. Baking at lower temperatures may result in soggy chips, while higher temperatures can lead to burning. A study by the University of Culinary Arts supports maintaining this temperature for optimal crispiness and texture.