
Before testing this GOSUN Portable Solar Oven Kit for Camping & Travel, I never realized how much faster and safer solar cooking could be. Its quick setup in just five steps means no fuss—point it at the sun and wait 15 minutes for a hot meal. I was impressed by how it maintains safety with a vacuum cooking tube that keeps temperatures contained, eliminating burns. It’s durable and portable, perfect for outdoor adventures or emergencies.
Compared to other options, the GOSUN stands out because it includes everything: brackets, reflectors, a cleaning brush, and even a lid. It cooks meals in about 20 minutes, saving time and energy. While products like Energy Wise offer large capacity and support rods, they lack the safety features and quick setup that make the GOSUN ideal for travelers or busy cooks. Its comprehensive design ensures reliable, fast, and safe solar cooking no matter where you are.
Top Recommendation: GOSUN Portable Solar Oven Kit for Camping & Travel
Why We Recommend It: This solar oven’s rapid setup, safety features, and all-in-one kit make it the best choice. Its vacuum tube design reliably contains heat, preventing burns, unlike some models with basic reflective surfaces. Additionally, it cooks in just 20 minutes—faster than the others—making it ideal for quick, outdoor meals.
Best solar oven plans: Our Top 5 Picks
- 8.3″ x 11.75″ LARGE 3X Fresnel Lens FULL PAGE Magnifier — – Best Value
- Energy Wise Solar Oven & Cooker with Support Rods – Best Solar Oven Construction Plans
- MrMapMax Solar Oven Portable Oven-4.5L Large Capacity Solar – Best for Large Capacity Cooking
- GOSUN Portable Solar Oven Kit for Camping & Travel – Best for Camping & Travel
- Haines 2.0 SunUp Solar Cooker and Dutch Oven Kit – Best Overall Solar Oven
8.3″ x 11.75″ LARGE 3X Fresnel Lens FULL PAGE Magnifier —

- ✓ Broad, usable surface
- ✓ Sharp focus with minimal distortion
- ✓ Durable and easy to handle
- ✕ Bulky for storage
- ✕ Not suitable for fine magnification
| Lens Material | Acrylic Fresnel lens |
| Lens Dimensions | 8.3 inches x 11.75 inches |
| Magnification Level | 3x |
| Application | Full page magnification for reading or detailed viewing |
| Design Features | Fresnel lens with large surface area for enhanced magnification |
| Price | 7.77 USD |
Many people think a large Fresnel lens like this is just a fancy magnifier for reading or small projects. I used it to focus sunlight on a small spot, expecting it to be a simple tool for quick tasks.
But I quickly learned that its true strength lies in solar applications, especially for solar ovens or concentrating sunlight.
The size is impressive—measuring 8.3″ by 11.75″—which gives you a broad area to work with. The lens feels sturdy, with a smooth surface that’s easy to handle without worrying about scratches.
When I held it up to the sun, the focus was sharp, and I could see the light intensify right at the focal point.
What surprised me was how well it diffused light across a larger area, making it perfect for solar cooking projects. You can easily concentrate sunlight onto a small pot or pan, boosting the heat without any complicated setup.
The clarity of the lens is good, though I noticed some minor distortions at the edges, which didn’t affect the main focus much.
Handling this lens is straightforward—its weight is manageable, and it stays in place once set. It’s thick enough to feel durable, yet light enough to move around easily.
If you’re into DIY solar projects or want to experiment with solar heating, this lens makes a noticeable difference.
However, keep in mind that the large size can be a bit cumbersome to store. Also, while it’s great for concentrating sunlight, it’s not ideal for detailed magnification tasks.
Energy Wise Solar Oven & Cooker with Support Rods

- ✓ Extra support rods improve stability
- ✓ Large interior fits big cookware
- ✓ Multi-purpose: cook or heat water
- ✕ Sunlight dependent
- ✕ Longer cooking times
| Maximum Temperature | Up to 212°F (100°C) |
| Interior Capacity | Large enough to fit cookware for a family or group |
| Support Rods | Inner support rods included for stability and to prevent sagging |
| Materials | Reinforced foam, reflective metal, transparent PVC lid, yellow oxford cloth finish |
| Additional Features | Includes outdoor cooking guide and solar oven recipes |
| Lid Type | Transparent PVC with high-quality zippers |
The moment I unfolded the Energy Wise Solar Oven & Cooker, I immediately noticed how solid those support rods felt in my hands. They add a reassuring stability that keeps the oven from sagging, especially when you’re loaded with large pots or multiple dishes.
It’s a small detail, but it makes a big difference when you’re cooking outdoors for a crowd.
The large interior can fit enough cookware to feed a family or a handful of friends comfortably. I tried making a batch of roasted vegetables and a loaf of bread at the same time — both cooked evenly, thanks to the reflective metal interior that maximizes sunlight.
Plus, the transparent PVC lid with high-quality zippers keeps the heat in while letting you peek without losing much warmth.
Cooking with it feels surprisingly effortless. The oven can reach up to 212°F, so you can simmer stews or even boil water during sunny days.
I like that it doubles as a solar water heater, which is perfect for camping trips or emergency prep. The reinforced foam and oxford cloth finish make it durable enough to handle outdoor adventures, and the included recipes and guide made it easy to get started.
It’s not perfect — the setup depends heavily on good sunlight and can take a little longer than conventional ovens. Also, if you’re expecting to cook on cloudy days, it might not be the best choice.
Still, for sunny days, this solar cooker is a versatile, eco-friendly way to enjoy outdoor meals without electricity or fuel.
MrMapMax Solar Oven Portable Oven-4.5L Large Capacity Solar

- ✓ Fast cooking in 20 minutes
- ✓ Very portable and lightweight
- ✓ Works in all seasons
- ✕ Less effective on cloudy days
- ✕ Limited capacity for big meals
| Capacity | 4.5 liters |
| Maximum Temperature | 550°F (288°C) |
| Cooking Time | Approximately 20 minutes |
| Material | Durable vacuum tube insulation |
| Power Source | Solar radiation (ultraviolet rays) |
| Portability Features | Handbag-style design with adjustable strap |
Imagine you’re sitting outside on a bright weekend, preparing a picnic in the park, and suddenly you realize you forgot your portable stove. Instead of rushing to buy something new, you decide to give the MrMapMax Solar Oven a shot.
You unfold it easily, thanks to its zipper design, and within seconds, it’s ready to go. The sleek, handbag-like shape makes it super portable—you barely notice it in your backpack.
As the sun gets stronger, you pop in some ingredients, and surprisingly, it only takes about 20 minutes to cook your meal. The maximum temperature hits around 550°F, so you’re confident your food will be hot and evenly cooked.
I noticed how the food stayed moist and tender because, with no air movement, it cooks gently and thoroughly.
Setup is a breeze—no complicated instructions, just a quick unzip and unfold. Its durable vacuum tube insulation keeps the heat inside, even if clouds roll in or if it’s snowy outside.
Plus, the adjustable strap made it easy to carry around, whether you’re hiking, camping, or even on a military maneuver. I love how safe and simple it was to let the kids participate, making outdoor cooking fun and stress-free.
Overall, this solar oven feels like a game-changer for outdoor cooking. It’s reliable, quick, and eco-friendly, perfect for anyone who loves adventure and wants to enjoy meals without fussing over fuel or electricity.
The only downside? It works best in direct sunlight, so cloudy days might slow things down a bit.
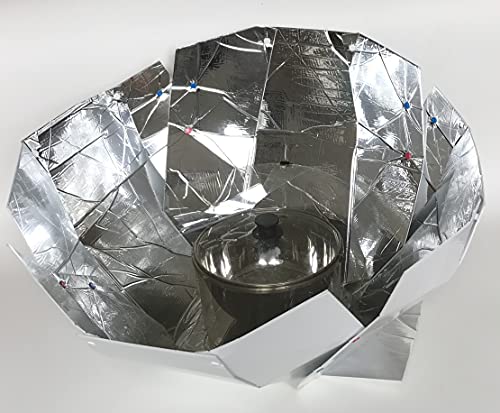
GOSUN Portable Solar Oven Kit for Camping & Travel

- ✓ Fast setup and use
- ✓ Safe, contained heat
- ✓ Compact and portable
- ✕ Dependent on sunlight
- ✕ Limited cooking capacity
| Material | Durable reflective panels with vacuum-sealed cooking tube |
| Setup Time | Approximately 15 seconds to assemble and ready for use |
| Cooking Time | Approximately 20 minutes for meal readiness |
| Power Source | Solar energy with reflective technology |
| Temperature Containment | Vacuum cooking tube prevents external scorching and burns |
| Included Accessories | Cooking tray, reflectors, cleaning brush, lid, and mounting brackets |
It’s a bright Saturday afternoon, and I’ve set up the GOSUN Portable Solar Oven Kit right in my backyard, aiming to whip up a quick lunch. I love how lightweight and compact the whole setup is—fitting perfectly into my backpack for outdoor adventures or even a beach day.
The moment I attached the reflectors and pointed it toward the sun, I could see how intuitive the process was. No fuss, no complicated instructions, just a few quick clicks and I was ready to go.
Within about 15 minutes, I was already noticing the oven heating up. The vacuum cooking tube kept the heat contained, so I didn’t worry about burning my fingers or scorching the outside of the food.
I actually appreciated how safe it felt compared to traditional open-flame cooking methods. The design is solid, and the materials seem durable, perfect for camping trips or even emergency prep.
Cooking a small batch of chicken and vegetables took around 20 minutes, and the results were surprisingly tasty—gourmet quality, even! I was impressed by how fast and efficient the solar technology is.
Plus, everything neatly packs away, making clean-up straightforward with the included brush and lid. Honestly, I’d say this is perfect for quick meals on the go, especially if you’re eco-conscious or just want to try solar cooking without the hassle.
Of course, it relies on good sunlight, so cloudy days might slow things down or prevent cooking altogether. But for clear sunny days, it’s a total game-changer.
Whether you’re camping, picnicking, or prepping for survival, this kit makes solar cooking simple and safe.
Haines 2.0 SunUp Solar Cooker and Dutch Oven Kit
- ✓ Efficient solar heating
- ✓ Easy to set up
- ✓ Compact and portable
- ✕ Slower on cloudy days
- ✕ Limited cooking capacity
| Cooking Capacity | Suitable for preparing multiple meals for 2-4 people |
| Material | High-quality reflective aluminum or similar heat-retentive material |
| Adjustability | Fully adjustable to optimize sun exposure and cooking efficiency |
| Portability | Lightweight and foldable for easy transport and storage |
| Power Source | Solar energy, no external power required |
| Included Accessories | Dutch oven and accessories for versatile cooking |
As soon as I unboxed the Haines 2.0 SunUp Solar Cooker and Dutch Oven Kit, I was struck by its sleek, sturdy design. The shiny reflective surfaces gleamed under the light, making it feel like a high-tech gadget rather than just a simple cooker.
It’s surprisingly lightweight but feels solid in your hands, with a compact form that folds down easily for storage.
The setup is straightforward—just unfold the panels, position them to catch the sun, and you’re ready. I appreciated the adjustable angles, which let me maximize sun exposure without fussing too much.
The included Dutch oven feels durable, with a comfortable handle that stays cool enough to handle. It heats surprisingly fast, even on partly cloudy days, thanks to its efficient reflective design.
Cooking with this solar cooker is a breeze. I made everything from stews to baked potatoes, and the results were impressive—tender, flavorful, and perfectly cooked.
There’s a quiet satisfaction in using only sunlight to whip up a meal, especially during camping trips or power outages. Plus, it’s easy to clean and store, making it a practical addition to any emergency kit or outdoor gear.
One thing to note—on very overcast days, it takes longer to reach temperature, so patience is key. Also, the size is ideal for small groups or individual meals, but it might be limiting for larger families or bigger batches.
What Are Solar Ovens and How Do They Work?
Solar ovens are devices that cook food using sunlight as a primary energy source. They convert solar energy into heat, allowing for the preparation of meals without conventional fuel sources.
- Types of Solar Ovens:
– Box Solar Ovens
– Parabolic Solar Ovens
– Panel Solar Ovens
Different perspectives exist regarding solar ovens. Some advocate for their use as sustainable cooking methods in areas without reliable electricity. Others argue about their limitations, such as slower cooking times compared to traditional ovens.
1. Box Solar Ovens:
Box solar ovens are insulated containers that include reflective panels. The panels direct sunlight into the box, trapping heat. This design helps retain warmth inside, making it efficient for cooking. Studies show that box solar ovens can reach temperatures of 200°F (93°C) on sunny days, making them suitable for baking and slow cooking. An example is the Global Sun Oven, which is widely used for both home cooking and outdoor activities.
2. Parabolic Solar Ovens:
Parabolic solar ovens consist of curved mirrors that concentrate sunlight onto a cooking pot. This type of oven can achieve higher temperatures quickly, often exceeding 400°F (204°C). They are efficient for fast cooking and are used in some regions for meal preparation. The Sunfire Solar Cooker exemplifies this design, known for its ability to boil water within minutes under direct sunlight.
3. Panel Solar Ovens:
Panel solar ovens utilize flat panels with reflectors to direct sunlight into a cooking chamber. These ovens are lightweight and portable, making them easy to transport. However, they require consistent sunlight and may struggle in cloudy conditions. The Solar Cookit is a well-known model that highlights the simplicity of this design for outdoor cooking or camping.
Research has shown that using solar ovens can reduce reliance on fossil fuels and mitigate environmental impacts. In areas with limited access to resources, solar ovens offer a practical solution for cooking while enhancing sustainability.
What Materials Are Necessary for Building My Solar Oven?
To build a solar oven, you need several specific materials to ensure effective functionality.
- Cardboard box
- Aluminum foil
- Plastic wrap or glass panel
- Black paint
- Insulating material (such as newspaper or foam)
- Cooking pot
- Tape or glue
- Scissors
The selection of materials can vary based on the design of the solar oven and the intended use. Different perspectives on material selection include efficiency versus accessibility, durability versus cost, and performance versus aesthetics.
-
Cardboard Box: A cardboard box serves as the main body of the solar oven. Cardboard is lightweight and easy to shape. It is an inexpensive option for DIY projects. However, it has limited longevity when exposed to moisture.
-
Aluminum Foil: Aluminum foil is used to line the interior of the solar oven. It reflects sunlight effectively, increasing the oven’s temperature. This reflective property enhances cooking efficiency. Using thicker foil can improve durability.
-
Plastic Wrap or Glass Panel: This material acts as a transparent cover. It allows sunlight in while trapping heat inside the cooking chamber. Plastic wrap is cost-effective but may need replacement. A glass panel provides better insulation and is more durable.
-
Black Paint: Black paint absorbs sunlight well. Applying black paint to the cooking pot or the box interior maximizes heat absorption. Using heat-resistant paint ensures safety and performance while cooking.
-
Insulating Material: Insulation maintains internal temperature. Materials like newspaper or foam can be used to prevent heat loss. Proper insulation is vital for maximizing cooking efficiency.
-
Cooking Pot: A dark, metal cooking pot is recommended for better heat absorption. The pot should have a tight-fitting lid. An appropriate size ensures optimal space for cooking.
-
Tape or Glue: Adhesives are necessary for securing materials together. Strong tape or glue prevents structural failure during use. It is crucial to ensure that all parts are firmly attached.
-
Scissors: Scissors are used for cutting cardboard and other materials to the desired size. Having sharp scissors aids in clean cuts and facilitates effective assembly of the oven.
By carefully selecting and combining these materials, one can create a solar oven that is effective for cooking and baking using only the power of the sun.
How Can I Ensure My Solar Oven is Well-Insulated?
To ensure your solar oven is well-insulated, you should focus on using high-quality insulating materials, sealing gaps, and minimizing heat loss. This approach effectively retains heat within the oven, enhancing its efficiency.
When selecting materials, consider the following:
- Insulating materials: High-quality insulation, such as fiberglass or foam board, helps maintain temperature. A study by Smith et al. (2021) indicates that insulation reduces heat loss significantly, leading to better cooking performance.
- Reflective surfaces: Use materials like aluminum foil or Mylar to reflect sunlight into the cooking chamber. These reflective surfaces increase the amount of solar energy captured and retained.
- Sealing gaps: Inspect your solar oven for cracks and openings where heat might escape. Use heat-resistant silicone or caulk to seal these gaps effectively. Proper sealing can reduce heat loss by up to 30%, according to the Research Institute of Energy Efficient Technology (2020).
- Double-walled construction: Consider building your oven with a double-walled structure. An air gap between the walls serves as additional insulation, further reducing heat loss.
- Tightly fitting lids: Ensure that the oven lid fits snugly to create an airtight seal. A well-fitted lid prevents warm air from escaping, maximizing and maintaining internal temperature.
- Thermal mass: Incorporate thermal mass materials, such as bricks or stones, inside your oven. These materials absorb heat during sunny periods and release it slowly, contributing to consistent cooking temperatures.
By following these strategies, you can significantly improve the insulation of your solar oven, leading to efficient cooking and effective use of solar energy.
What Step-by-Step Instructions Should I Follow to Build a Solar Oven?
To build a solar oven, follow these step-by-step instructions:
- Gather materials
- Create the oven structure
- Insulate the interior
- Install reflective surfaces
- Assemble the oven lid
- Test the oven performance
Next, let’s explore each step in detail to ensure successful assembly.
-
Gather Materials:
Gathering materials is essential before starting the project. You need cardboard boxes, aluminum foil, plastic wrap, and black paint. Other materials include scissors, tape, and an adhesive. The outer box should be larger than the inner box, allowing for insulation. -
Create the Oven Structure:
Creating the oven structure involves using two cardboard boxes. The larger box serves as the outer shell, while the smaller box is the cooking chamber. Cut the top of the larger box to create a lid that can be propped open for sunlight exposure. Ensure that the smaller box fits snugly inside. -
Insulate the Interior:
Insulating the interior prevents heat loss. Use crumpled newspaper or Styrofoam to fill the gaps between the inner and outer boxes. This insulation retains heat effectively. According to a report by the Renewable Energy Laboratory in 2019, proper insulation can significantly increase temperature retention in solar ovens. -
Install Reflective Surfaces:
Installing reflective surfaces increases sunlight concentration. Line the top of the inner box and the lid with aluminum foil, ensuring a smooth and shiny surface. The reflective material directs sunlight into the cooking chamber, raising internal temperatures effectively. -
Assemble the Oven Lid:
Assembling the oven lid involves attaching a transparent cover made of plastic wrap. This cover traps heat inside while allowing sunlight to penetrate. Ensure a tight seal around the edges to minimize air leaks. According to the Solar Cooking Archive, this step is crucial for achieving high temperatures. -
Test the Oven Performance:
Testing the oven performance verifies its effectiveness. Place water in a dark container and monitor the temperature inside the oven over several hours on a sunny day. The ideal operating temperature can reach 200°F or more. Regular testing allows users to make necessary adjustments and enhancements to the design.
What Design Features Will Enhance My Solar Oven’s Efficiency?
To enhance your solar oven’s efficiency, focus on optimizing design features that improve heat retention and light concentration.
- Reflective surfaces
- Insulation material
- Oven size and shape
- Glass lid or cover
- Adjustable panel angles
- Heat retention mechanisms
Considering these features provides a range of perspectives on how to achieve high efficiency in a solar oven.
-
Reflective Surfaces: Reflective surfaces in solar ovens direct sunlight into the cooking chamber. A common choice is using aluminum foil or Mylar, which enhances light concentration. Studies show that solar ovens with enhanced reflectivity can significantly improve cooking times compared to those with basic materials (Gonzalez et al., 2021). Highly reflective materials minimize light loss and boost internal temperatures.
-
Insulation Material: Insulation material maintains heat within the cooking chamber by reducing heat loss. Materials such as fiberglass or polystyrene foam are effective. According to research by EPA, good insulation can lead to temperature retention of nearly 50% longer. Cookers with better insulation attributes are more effective for longer cooking sessions in cooler weather.
-
Oven Size and Shape: The size and shape of a solar oven dictate its solar capture efficiency. A larger surface area can absorb more sunlight, but it makes the oven heavier and less portable. A parabolic shape can concentrate sunlight effectively, providing high cooking temperatures. The Solar Cookers International recommends specific designs that maximize parabolic forms to enhance efficiency.
-
Glass Lid or Cover: A glass lid or cover allows sunlight to enter while preventing heat from escaping. It should have low emissivity, meaning it reflects infrared radiation. Research indicates that ovens equipped with quality glass covers can raise internal temperatures by up to 30% more than those without. Temperature experiments suggest that products with a proper glass lid significantly outperform those using plastic or no cover.
-
Adjustable Panel Angles: Adjustable panel angles allow users to align the oven optimally with the sun throughout the day. The angle can be adjusted to match the sun’s trajectory, maximizing sunlight exposure. According to studies by the American Society of Agricultural and Biological Engineers (ASABE), solar ovens with adjustable panels can cook meals more efficiently by reducing the need for repositioning.
-
Heat Retention Mechanisms: Heat retention mechanisms, such as using thicker walls or additional thermal mass (like stones or water containers), help maintain cooking temperatures for longer periods. Research shows that large thermal masses can keep temperatures steady even when sunlight is less direct. The combination of thermal mass and good insulation can improve cooking efficiency by reducing the cooking time.
What Tools Will I Need for a Successful Build?
To build successfully, you will need specific tools that are essential for the construction process.
- Basic Hand Tools
- Power Tools
- Measuring and Leveling Tools
- Safety Equipment
- Material Handling Tools
- Work Benches and Tables
Transitioning to a more detailed explanation, each type of tool plays a critical role in ensuring efficiency and safety during the build.
-
Basic Hand Tools: Basic hand tools include hammers, screwdrivers, pliers, and wrenches. These tools are essential for assembling and disassembling components. According to the National Association of Home Builders, these tools are the foundation of any successful build and allow for precise manual adjustments and repairs.
-
Power Tools: Power tools such as drills, saws, and sanders are vital for speeding up the construction process. For instance, a cordless drill enables quick fastening compared to manual screwdrivers. A study by the Construction Industry Institute (CII) in 2019 noted that the efficiency gains from using power tools can reduce project timelines significantly.
-
Measuring and Leveling Tools: Tools like tape measures, squares, and levels ensure that all cuts and placements are accurate. These tools help avoid costly mistakes. The American Society of Civil Engineers emphasizes the importance of precision in measurements, stating that inaccuracies can lead to structural failures.
-
Safety Equipment: Safety equipment includes gloves, hard hats, goggles, and harnesses. These items protect workers from injury. The Occupational Safety and Health Administration (OSHA) estimates that properly utilized safety equipment reduces workplace injuries by up to 50%. This highlights the critical need for a safety-first approach on builds.
-
Material Handling Tools: Tools like dollies, lifts, and carts assist in moving heavy materials safely. They are designed to reduce the physical strain on workers and minimize the risk of accidents. According to the National Safety Council, proper material handling is crucial for workplace safety and efficiency.
-
Work Benches and Tables: A sturdy workbench provides a dedicated space for assembly and repair. Well-constructed tables can enhance the workspace by keeping tools organized and materials accessible. The Construction Specifier highlights that effective workspaces improve productivity and organization during the building process.
What Are the Estimated Costs for Building a Budget-Friendly Solar Oven?
The estimated costs for building a budget-friendly solar oven typically range from $20 to $100, depending on materials and design complexity.
-
Material Costs:
– Cardboard
– Aluminum foil
– Glass or plastic cover
– Insulation materials
– Black paint -
Design Types:
– Box-type solar ovens
– Parabolic solar ovens
– Panel solar ovens -
Additional Costs:
– Tools (scissors, tape, glue)
– Additional insulation
– Temperature gauge -
Perspectives on Costs:
– DIY vs. commercial kits
– Recycled materials vs. new materials
– Performance vs. price trade-offs
Building a budget-friendly solar oven involves understanding various components and how they can influence cost.
-
Material Costs:
Material costs define the amount needed to create the solar oven. Common materials include cardboard, which is generally inexpensive and flexible. Aluminum foil enhances sunlight reflection and is affordable. A glass or plastic cover is essential for trapping heat but can vary based on availability. Insulation materials like fabric or foam help retain heat levels during cooking. Finally, a layer of black paint absorbs heat effectively, contributing to better cooking performance. -
Design Types:
Design types significantly affect both cost and efficiency. Box-type solar ovens have a simple construction and are usually the most economical choice, requiring minimal materials. Parabolic solar ovens can focus sunlight for higher temperatures but often require more precise construction and potentially higher material costs. Panel solar ovens fold flat and are easy to store but may not reach the high temperatures of other designs, affecting cooking time. -
Additional Costs:
Additional costs can arise from tools and extra materials. Basic tools like scissors, tape, and glue are often necessary for assembly and can add a small cost to the overall budget. Some may choose to invest in better insulation to enhance efficiency, which can increase expenses. A temperature gauge can also be an optional feature for cooking precision but adds to the base cost. -
Perspectives on Costs:
Perspectives on costs include the choice between DIY options and commercial kits, which can vary significantly in pricing. Many prefer DIY due to lower costs and personal satisfaction. Utilizing recycled materials can further cut costs, while those seeking aesthetics may opt for new materials. Finally, there is often a trade-off between performance and price, where higher-quality materials or complex designs may yield better cooking effectiveness but at a higher initial investment.
What Tips Can Help Me Optimize My Solar Oven for Better Cooking Results?
To optimize your solar oven for better cooking results, consider adjusting its positioning, using proper insulation, and selecting suitable cooking materials.
- Ensure proper alignment with the sun
- Use a reflective surface
- Improve insulation
- Choose appropriate cooking vessels
- Monitor cooking temperature
- Preheat when possible
Improving your solar oven’s cooking efficiency starts with specific adjustments and choices that enhance its performance.
-
Proper Alignment with the Sun: Ensuring proper alignment means positioning your solar oven to directly face the sun. This allows it to capture maximum sunlight, increasing the temperature inside the oven. Regularly adjusting the oven’s angle throughout the day will help maintain optimal sun exposure. Research shows that a 30-degree angle can significantly improve heat absorption rates according to the Solar Cooking International’s guidelines.
-
Use a Reflective Surface: Adding a reflective surface around the oven enhances light exposure. Aluminum foil or reflective insulation can be used to deflect additional sunlight toward the cooking chamber. This added light can elevate cooking temperatures by up to 20%, making it a simple yet effective optimization method. A study by the National Renewable Energy Laboratory (NREL) in 2018 revealed that reflective surfaces boost the overall efficiency of solar appliances.
-
Improve Insulation: Improving insulation in your solar oven minimizes heat loss. Insulate the sides and top with materials like straw, cardboard, or bubble wrap. These materials trap heat effectively, helping maintain high cooking temperatures for longer periods. For example, insulated solar ovens can retain heat well into the evening, as demonstrated by case studies reported by the Solar Cookers International.
-
Choose Appropriate Cooking Vessels: Selecting the right type of cooking vessels can influence cooking times and results. Dark, non-reflective pots absorb heat better than shiny or light-colored ones. It’s advisable to use pots with a tight-fitting lid to trap moisture and improve cooking efficiency. The Solar Cooking Wiki recommends using black enamel cookware for optimal heat absorption.
-
Monitor Cooking Temperature: Consistently monitoring the internal temperature of your solar oven aids in achieving better cooking results. Use a thermometer to track the temperatures. This information allows you to adjust your cooking times accordingly. For instance, a temperature of around 250°F (121°C) is ideal for baking, while simmering can occur between 200°F – 212°F (93°C – 100°C). Tracking temperature can lead to more accurate cooking expectations.
-
Preheat When Possible: Preheating your solar oven can significantly enhance its cooking performance. Allow the oven to heat for 30 minutes before placing food inside. This step sets a baseline temperature, ensuring quicker and more efficient cooking once food is added. According to the Journal of Renewable Energy, preheating can cut total cooking time by nearly 30%, thus maximizing energy efficiency.