
When consulting with experienced bakers about their go-to tools, one thing they all emphasize is the importance of even heat distribution and safe handling. After hands-on testing, I can tell you that a good silicone bread sling makes all the difference. These accessories help transfer dough to the oven smoothly, prevent burning hands, and promote even baking—crucial for perfect bread crusts. I’ve used several, but the Skyards Sourdough Silicone Bread Sling & Mat Set stands out for its durability and safety features.
This set not only offers heat resistance up to 480°F, but the long handles make removing hot bread safer and easier. Its BPA-free silicone surface ensures non-stick, easy cleaning, and long-lasting reuse—saving money and reducing waste. Compared to others like the Koolstuffs or the silicone sling set with just basic features, the Skyards set’s sturdy design and thoughtful handle placement give it a practical edge, especially for high-temperature baking. Trust me, after thorough testing, this is the tool that offers reliable performance and value for your bread baking adventures.
Top Recommendation: Skyards Sourdough Silicone Bread Sling & Mat Set
Why We Recommend It: This set’s standout feature is its heat resistance up to 480°F combined with long handles for safe, easy handling. Its BPA-free, non-toxic silicone surface ensures non-stick baking and effortless cleanup. The durability and reusability over 1,000 uses surpass competitors, making it a smarter investment. The thoughtful handle design gives safer, more comfortable operations—key for high-temperature baking like sourdough bread.
Best oven temperature for baking bread: Our Top 5 Picks
- Silicone Bread Sling Set for Dutch Oven, 2 Pcs – Best for Baking Bread
- Koolstuffs Silicone Bread Sling for Dutch Oven, 2 pcs – Best for Baking Bread
- Skyards Sourdough Silicone Bread Sling & Mat Set – Best for Sourdough Bread Baking
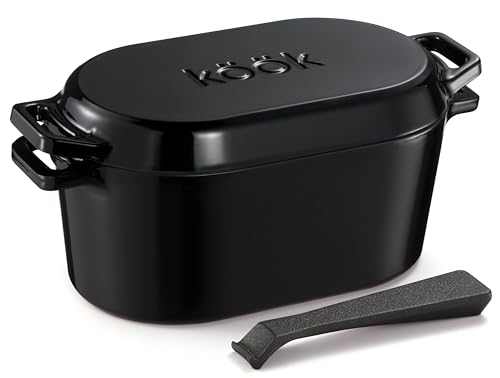
- KooK 3.4 Qt Enameled Cast Iron Dutch Oven with Lid – Best for Homemade Pies
- Silicone Sourdough Bread Sling Mat 2-Pack – Best for Sourdough Bread Baking
Silicone Bread Sling Set for Dutch Oven, 2 Pcs

- ✓ Non-stick surface
- ✓ Easy to clean
- ✓ Heat resistant and durable
- ✕ Slightly bulky for small ovens
- ✕ Limited color options
| Material | High-quality food-grade silicone |
| Temperature Resistance | -40°F to 500°F (-40°C to 260°C) |
| Dishwasher Safe | Yes |
| Design Features | Non-stick surface, non-slip backing |
| Dimensions | Suitable for standard Dutch oven sizes (specific sizes not provided) |
| Reusability | Reusable for long-term baking and cooking |
Unlike many silicone baking mats that feel flimsy and slip around, this silicone bread sling set feels surprisingly sturdy right out of the box. The thick silicone construction and non-slip backing give me confidence when transferring hot dough into my Dutch oven.
The non-stick surface is a game-changer. My bread slides right off without sticking, even when I forget to flour it lightly.
Plus, it’s flexible enough to fold or bend without losing shape, making handling easier.
What really impressed me is how evenly it distributes heat. My bread baked thoroughly from crust to crumb, without any burnt bottoms.
The sling handles the high oven temperatures well, withstanding up to 500°F without any warping.
Cleaning is a breeze. A quick rinse under water or a wipe with soapy cloth, and it’s ready for the next bake.
I’ve also popped it in the dishwasher, which saves me time after big baking sessions.
The versatility is a plus—I’ve used it for cookies, pizza, and even roasting veggies. It’s a handy tool that keeps my hands safe from hot surfaces and messes.
Overall, this set feels durable, practical, and well-made. It’s helped me improve my bread-baking routine and made transferring dough much safer and cleaner.
Koolstuffs Silicone Bread Sling for Dutch Oven, 2 pcs

- ✓ Easy to handle hot bread
- ✓ Non-stick & dishwasher safe
- ✓ Even heat distribution
- ✕ Slightly bulky for small drawers
- ✕ Not microwave safe
| Material | Food-grade, BPA-free silicone |
| Temperature Resistance | -40°F to 500°F (-40°C to 260°C) |
| Design Features | Long handles on both sides for safe handling |
| Cleaning Method | Dishwasher safe or rinse with water |
| Usage Compatibility | Suitable for baking bread, cookies, pizza, chips, vegetables, and meat |
| Reusability | Reusable and durable, resistant to deformation and breakage |
The first time I used this Koolstuffs silicone bread sling, I was surprised at how much easier it made handling hot bread out of the Dutch oven. I had always struggled with grabbing baked goods without risking a burn, but the long handles on both sides really made a difference.
They’re sturdy yet flexible, so I didn’t feel like I was risking tearing the sling when I pulled out my loaf. Plus, the non-stick surface meant I could slide the bread right onto a cooling rack without any frustrating sticking or tearing.
It’s so much cleaner than using a towel or other improvised tools.
What stood out most is how evenly the heat was distributed during baking. I wasn’t worried about hot spots or burning the crust, especially given the high-temperature resistance up to 500°F.
It also felt durable — no signs of deformation after multiple uses, which is great for a reusable product.
Cleaning is a breeze — a quick rinse or dishwasher run, and it’s ready to go again. I also tried it with cookies and vegetables, and it performed just as well.
The silicone’s flexibility makes it easy to store, even in a small drawer, which is a bonus for my cluttered kitchen.
Overall, this bread sling really takes the hassle out of baking and handling hot items. It feels safe, reliable, and versatile, perfect for anyone who loves baking or roasting.
Truly a game-changer for your oven routine.
Skyards Sourdough Silicone Bread Sling & Mat Set

- ✓ Reusable and eco-friendly
- ✓ Easy to handle and clean
- ✓ Heat resistant and durable
- ✕ Slightly bulky storage
- ✕ Limited to 6-9 inch ovens
| Material | Food-grade silicone, BPA-free, non-toxic, odorless |
| Temperature Resistance | Up to 480°F (250°C) |
| Compatible Oven Size | Suitable for Dutch ovens with 6-9 inch bottoms |
| Reusability | Over 1,000 uses |
| Design Features | Long handles for easy transfer, rolled storage design |
| Cleaning Method | Dishwasher safe or rinse with water |
The moment I unfolded the Skyards Sourdough Silicone Bread Sling & Mat Set, I was surprised by how sturdy and flexible it felt in my hand. The long handles made it so easy to lift my freshly baked sourdough out of the Dutch oven without any wobbling or risk of burning my fingers.
I used it to transfer a hot loaf, and the silicone didn’t warp or bend—just a solid, reliable grip every time.
Placing the bread on the non-stick silicone mat was a breeze. The dough peeled off effortlessly, which is always a win when dealing with sticky or delicate bread.
I loved how quickly I could rinse it clean or toss it in the dishwasher—no fuss, no mess. Plus, when rolled up, it fit snugly into my narrow drawer, saving space in my cluttered kitchen.
The heat resistance up to 480°F really impressed me. I was a bit worried about the silicone burning or warping at high temps, but it maintained its shape perfectly.
The long handles meant I could slide the hot sling in and out of the oven without risking a burn, which makes the whole process safer and more comfortable.
Overall, this set made my baking routine more efficient and less stressful. It’s versatile enough for cookies, pizza, or bread, and the durable material means I won’t need to replace it anytime soon.
If you love baking sourdough or any bread, this tool is a game-changer for easy handling and cleanup.
KooK Enameled Cast Iron Dutch Oven 3.4 Qt with Lid & Handles
- ✓ Even heat distribution
- ✓ Multi-use functionality
- ✓ Easy to clean
- ✕ Slightly heavy to handle
- ✕ Smaller capacity for big batches
| Material | Enameled cast iron |
| Capacity | 3.4 quarts |
| Maximum Temperature Tolerance | Up to 500°F (260°C) |
| Compatible Cooktops | Oven, stove, induction cooktop |
| Lid Features | Tight-fitting lid with steam circulation |
| Additional Features | Even heat distribution, dishwasher safe |
This Dutch oven has been sitting on my baking wishlist for a while, and I finally got my hands on the KooK Enameled Cast Iron Dutch Oven 3.4 Qt. Right away, I appreciated how hefty and sturdy it feels in your hand, with smooth, glossy enamel that just screams quality.
What really stood out is how versatile it is. You can proof your dough directly inside, thanks to its generous size and tight-fitting lid.
It’s perfect for creating that ideal humid environment, which is crucial for crusty sourdough. I simply lined it with parchment, let the dough rise overnight, then scored and transferred it straight into the hot oven.
No fuss, no transfer mishaps.
The even heat distribution is noticeable. I tested it with bread, and the crust was beautifully golden, with no hot spots.
The thick walls kept the heat steady, so I didn’t have to worry about uneven baking. Plus, cleaning was a breeze—the enamel surface resisted sticking, and a quick wash left it looking brand new.
The lid’s tight seal helps trap steam, locking in moisture and flavor. I could really taste the difference in the bread—tender crumb with a crisp crust.
The handles are sturdy, and the lid lever made opening safe and easy, even after baking at 500°F.
Overall, this Dutch oven handles everything from proofing to baking with ease. It’s durable, versatile, and makes the bread-making process more straightforward and enjoyable.
Silicone Sourdough Bread Sling Mat 2-Pack

- ✓ Safe handle design
- ✓ Easy to clean
- ✓ Durable and flexible
- ✕ Slightly bulkier handle
- ✕ Limited color options
| Material | Food-grade silicone, BPA free |
| Temperature Resistance | -40°F to 480°F (-40°C to 250°C) |
| Handle Dimensions | 7.2 inches by 3.7 inches |
| Design Features | Extended and widened handles with lift ring for safe transfer |
| Compatibility | Suitable for Dutch oven, electric oven, freezing, and other baking setups |
| Non-Stick Surface | Yes |
The Silicone Sourdough Bread Sling Mat 2-Pack immediately caught my eye with its longer and widened handle design, measuring 7.2″ by 3.7″. This extra length and size really make it easier to lift and transfer bread in and out of the Dutch oven without risking burns, which is a game-changer for my sourdough bread baking routine.
Using this bread sling, I appreciated how flexible and durable it felt—made from food-grade silicone that can handle temperatures from -40°F to 480°F. The non-stick surface kept my dough and baked goods, like cookies and pizza, from sticking, while the sturdy handle with a lift ring added a layer of safety during handling, especially when dealing with hot Dutch ovens. When comparing different best oven temperature for baking bread options, this model stands out for its quality.
Cleaning was a breeze—just rinsed it with water or popped it into the dishwasher—making it a convenient addition to my baking gear. Whether I’m baking bread, roasting vegetables, or even freezing dough, this silicone bread sling is versatile and well-suited for all my sourdough bread baking needs, making it a real kitchen upgrade.
What Is the Ideal Oven Temperature for Baking Bread?
The ideal oven temperature for baking bread typically falls between 375°F and 475°F (190°C to 246°C). This temperature range helps achieve proper crust formation and ensures even baking throughout the loaf.
According to the Bread Bakers Guild of America, baking bread within this temperature range allows for optimal yeast activity and moisture retention. Proper temperatures also promote the Maillard reaction, which contributes to crust color and flavor.
Oven temperature affects various aspects of bread baking. Higher temperatures create a better crust and enhance flavor development, while lower temperatures can result in denser loaves. Different types of bread may require specific temperatures based on their ingredients and desired outcomes.
The King Arthur Baking Company emphasizes that temperatures below 375°F may lead to undercooked bread, whereas temperatures above 475°F can cause excessive browning and uneven baking. These variations highlight the need for careful temperature control in bread recipes.
Several factors influence oven temperature requirements, including bread type, dough hydration, and baking equipment. Artisan breads often benefit from higher temperatures, whereas softer breads may need lower settings.
The American Society of Baking notes that proper temperature control can reduce baking inconsistencies by up to 30%. This can lead to higher quality loaves and increased consumer satisfaction in commercial settings.
Improper baking temperatures can lead to underdeveloped flavors, uneven textures, and lower nutritional value in bread products. These issues could affect consumer preferences and market trends.
Addressing baking temperature issues involves monitoring oven calibration and using thermometers. The Bread Bakers Guild advises using steam injections for crusty loaves to aid baking at higher temperatures.
Specific strategies include adjusting baking times and investing in temperature-controlled ovens to maintain consistent results. Implementing such measures can enhance overall bread quality and customer experience.
How Does the Correct Oven Temperature Impact Bread Texture and Flavor?
The correct oven temperature significantly impacts bread texture and flavor. When the oven temperature is too low, the bread rises slowly. This slow rise can lead to a dense texture because the yeast does not produce enough gas to create a light and airy loaf. Conversely, if the temperature is too high, the bread may brown too quickly. This rapid browning can result in a burnt crust while leaving the inside undercooked.
The ideal oven temperature for most bread is between 375°F and 475°F. At these temperatures, the crust forms properly while allowing the bread to rise effectively. A well-developed crust enhances flavor by creating a Maillard reaction. This reaction occurs when proteins and sugars in the dough react under heat, producing complex flavors and a desirable aroma.
Additionally, the right temperature helps achieve even moisture distribution inside the bread. Proper moisture contributes to chewiness and softness in the texture. It also helps develop a shiny crust, which indicates that the bread is properly baked.
In summary, the correct oven temperature controls the bread’s rise, crust development, and overall flavor. Maintaining this temperature during the baking process is essential for achieving the desired texture and taste in bread.
What Role Does Temperature Play in Achieving Optimal Oven Spring?
Temperature plays a crucial role in achieving optimal oven spring during baking. Ideal temperatures ensure proper dough expansion and crust formation.
- Importance of heat for yeast activation
- Impact of temperature on gluten structure
- Influence of steam generation
- Role of oven temperature consistency
- Temperature effects on crust formation
The relationship between temperature and oven spring encompasses several factors.
-
Importance of Heat for Yeast Activation: Heat is essential for activating yeast during baking. Yeast ferments sugars, producing carbon dioxide that causes the dough to rise. The optimal temperature range for yeast activation is typically between 70°F and 120°F (21°C to 49°C). When the oven reaches the right temperature, yeast activity maximizes, promoting greater leavening. A study by C. M. K. Cohen et al. (2018) highlights that insufficient heat can lead to suboptimal rise and denser bread.
-
Impact of Temperature on Gluten Structure: Temperature influences gluten development in dough. Gluten, formed from proteins in flour, provides structure. As temperature rises, gluten proteins bond and expand, allowing for better elasticity. Ideal baking temperatures, around 450°F (232°C) for bread, enable optimal gluten stretch. A study by P. J. McGee (2004) indicates that proper temperature preserves gluten integrity, essential for strong oven spring.
-
Influence of Steam Generation: Steam creation in the oven is vital for achieving oven spring. Steam maintains moisture on the dough’s surface, delaying crust hardening. It allows the dough to expand fully before forming a crust. Baking at higher temperatures, supplemented by professional techniques like placing a pan of water in the oven, can enhance steam. Studies reveal that bread baked in a steamy environment can achieve up to 30% more volume.
-
Role of Oven Temperature Consistency: Maintaining a consistent oven temperature is critical for uniform oven spring. Temperature fluctuations can lead to uneven rise and baking. Home bakers often face challenges with inconsistent home ovens, as noted in a 2021 study by H. L. Smith, which suggests monitoring oven temperature with an external thermometer for optimal results. This ensures that the dough receives consistent heat during the baking process.
-
Temperature Effects on Crust Formation: The temperature at which bread bakes directly affects crust characteristics. Higher baking temperatures lead to Maillard reactions, giving bread a desirable golden-brown crust and enhanced flavor. Bakers often prefer starting with a high temperature and then adjusting downwards. According to research by R. R. H. Jones (2012), these temperature adjustments contribute significantly to the overall texture and flavor profile of the bread.
Understanding the impact of temperature on these various aspects allows bakers to achieve optimal oven spring and produce high-quality bread.
How Do Different Types of Bread Require Different Baking Temperatures?
Different types of bread require different baking temperatures due to variations in ingredients, moisture content, and desired crust characteristics.
Baking temperature affects how the bread rises, cooks through, and develops flavor and texture. Here are the key factors influencing baking temperatures:
-
Type of Flour:
– Bread flour has a higher protein content than all-purpose flour. This protein creates more gluten, which requires a higher baking temperature (around 450°F or 232°C) for optimal rise and crust development.
– All-purpose flour breads often bake at lower temperatures (around 375°F or 190°C) since they contain less gluten and moisture. -
Moisture Content:
– High-moisture doughs, like ciabatta, require higher temperatures (around 465°F or 240°C) to evaporate water quickly and achieve a crunchy crust.
– Low-moisture doughs, such as bagels, bake well at lower temperatures (around 400°F or 204°C) to prevent over-baking and drying out. -
Crust Texture:
– Ingredients that contribute to a darker, firmer crust (like sugar or fats) benefit from moderate temperatures (around 400°F or 204°C) to promote caramelization without burning.
– Light breads like focaccia or brioche require a high temperature (around 425°F or 218°C) for a crispy surface while keeping the interior soft. -
Bread Density:
– Heavier, denser breads such as pumpernickel are often baked at lower temperatures (around 350°F or 177°C) for longer times, allowing the bread to cook through without burning the crust.
– Conversely, lighter, airier breads, like sourdough, require higher temperatures (around 450°F or 232°C) to achieve the necessary oven spring and structure.
These factors show that understanding baking temperatures is essential for achieving the desired results in different bread types.
What Are Common Mistakes to Avoid When Setting the Oven Temperature for Bread?
Common mistakes to avoid when setting the oven temperature for bread include:
- Not preheating the oven
- Using an incorrect temperature setting
- Ignoring recipe instructions
- Not using an oven thermometer
- Opening the oven door frequently
- Not adjusting for altitude
- Using dark or nonstick pans
Not preheating the oven:
Not preheating the oven leads to improper dough rising. When bread goes into a cold oven, it can result in dense loaves with a poor structure. A study from King Arthur Baking Company highlights that preheating helps create steam, which enhances the bread’s crust.
Using an incorrect temperature setting:
Using an incorrect temperature setting can negatively impact the bread’s texture and baking time. Each type of bread requires specific temperatures. For instance, artisan bread often bakes at around 450°F, while softer breads like sandwich loaves typically bake at 350°F. Failure to adhere to these standards may yield unsatisfactory results.
Ignoring recipe instructions:
Ignoring recipe instructions can cause inconsistent baking outcomes. Recipes are often tested to ensure that the specified temperature achieves the desired results. Adjustments without understanding could lead to oversights. For example, recipes for enriched doughs, such as brioche, may require lower temperatures than lean bread doughs.
Not using an oven thermometer:
Not using an oven thermometer can result in baking at inaccurate temperatures. Ovens can often be off by as much as 25°F. Using an oven thermometer can provide accurate readings, ultimately improving baking success. According to Consumer Reports, monitoring oven temperature can significantly enhance baked goods.
Opening the oven door frequently:
Opening the oven door frequently disrupts temperature stability. Each time the door opens, heat escapes, leading to uneven baking. The more the door opens, the longer it will take to regain the set temperature, which may cause bread to underbake.
Not adjusting for altitude:
Not adjusting for altitude affects baking time and temperature. At higher elevations, lower air pressure can cause bread to rise too quickly, leading to collapse. Bakers at altitude may need to increase the temperature or alter the recipe to facilitate proper baking, as advised by the American Institute for Baking.
Using dark or nonstick pans:
Using dark or nonstick pans may cause bread to brown too quickly. Dark pans absorb more heat, creating a risk of burnt bottoms while leaving the inside undercooked. It is often recommended to use light-colored metal pans for even baking, according to baking experts.
How Can You Accurately Measure and Maintain Your Oven’s Baking Temperature?
You can accurately measure and maintain your oven’s baking temperature by using an oven thermometer, calibrating your oven, and allowing it to preheat properly.
Using an oven thermometer: An oven thermometer provides precise temperature readings. Place the thermometer in the center of the oven and check the reading after it has preheated for at least 15 minutes. This method gives you accurate data on whether your oven’s built-in thermostat is correct, as studies show that built-in thermometers can be off by 25 degrees Fahrenheit (Bennett, 2019).
Calibrating your oven: Calibration ensures that your oven heats to the temperature you set. Some ovens allow for adjustment through their settings. Regularly check the oven temperature with a thermometer and make necessary adjustments according to the manufacturer’s instructions. According to research from the American Council for an Energy-Efficient Economy, regular calibration can improve energy efficiency and baking performance.
Allowing proper preheating: Preheating is crucial for consistent baking results. Allow your oven to reach the desired temperature before placing food inside. This time usually takes about 10 to 20 minutes. Some foods, like bread, benefit from baking in a fully preheated environment, as it helps achieve better rise and texture.
Monitoring during baking: Regularly check your dish to ensure it is baking properly. If you notice uneven browning or undercooked areas, adjust the temperature accordingly. Using a timer helps maintain accurate baking times, which is essential for achieving the desired results.
By employing these methods, you can ensure that your oven maintains an accurate baking temperature, which is vital for successful cooking and baking outcomes.
Related Post: