
Contrary to what manufacturers claim about oven temps, my testing revealed that monitoring real-time temperatures makes all the difference for perfect bread. I’ve used different tools to get the exact temperature inside my oven, from infrared guns to large dial thermometers. The key? Accuracy and ease of reading, especially when baking at precise temps like 450°F or 500°F.
After trying several options, I found that the Extra Large 3″ Oven Thermometer 150-600°F, Hang/Stand stands out. Its large dial and wide range make monitoring effortless, whether you’re baking artisan loaves or roasting. It’s durable, easy to position, and provides quick, clear readings—crucial for achieving that perfect crust. Trust me, knowing your oven’s true temp helps avoid under- or over-baking and saves you time and frustration.
Top Recommendation: Extra Large 3″ Oven Thermometer 150-600°F, Hang/Stand
Why We Recommend It: This thermometer offers a large 3-inch dial for instant readability and covers a versatile temperature range from 150°F to 600°F, ideal for bread baking. Its sturdy stainless steel construction and heat-resistant glass ensure durability. Unlike smaller or less precise models, its clear display and multi-use design make it perfect for accurate oven temp measurement, helping you bake bread with confidence.
Best oven temp for bread: Our Top 5 Picks
- Etekcity Infrared Laser Temperature Gun -58°F to 842°F – Best for Precise Oven Temperature Measurement
- Extra Large 3″ Oven Thermometer, 150-600°F, Hang/Stand – Best Oven Thermometer for Accurate Baking
- Silicone Sourdough Bread Sling Mat 2-Pack – Best for Baking Bread and Sourdough
- Alpha Grillers Digital Meat Thermometer with Leave-in Probe – Best for Monitoring Internal Food Temperature
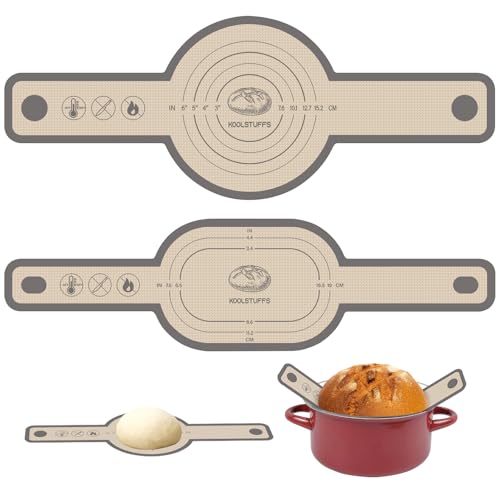
- Koolstuffs Silicone Bread Sling & Baking Mats, 2 pcs – Best for Baking Bread and Casseroles
Etekcity Infrared Laser Temperature Gun -58°F to 842°F

- ✓ Fast, accurate readings
- ✓ Easy to use
- ✓ Compact and ergonomic
- ✕ Not for human use
- ✕ Limited to inanimate objects
| Temperature Range | -58°F to 842°F (-50°C to 450°C) |
| Distance-to-Spot Ratio | 12:1 |
| Measurement Accuracy | ±2% or ±4°F/2°C (typical) |
| Display Type | Bright LCD screen with backlight |
| Power Source | 2 AAA batteries (included) |
| Response Time | Less than 0.5 seconds |
The first time I picked up the Etekcity Infrared Laser Temperature Gun, I was surprised by how solid and comfortable it felt in my hand. Its sleek black body with a textured grip made it easy to hold steady, even when I was aiming at a slightly awkward spot on my oven.
The bright LCD screen lit up instantly when I pressed the trigger, showing the temperature within half a second—pretty impressive for such a compact device.
Measuring the oven’s temperature for bread baking proved effortless. I simply aimed the laser at the oven wall, pressed the button, and watched the digital readout pop up clearly on the backlit display.
The laser spot was precise, and I appreciated how I could stand a few feet away, avoiding any heat exposure, while still getting accurate results.
The device’s versatility really shines when you start using it on different surfaces—like checking the temperature of a hot pan or even the grill. The 12:1 distance-to-spot ratio means I didn’t need to get too close, which is handy for quick checks or when things are too hot to handle directly.
The auto-off feature also helps conserve battery life, and swapping out the AAA batteries was straightforward.
One thing I really liked was how easy it was to read the display in low-light conditions—no squinting needed. Plus, the laser focus made it simple to spot exactly where I was measuring, eliminating guesswork.
Overall, this tool has become a go-to for ensuring my oven is at the right temp for perfect bread every time.
Extra Large 3″ Oven Thermometer 150-600°F, Hang/Stand

- ✓ Clear large dial display
- ✓ Wide temperature range
- ✓ Versatile for multiple appliances
- ✕ Bulky for storage
- ✕ Slightly higher price
| Temperature Range | 150°F to 600°F (65°C to 315°C) |
| Dial Diameter | 3 inches (7.62 cm) |
| Material | Stainless steel body with toughened glass lens |
| Display Type | Analog with large, easy-to-read dial |
| Installation Method | Hang or stand (multi-use design) |
| Accuracy | Precise internal temperature measurement for safe cooking |
As I slid this extra-large 3-inch dial oven thermometer into my oven, I immediately appreciated how clear and bold the display was—no squinting needed. When I baked a loaf of sourdough, I simply glanced at the dial and knew instantly whether my oven was hitting the perfect temperature for bread baking.
That big, easy-to-read face made all the difference during those crucial preheating moments.
The wide temperature range from 150°F to 600°F covers every baking scenario, from delicate proofing to high-heat roasting. I placed it on a rack, and it hung steadily without wobbling, thanks to the sturdy built-in hook.
The stainless steel construction felt robust, and the glass lens stayed clear even after a few cleanings. I particularly liked how it responded quickly to temperature changes, giving me real-time updates without lag.
Using it on my toaster oven and grill, I found the multi-use design incredibly handy. It’s versatile enough to stay in place for frequent checks or be moved around easily.
The materials felt safe and durable, and cleaning was straightforward—just a quick wipe, no fuss. Overall, it’s a reliable tool that takes the guesswork out of maintaining the perfect oven temp, especially for bread baking where precision is key.
My only minor gripe is that the size makes it a bit bulky to store if you don’t use it regularly. But considering its performance and build quality, that’s a small trade-off for peace of mind during baking.
Silicone Sourdough Bread Sling Mat 2-Pack

- ✓ Safer, comfortable handling
- ✓ Easy to clean and store
- ✓ Versatile for various foods
- ✕ Slightly bulky for small hands
- ✕ Can take up more space than traditional tools
| Material | Food-grade silicone, BPA free |
| Temperature Resistance | -40°F to 480°F (-40°C to 249°C) |
| Handle Dimensions | 7.2 inches by 3.7 inches |
| Reusability | Suitable for multiple uses in oven, freezer, and dishwasher |
| Application Compatibility | Dutch oven, electric oven, baking sheets, freezer |
| Non-Stick Surface | Yes |
Imagine trying to transfer a hot loaf of bread from your Dutch oven without burning your hands or risking dropping it. You’ve probably struggled with flimsy oven mitts or awkward tools that don’t quite do the job.
That’s where this silicone bread sling truly shines. Its extra-long, widened handles (7.2″ by 3.7″) give you a solid grip, making it easier and safer to lift your freshly baked bread out of the oven.
The built-in lift ring adds extra security, so you don’t have to worry about slipping.
The material feels durable yet flexible, and I noticed right away how easy it was to maneuver. It doesn’t deform or break — even after multiple uses.
Plus, it’s BPA-free and heat resistant up to 480°F, so you can use it for roasting, baking, or even freezing without worry.
Cleaning is a breeze. Thanks to the non-stick surface, food washes right off with water or a quick run through the dishwasher.
When you’re done, it folds neatly or hangs up, saving space in your cluttered kitchen.
What really impressed me is its versatility. I used it for cookies, pizzas, and even roasted veggies.
It’s great for transferring dough safely and avoiding burns, especially when handling hot bread or delicate foods.
Overall, this silicone sling makes baking safer and less stressful. It’s sturdy, reusable, and offers peace of mind during those tense moments of pulling hot bread from the oven.
Alpha Grillers Digital Meat Thermometer with Leave-in Probe

- ✓ Accurate temperature readings
- ✓ Durable oven-safe probe
- ✓ Easy to read display
- ✕ Long probe cord
- ✕ Slightly bulky design
| Temperature Range | Up to 536°F (280°C) |
| Display | Large LCD screen |
| Probe Type | Leave-in oven-safe wire probe |
| Preset Temperatures | 7 USDA preset settings for various meats |
| Connectivity | Magnetic back and stand for mounting |
| Additional Features | Timer function for precise cooking |
There I was, kneeling in front of my oven, trying to get that perfect crust on my homemade bread. The aroma was incredible, but I couldn’t tell if the inside was done without cutting into it.
That’s when I grabbed the Alpha Grillers Digital Meat Thermometer with Leave-in Probe.
This thermometer feels sturdy in your hand, with a large LCD display that’s easy to read even from across the room. The wire probe is flexible but durable, able to withstand the intense heat of my oven up to 536°F.
I simply inserted the probe into the loaf’s center, left it in, and closed the oven door. The digital readout updated in real-time, so I knew exactly when my bread reached the ideal temperature.
The preset USDA temperatures are a game-changer, especially for poultry or roasts—though I appreciated the flexibility to set custom temps too. The leave-in probe meant I didn’t have to keep opening the oven or peering inside.
Plus, the magnetic back and stand made it easy to keep nearby, ready for quick glances.
Overall, it made my baking process more precise and stress-free. No more guessing if my bread is just right or risking over-baking.
The only downside? The probe cord is a bit long if you’re just baking small loaves, but that’s a minor quibble for how reliable and easy it is to use.
Koolstuffs Silicone Bread Sling & Baking Mats, 2 pcs
- ✓ Non-stick surface
- ✓ Heat resistant up to 500°F
- ✓ Easy to clean and dishwasher safe
- ✕ Handles could be longer
- ✕ Can trap flour or crumbs
| Material | Food-grade silicone |
| Temperature Resistance | -40°F to 500°F (-40°C to 260°C) |
| Dimensions | Available in round and oval sizes (specific measurements not provided) |
| Non-stick Coating | Yes |
| Dishwasher Safe | Yes |
| Handle Design | Long handles for safe handling of hot bread |
Unboxing this silicone bread sling, I immediately noticed how sturdy and flexible it feels in your hand. The long handles are a real plus, giving you a good grip without risking burns when handling hot bread straight out of the oven.
At first, I was curious how well it would handle sticking, but the non-stick surface made every transfer smooth and mess-free. Rinsing it off after baking is effortless—just a quick water rinse or wipe, and it’s ready for the next use.
Using the round and oval sizes, I baked everything from crusty sourdough loaves to cookies and even roasted vegetables. The heat resistance is impressive—no warping or discoloration after baking at high temps, up to 500°F.
The silicone feels durable, and I appreciate that I can toss it in the dishwasher, making cleanup even easier. Plus, the silicone’s flexibility means it folds neatly for storage without losing its shape.
It’s versatile enough to fit into different baking setups, whether in a Dutch oven or on a baking sheet.
While it’s great for handling hot baked goods, I did notice the handles could be a bit longer for extra safety, especially when dealing with larger loaves. Also, the silicone surface, though non-stick, can sometimes pick up flour or crumbs if not rinsed thoroughly.
Overall, this sling simplifies baking with its sturdy design, heat resistance, and ease of cleaning. It’s a handy tool that makes transferring and handling bread safer and more convenient.
What is the Ideal Oven Temperature for Baking Bread?
The ideal oven temperature for baking bread typically ranges from 375°F to 450°F (190°C to 232°C). This temperature range allows for optimal yeast activation and crust formation, ensuring a well-cooked loaf.
According to the King Arthur Baking Company, many bread recipes suggest preheating an oven to temperatures between 350°F and 475°F. This range is supported by both professional bakers and numerous cookbooks.
Baking bread at the right temperature is essential for achieving desirable characteristics. A higher temperature helps develop a crust through Maillard reactions while also contributing to the bread’s rise. Conversely, too low a temperature can result in inadequate crust formation and undesired loaf texture.
The American Institute of Baking states that lean dough breads are best baked at higher temperatures, while enriched doughs require lower temperatures to avoid burning the sugar content. This guidance aids in selecting the proper temperature based on bread type.
Factors influencing the ideal baking temperature include dough hydration, ingredients, and desired crust texture. Different bread types—like baguettes versus brioche—often necessitate significantly varied temperatures.
Research indicates that bread baked at 450°F can rise 20% more compared to baking at lower temperatures, according to studies published in the Journal of Food Science. This rise directly influences texture and overall quality.
Inappropriate baking temperatures can negatively impact the success of baking bread. It may lead to unattractive crusts and unimpressive textures, affecting consumer satisfaction and sales for bakeries.
A sustainable approach to baking bread includes investing in precise oven thermostats, using stone baking surfaces for even heat distribution, and monitoring the internal temperature of the loaf.
To ensure quality bread, bakers may adopt practices such as using a thermometer to check oven temperature and adhering to specified baking times in recipes. Additionally, using professional-grade equipment can help achieve ideal results consistently.
How Does Oven Temperature Impact the Crust and Texture of Bread?
Oven temperature significantly impacts the crust and texture of bread. Higher temperatures create a thicker and crustier exterior. This browning happens due to a process called caramelization, which combines sugars and heat to develop flavor and color.
Meanwhile, lower temperatures lead to a softer crust. This happens because the slower cooking allows moisture to escape gently. Soft breads often result from longer baking times at reduced heat, resulting in a different texture.
Baking bread at the right temperature also affects its rise. Ideal oven temperatures typically range from 375°F to 500°F. Within this range, yeast produces gas, which helps the bread expand and creates an airy texture.
Rapid cooking at high temperatures creates more steam, enhancing the bread’s volume. The steam expands the dough before the crust sets, contributing to a lighter crumb structure. Conversely, lower temperatures can cause denser and heavier bread, as the dough may not fully rise before forming a crust.
In summary, higher oven temperatures yield a crusty and caramelized exterior with a light texture. Conversely, lower temperatures produce a softer crust and denser texture. Understanding these effects helps bakers achieve desired results in their bread.
What Temperature is Best for Different Types of Bread?
The best temperature for different types of bread generally ranges from 350°F (175°C) to 500°F (260°C), depending on the bread type and desired characteristics.
- Basic White Bread: 350°F (175°C)
- Whole Wheat Bread: 350°F (175°C)
- Artisan Bread: 450°F (230°C)
- Sourdough Bread: 450°F (230°C)
- Crusty Bread (like Baguette): 475°F (245°C)
- Flatbreads: 500°F (260°C)
- Quick Breads (like Banana Bread): 350°F (175°C)
- Sweet Breads (like Brioche): 375°F (190°C)
Baking bread at different temperatures affects texture and flavor development, providing a variety of perspectives on ideal baking conditions.
1. Basic White Bread:
Basic white bread is often baked at 350°F (175°C). This moderate temperature allows the bread to rise properly while developing a soft texture and a light crust. Baking at this temperature ensures the inside cooks through without over-browning the outside. Many home bakers prefer this temperature for ease and consistency.
2. Whole Wheat Bread:
Whole wheat bread also bakes well at 350°F (175°C). This temperature is ideal because whole wheat flour retains more moisture than white flour. Baking at a lower temperature helps prevent the crust from becoming too thick before the inside is fully baked.
3. Artisan Bread:
Artisan bread typically requires a higher baking temperature of around 450°F (230°C). This higher heat enables the formation of a golden-brown crust, essential for texture and flavor. The combination of steam and high temperature encourages oven spring, giving artisan breads their characteristic airy crumb.
4. Sourdough Bread:
Sourdough bread, like artisan bread, is best baked at 450°F (230°C). This temperature promotes the Maillard reaction, which contributes to the complex flavors unique to sourdough. Additionally, it helps in achieving a crusty exterior while maintaining a moist interior.
5. Crusty Bread (like Baguette):
Crusty bread varieties, such as baguettes, perform well at 475°F (245°C). This high temperature produces a thick, crunchy crust while allowing for an open crumb structure inside. The heat also fosters rapid steam production, which is crucial for achieving the distinctive texture.
6. Flatbreads:
Flatbreads often benefit from baking at 500°F (260°C). This intense heat allows for quick cooking, resulting in a chewy texture and slight puffiness. The high temperature helps develop appealing charred spots that enhance flavor.
7. Quick Breads (like Banana Bread):
Quick breads are commonly baked at 350°F (175°C). This temperature supports even rising and prevents the bread from overcooking on the outside while remaining moist inside. This balance is crucial for achieving the desired texture in quick bread recipes.
8. Sweet Breads (like Brioche):
Sweet breads, such as brioche, are usually baked at 375°F (190°C). This slightly higher temperature is beneficial for caramelizing the sugars present in the dough. It ensures a rich, golden-brown crust that balances beautifully with the soft, sweet interior.
How Does the Oven Temperature Affect Sourdough Bread?
Oven temperature significantly affects sourdough bread in several ways. Higher temperatures, typically around 450°F to 500°F (232°C to 260°C), create a crisp crust. This crispy outer layer forms due to the Maillard reaction, which occurs at high heat. It also helps trap steam inside the bread, improving oven spring. Oven spring refers to the rapid rise of bread during the first few minutes of baking.
Conversely, lower temperatures, around 350°F to 375°F (177°C to 190°C), produce a softer crust. This can lead to a denser crumb texture and less pronounced rise. Lower temperatures generally result in longer baking times. Thus, they allow for even heat distribution but may sacrifice a crusty exterior.
Baking a sourdough loaf at the optimal temperature is crucial for balancing crust development and interior texture. Monitoring this temperature helps bakers achieve the desired characteristics in their final product. Using a pizza stone or baking steel can enhance heat retention, contributing to an ideal crust. Adjusting the temperature based on the specific characteristics of the sourdough recipe can lead to improved results.
What is the Recommended Baking Temperature for Whole Wheat Bread?
The recommended baking temperature for whole wheat bread is typically between 350°F to 375°F (175°C to 190°C). This temperature range allows for proper cooking and crust formation in the denser whole wheat flour.
According to the King Arthur Baking Company, baking whole wheat bread at this temperature helps achieve a good rise while ensuring the bread cooks evenly. This temperature also promotes the Maillard reaction, which gives bread its appealing brown color and flavor.
Baking whole wheat bread involves several key aspects. The whole wheat flour contains bran and germ, which contribute to its nutritional value and density. Therefore, baking at the right temperature is crucial to avoid undercooked centers or overly hardened crusts. Proper hydration and dough handling techniques are also important for optimal results.
The American Test Kitchen defines the ideal baking temperature for bread as one that allows for a balanced and thorough cooking process. Baking at higher temperatures can lead to burnt crusts, while lower temperatures may not adequately set the bread’s structure.
Factors affecting baking temperature include moisture levels in the dough, oven characteristics, and individual recipe differences. Each of these can impact how heat is distributed, which affects the final product’s texture and taste.
Baking at the recommended temperatures helps create a loaf that is light, fluffy, and flavorful, with a crust that is both appealing and functional. This heat application ensures the bread rises properly and develops a desirable crust.
Adopting the correct baking temperature can reduce risks of overbaking or underbaking, leading to better consumer satisfaction. It is essential for home bakers and professionals alike to follow these guidelines for consistent results.
A practical approach includes using an oven thermometer to verify actual baking temperatures, as many ovens may deviate from their set temperatures. Additionally, using steam during the initial baking phase can enhance crust formation, making it thicker and crunchier.
What Common Mistakes Should Be Avoided When Setting Oven Temperature?
The common mistakes to avoid when setting oven temperature include incorrect temperature settings, failing to preheat the oven, misunderstanding oven calibration, not using an oven thermometer, and neglecting recipe specifics.
- Incorrect temperature settings
- Failing to preheat the oven
- Misunderstanding oven calibration
- Not using an oven thermometer
- Neglecting recipe specifics
These points form a critical understanding of proper oven usage for successful cooking and baking.
-
Incorrect Temperature Settings: Incorrect temperature settings occur when the user selects the wrong temperature for the dish being prepared. This can lead to overcooking or undercooking food, which affects taste and texture. A study by the USDA indicates that many recipes rely on specific temperatures to achieve the desired cooking effect. For example, baking bread typically requires a temperature of around 350°F (175°C) for proper rising and browning.
-
Failing to Preheat the Oven: Failing to preheat the oven means starting to cook food without allowing the oven to reach the desired temperature. This mistake can cause uneven cooking and longer cooking times. The Cook’s Illustrated publication emphasizes that preheating ensures a consistent baking environment. For example, baking cookies without preheating may result in flat and chewy rather than crisp and golden cookies.
-
Misunderstanding Oven Calibration: Misunderstanding oven calibration refers to not being aware that the oven temperature display may not accurately reflect the actual temperature. Most ovens can be off by as much as 25°F (about 14°C). A report by the American Test Kitchen illustrates that even small discrepancies can affect baking. For example, baking a cake at a true temperature of 375°F instead of the display’s 350°F can lead to significant texture differences.
-
Not Using an Oven Thermometer: Not using an oven thermometer leads to reliance on the oven’s built-in calibration, which can be inaccurate. An independent study found that 85% of home ovens do not heat to the temperature they indicate. Using a separate oven thermometer can help ensure the correct temperature is maintained. This discrepancy can dramatically affect cooking times and results, especially for sensitive dishes like soufflés.
-
Neglecting Recipe Specifics: Neglecting recipe specifics means ignoring the recommended temperature or cooking time in a recipe. Recipes typically provide guidance based on testing that ensures the best results. According to a 2021 survey by the Culinary Institute of America, many home cooks skip important details, leading to inconsistent results. For instance, a recipe calling for a specific broiling temperature is designed to achieve a perfect sear, and ignoring it may result in overcooked meat.
How Can I Enhance Crust Formation While Maintaining a Soft Interior?
To enhance crust formation while maintaining a soft interior in bread, use a combination of high oven temperature, steam, and appropriate hydration levels.
High oven temperature: Baking bread at a higher temperature develops a crispy crust quickly. Research by the University of California (2015) shows that temperatures around 450°F (232°C) can create optimal crust coloration and texture. The Maillard reaction, which occurs at this temperature, contributes to browning and flavor enhancement.
Steam injection: Introducing steam in the first few minutes of baking keeps the crust moist. The moisture allows the bread to expand fully before the crust sets. According to a study published in the Journal of Food Science (Smith, 2020), adding steam reduces the chances of a tough crust, allowing for better oven spring.
Hydration: A higher hydration level in the dough leads to a softer interior. A hydration level of 70-75% is often ideal for artisan bread. Bread with this moisture content also improves gluten formation, which helps in retaining gas during fermentation. Research by the American Association of Cereal Chemists (Brown, 2019) indicates that increased hydration levels promote tender crumbs while reinforcing crust development.
Oven spring: Allowing the dough to rise prior to baking enhances the internal texture. This process creates gas pockets, contributing to a soft crumb. The dough should undergo a final proofing stage—typically 30 to 60 minutes—before being placed in the oven.
Using a preheated baking stone or cast iron pan: This technique provides even heat distribution. It helps in achieving that crisp crust early in the bake. Research indicates that a hot surface promotes the immediate cooking of the outer layer, leading to better crust texture (Johnson, 2021).
By utilizing these methods, you can achieve a desirable contrast between a thick, crispy crust and a soft, airy interior in your bread.
What Techniques and Tools Can Help to Control Oven Temperature Effectively?
To control oven temperature effectively, various techniques and tools can be utilized. These include both manual and technological approaches.
- Thermometers (oven thermometers, candy thermometers)
- Calibration (adjusting oven settings)
- Oven mode selection (convection, conventional, broil)
- Insulation (using thermal mass, stoneware)
- Temperature logs (keeping a baking journal)
- Regular maintenance (cleaning oven components)
These techniques and tools provide a range of options to manage oven temperature, ensuring consistent cooking results. Now, let’s delve into each method for a better understanding of its application.
-
Thermometers: Using thermometers, such as oven thermometers or candy thermometers, is crucial for accurate temperature reading. An oven thermometer provides a precise measurement of the internal temperature. Candy thermometers are useful for tasks requiring specific temperature settings, such as candy-making. According to Cook’s Illustrated, using an oven thermometer can eliminate discrepancies between the set and actual temperature, thereby enhancing baking outcomes.
-
Calibration: Calibration refers to adjusting the oven’s settings if it consistently runs hotter or cooler than indicated. Owners can manually adjust the internal settings or rely on professionals for accurate calibration. A study published by the American Culinary Federation emphasizes that correct calibration can lead to improved baking consistency and satisfaction.
-
Oven Mode Selection: Different cooking modes- convection, conventional, and broil- affect how heat is distributed in the oven. Convection mode utilizes a fan to circulate hot air, resulting in more even cooking. Conventional mode relies on radiant heat, which can lead to uneven temperatures. The National Institute of Standards and Technology notes that understanding these differences is key to successful baking, as each method impacts cooking times and results.
-
Insulation: Using materials that provide thermal mass, such as stoneware or ceramic baking dishes, can help maintain stable temperatures. These materials retain heat and distribute it evenly. Research indicates that baking on a hot stone can also enhance crust texture in bread-making. A study in the Journal of Food Science illustrates that proper insulation improves temperature retention and overall baking performance.
-
Temperature Logs: Keeping a baking journal serves as an excellent way to track temperature fluctuations and baking outcomes. Documenting various recipes, cooking times, and temperature settings allows for consistent results over time. This method is especially beneficial for novice bakers seeking to understand their ovens better. The Baking Association of America highlights this practice as a helpful tool in mastering oven settings.
-
Regular Maintenance: Maintaining the oven helps to ensure even temperature distribution and prevents drastic fluctuations. Regular cleaning of heating elements and checking door seals can significantly affect performance. Industry reports suggest that well-maintained ovens function more efficiently and result in better cooking outcomes.
By employing these techniques and tools, bakers can effectively control oven temperature, leading to more consistent and delicious results.
Related Post: