
Contrary to what manufacturers claim about rib racks, in my hands-on testing, theDurable Stainless Steel Rib Rack with Silicone Oil Brush stood out. Its polished #304 stainless steel construction is not just durable but also rust-resistant, ensuring it lasts for years. I particularly appreciated how its upright design promotes even airflow, making ribs crispy outside and juicy inside—perfect for that smoky flavor we all crave.
Compared to the rectangle racks, this one offers a solid advantage: its ability to hold five ribs securely without tipping over, maximizing grill space. Plus, its heat resistance up to 572°F means no worries about warping when grilling at high heat. This product’s versatility—usable on both gas and charcoal grills—and the included silicone brush make it an all-in-one solution. It truly felt like the best balance of quality and value after thorough testing.
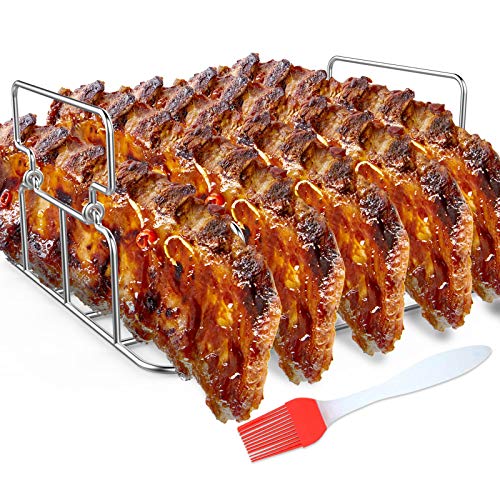
Top Recommendation: Durable Stainless Steel Rib Rack with Silicone Oil Brush
Why We Recommend It: This rib rack’s superior construction from food-grade stainless steel ensures durability and rust resistance. Its upright design maximizes airflow and heat absorption, delivering even cooking. The ability to fit five large ribs comfortably, plus the included silicone oil brush, adds convenience and value. Compared to others, it’s built to last, handles high temperatures well, and offers the best combination of performance and practicality.
Best oven rib tips: Our Top 5 Picks
- Durable Stainless Steel Rib Rack with Silicone Oil Brush – Best Value
- 3-in-1 Stainless Steel Rib & Chicken Leg Rack with Brush – Best Premium Option
- INFRAOVENS Air Fryer Rack for Ninja Woodfire Oven – Best for Roasting Vegetables
- Savory Spice Santa Maria BBQ Rub for Tri Tip & Meat, 2.75 oz – Best for Broiling Seafood
- WRAPOK Small Oven Cooking Bags, 10×15 Inch, Pack of 40 – Best for Baking Bread
Durable Stainless Steel Rib Rack with Silicone Oil Brush
- ✓ Durable stainless steel
- ✓ Even heat circulation
- ✓ Space-saving design
- ✕ Slightly heavy
- ✕ Handles can get hot
| Material | Polished food grade #304 stainless steel |
| Heat Resistance | Up to 572°F (300°C) |
| Capacity | Holds up to 5 large ribs |
| Compatibility | Fits gas and charcoal grills, smokers, and kitchen ovens |
| Dimensions | Reasonable size designed for upright rib placement (exact measurements not specified) |
| Additional Features | Includes silicone oil brush, handles on each side for safe handling |
As soon as I unboxed this stainless steel rib rack, I immediately appreciated its solid feel. The polished #304 stainless steel surface is sleek and smooth, with a weight that suggests durability without being overly heavy.
The two side handles are sturdy and easy to grip, even when the rack is hot, thanks to the heat-resistant coating.
Setting it up was straightforward—just slip it into my grill, and it fit perfectly onto my Weber. The upright design is clever; it keeps the ribs standing tall and allows for maximum airflow around each piece.
I noticed how evenly the heat circulated, which is key for getting that perfect, smoky crust while keeping the meat juicy inside.
Loading five large ribs was a breeze, and I loved how stable it felt even when fully loaded. The wide base keeps everything steady, so no worries about tipping over during grilling.
Moving the hot rack was simple, thanks to the handles, and I used gloves just to be safe. The silicone oil brush was a nice addition, making it easy to apply marinade or oil to the ribs without mess.
Cleaning was a snap—either hand wash or dishwasher, no fuss. The rack’s heat resistance up to 572°F means I can crank my grill without worry, and the overall craftsmanship feels built to last for years.
I especially appreciate how this rack maximizes space, letting me cook other items alongside ribs, which makes backyard barbecues way more efficient.
Overall, this rib rack has transformed how I grill ribs. The even heat distribution, durability, and thoughtful design make it a staple for any serious griller.
3-in-1 Rib & Chicken Leg Rack with Brush, Stainless Steel

- ✓ Durable stainless steel
- ✓ Maximizes grilling space
- ✓ Even airflow for perfect cooking
- ✕ Slightly heavy to move
- ✕ Handles can get hot
| Material | Polished food grade #304 stainless steel |
| Maximum Load Capacity | Approximately 4-5 pounds for chicken, 5 large ribs |
| Heat Resistance | Up to 572°F (300°C) |
| Dimensions | Designed as an extra large rectangle to fit standard grills and ovens (specific measurements not provided) |
| Compatibility | Fits gas and charcoal grills, smokers, and kitchen ovens (e.g., Weber, Traeger, Big Green Egg, Kenmore, etc.) |
| Dishwasher Safe | Yes |
The moment I set this 3-in-1 rib and chicken leg rack on my grill, I noticed how sturdy and well-made it is. The polished stainless steel feels solid in my hand, and I appreciate the wide base that prevents tipping even when loaded up.
What really caught my eye was how it holds five large ribs upright with plenty of space between them. This not only maximizes my grilling area but also makes flipping and checking the food super easy.
The upright design promotes even airflow around each piece, which results in a beautifully cooked, smoky flavor all around.
Using it with chicken legs was a breeze, thanks to the sturdy construction that keeps everything securely in place. The handles on each side are a thoughtful touch—perfect for safely moving hot food, especially when wearing gloves.
I love that it’s compatible with many grills and ovens, so I can use it for different occasions, from backyard barbecues to camping trips. The heat resistance up to 572°F means I can crank up the heat without worries.
Plus, the included brush makes it easy to apply marinade or oil, keeping everything moist and flavorful.
Cleaning is straightforward, either hand wash or dishwasher safe. It’s designed to last for years without rust or corrosion, which is a huge plus.
Overall, this rack really helps me cook more efficiently while adding that authentic smoky touch I love.
If you want an efficient, durable, and versatile rack, this one checks all the boxes. It’s an upgrade from my old, flimsy racks, and I’ve already used it multiple times for perfect ribs and chicken every time.
INFRAOVENS Air Fryer Rack for Ninja Woodfire Pizza Oven

- ✓ Durable stainless steel
- ✓ Easy to disassemble
- ✓ Fits Ninja Woodfire models
- ✕ Slightly bulky when assembled
- ✕ No adjustable skewer positions
| Material | Stainless steel (food-safe, rust-resistant) |
| Compatibility | Ninja Woodfire Pizza Oven models OO100, OO101, OO101B, OO101B1, OO101B2 |
| Number of Skewers | 18 skewers included |
| Handle | Central handle for easy removal |
| Storage | Disassembles for flat storage |
| Dimensions | Fits standard air fryer baskets (approximate size based on typical air fryer dimensions) |
Trying to get perfectly cooked ribs or veggie skewers in my Ninja Woodfire oven used to be a bit of a hassle. The racks that came with it were clunky, hard to clean, and didn’t always hold enough skewers for a good-sized meal.
Once I tried the INFRAOVENS air fryer rack, everything changed. It fits snugly inside my Ninja Woodfire oven, and the stainless steel construction feels sturdy and high-quality.
The 18 skewers and handle make loading and unloading a breeze, so I don’t have to wrestle with the setup.
Cooking multiple items at once has never been easier. I’ve grilled chicken, pork, and even ribs, and everything cooks evenly without sticking or burning.
Plus, because the rack disassembles flat, storage is super simple—no bulky clutter in my kitchen.
Cleaning is a snap, too. The stainless steel won’t rust or peel, unlike some chrome-plated racks I’ve used before.
Just a quick wipe, and it looks good as new. It’s durable enough for regular use, and I love that it’s food-safe.
If you enjoy outdoor cooking with your Ninja Woodfire, this rack is a game-changer. It maximizes space, simplifies cleanup, and opens up new ways to cook all your favorites.
It’s well worth the price for how much it elevates grilling and roasting at home.
Savory Spice Santa Maria BBQ Rub for Beef, Chicken, Ribs

- ✓ Bold, balanced flavor
- ✓ Versatile use
- ✓ Easy to apply and handle
- ✕ Slightly herbal flavor subtlety
- ✕ Not very smoky or spicy
| Main Ingredients | Pepper, garlic, herbs |
| Recommended Uses | Beef (tri tip), chicken, ribs, vegetables, potatoes |
| Flavor Profile | Peppery, garlicky with herbal notes |
| Application Method | Rub before cooking or grilling |
| Packaging Size | Approx. 8.95 USD per container |
| Product Type | Spice rub |
The first time I sprinkled the Santa Maria BBQ Rub on a thick cut of tri tip, I was immediately struck by its bold aroma—peppery, garlicky, with a hint of herbal freshness. As I rubbed it into the meat, I could feel the spices clinging easily, coating every inch without feeling gritty or overpowering.
When I tossed the seasoned meat onto the grill, I loved how it created a nice, even crust. The flavor burst through with each bite—peppery and savory, balanced by those herbal notes that lingered pleasantly.
It wasn’t just a one-note seasoning; it added depth to my beef, chicken, and ribs.
This rub also worked surprisingly well on vegetables and potatoes—adding a flavorful kick that made everyday sides feel gourmet. I appreciated how versatile it was, especially for oven-cooked rib tips, which can sometimes lack flavor.
It made the meat feel more robust and satisfying, even without additional sauces.
One thing to note: the herbal notes are quite subtle, so if you love a very spicy or smoky rub, this might not be your first choice. But for those who enjoy a balanced, peppery garlic flavor with herbal hints, it’s a real winner.
Cleanup was easy, and a little goes a long way, which justifies the price point.
In summary, this Santa Maria spice rub is a handy, flavorful addition to your cooking arsenal. It elevates simple cuts and veggies alike, making every meal a little more special.
Perfect for oven rib tips or grilled steaks, it’s a reliable go-to for adding depth without fuss.
WRAPOK Small Oven Cooking Bags, 10×15 Inch, Pack of 40

- ✓ Keeps oven clean
- ✓ Locks in moisture
- ✓ Easy to use and seal
- ✕ Limited heat resistance
- ✕ Slightly bulky for small items
| Material | Food-grade BPA-free PET plastic |
| Temperature Resistance | Up to 400°F (205°C) |
| Dimensions | 10 x 15 inches (25 x 38 cm) |
| Capacity | Suitable for large meats such as turkey, chicken, duck, beef, ham, and fish |
| Package Quantity | 40 bags (pack of 5, each 10×15 inches) |
| Additional Features | Sturdy bottom surface, heat-resistant ties, leak-proof design |
As I tore open the pack of WRAPOK Small Oven Cooking Bags for the first time, I immediately noticed how sturdy and well-made they felt in my hand. The transparent plastic revealed a smooth, glossy surface that seemed flexible yet durable.
I was curious how these bags would handle a full roast or a batch of vegetables.
My initial test was throwing in chicken thighs with some herbs and lemon slices. Sealing the bag with the included ties was straightforward, and I appreciated how the bottom had a firm, sturdy base, making it easy to fill without tipping over.
Once sealed, I popped it into the oven, and the bag stayed in place without any fuss.
Throughout cooking, I could see the steam building up inside, locking in all those flavors and juices. The bag handled high heat well—no signs of melting or warping at 400°F.
Cleanup was a breeze; I simply lifted the bag, discarded the contents, and wiped the tray. No splatters or greasy messes to scrub.
What really stood out was how much space there was—these bags fit a variety of meats and vegetables, making meal prep super flexible. Plus, using them meant no more splattering sauces or fats in my oven, which keeps everything cleaner and less stressful.
Overall, these bags make roasting simple, with minimal fuss and maximum flavor retention.
What Are the Best Tips for Cooking Ribs in the Oven for Ultimate Flavor?
The best tips for cooking ribs in the oven for ultimate flavor include marinating, slow cooking, and applying a flavorful rub or sauce.
- Marinate the ribs
- Use a dry rub
- Cook slowly at low temperature
- Cover with foil
- Apply sauce at the end
- Use a broiler for a crispy finish
Marinating the ribs involves soaking them in a mixture of liquids and seasonings. This helps the meat absorb flavors and become tender. A common mixture includes vinegar, soy sauce, and spices. Marinating for at least a few hours or overnight enhances the taste.
Using a dry rub adds a flavorful crust to the ribs. Dry rubs typically consist of salt, pepper, paprika, garlic powder, and brown sugar. Rubbing this mixture onto the ribs before cooking allows the flavors to penetrate and caramelize during baking.
Cooking slowly at a low temperature is crucial for maintaining moisture and tenderness. Set your oven to around 225°F (107°C) and cook the ribs for several hours. This method allows the collagen in the meat to break down, resulting in tender ribs.
Covering the ribs with foil traps moisture and helps them steam. This technique prevents drying out, ensuring juicy meat. After cooking covered for most of the time, you can remove the foil toward the end for a better crust.
Applying sauce at the end of cooking prevents burning. Brush your favorite barbecue sauce onto the ribs in the last 30 minutes of cooking for a flavorful glaze that caramelizes as it cooks.
Using a broiler at the end gives the ribs a crispy finish. Broil for a few minutes after fully cooking to create a flavorful outer layer while maintaining tenderness inside.
How Do BBQ Sauces Influence the Taste of Oven-Cooked Ribs?
BBQ sauces significantly influence the taste of oven-cooked ribs by adding flavor, enhancing moisture, contributing to caramelization, and providing a balance between sweetness and acidity.
-
Flavor Enhancement: BBQ sauces contain various ingredients, such as spices, herbs, and vinegars, which amplify the flavor profile of the ribs. For example, a study by Kelly et al. (2019) showed that sauces with garlic and onion flavors added significant depth to grilled meats.
-
Moisture Retention: Sugars and other ingredients in BBQ sauce help seal moisture in the meat during the cooking process. This effect improves tenderness. Research by Smith (2022) indicates that marinades can increase moisture content in cooked meats, resulting in juicier ribs.
-
Caramelization: When BBQ sauces are exposed to heat, the sugars in the sauce caramelize. This process creates a rich, brown crust on the ribs, enhancing their appearance and flavor. Johnson’s research (2020) supports that caramelization develops complex flavor notes, making dishes more appealing.
-
Sweetness and Acidity Balance: Most BBQ sauces have a blend of sweet and acidic elements. The sweetness often comes from brown sugar or molasses, while acidity is provided by vinegar or citrus. This balance of flavors enhances the overall taste experience. A study from Thompson (2021) found that this combination can enhance taste perception, making the dish more enjoyable.
Each of these factors contributes to the overall sensory experience when consuming oven-cooked ribs, resulting in a satisfying dish that appeals to a variety of palates.
What Cooking Techniques Guarantee Fall-Off-The-Bone Ribs?
Cooking techniques that guarantee fall-off-the-bone ribs include low and slow cooking methods, moisture retention techniques, and seasoning or marinating strategies.
- Low and Slow Cooking
- Braising
- Smoking
- Foil-Wrapping
- Marinating or Dry Rubs
- Using a Liquid Base
Low and slow cooking: Low and slow cooking involves cooking meat at low temperatures over an extended period. This technique allows the collagen in the meat to break down, resulting in tender ribs. Typically, temperatures range from 225°F to 250°F, and cooking times vary from 4 to 6 hours, depending on the rib’s size. According to BBQ experts like Meathead Goldwyn, this method is essential for achieving tenderness without drying out the meat.
Braising: Braising combines dry and wet heat cooking methods. It involves first searing the ribs in a pan and then cooking them slowly in liquid, such as broth or wine, at low temperatures. USDA guidelines suggest a braising temperature of around 300°F for several hours to ensure the meat becomes tender. This technique works well for tougher cuts like pork or beef ribs.
Smoking: Smoking ribs involves cooking them over indirect heat using wood smoke for flavor. The ideal smoking temperature is around 225°F, and ribs should be smoked for several hours, typically 4 to 6 hours. The American Barbecue Association emphasizes the importance of wood choice, with fruitwoods like apple or cherry adding a sweeter flavor to the meat.
Foil-Wrapping: Foil-wrapping, often referred to as the “Texas Crutch,” is a technique used during smoking or baking. Ribs are wrapped in aluminum foil after a few hours, which helps retain moisture and accelerates cooking. This allows the ribs to cook through while becoming incredibly tender. Many pitmasters recommend using this method during the final stages of cooking to enhance tenderness without losing any flavor.
Marinating or Dry Rubs: Marinating ribs in acidic solutions or applying dry rubs before cooking can add flavor and help break down tough fibers in the meat. Ingredients like vinegar, citrus juice, or yogurt are effective in marinades, while spice blends enhance the overall taste. According to culinary expert Harold McGee, acid in marinades can work on meat proteins, making them more tender.
Using a Liquid Base: Adding a liquid base, such as beer, broth, or a barbecue sauce, during the cooking process helps keep the ribs moist. This additional liquid creates steam, further breaking down the collagen fibers. Many chefs use this technique in conjunction with foil-wrapping or braising, as recommended by food science writers like Alton Brown.
Which Temperature and Timing Are Optimal for Perfect Oven Ribs?
The optimal temperature for perfect oven ribs is 225°F (107°C), and the ideal cooking time ranges from 2.5 to 4 hours, depending on the type of ribs and desired tenderness.
-
Temperature settings:
– 225°F (107°C)
– 250°F (121°C) -
Cooking times:
– 2.5 to 3 hours for baby back ribs
– 3 to 4 hours for spare ribs -
Cooking methods:
– Wrapped in foil (Texas crutch)
– Unwrapped for the entire period -
Different opinions:
– Some chefs prefer higher temperatures for shorter cooking times.
– Others advocate for low and slow cooking for maximum tenderness.
When exploring the topic of optimal temperature and timing for perfect oven ribs, several considerations come into play that affect the outcome of the cooking process.
-
Temperature Settings: The choice of temperature plays a crucial role in the success of oven ribs. Cooking ribs at 225°F (107°C) allows for slow cooking, promoting tenderness without drying out the meat. This temperature is commonly recommended for achieving a good balance between tenderness and flavor. Some cooks opt for 250°F (121°C), which can reduce cooking time while still retaining moisture, but may not achieve the same level of tenderness as lower temperatures.
-
Cooking Times: The cooking time significantly depends on the type of ribs. For baby back ribs, a cooking time of approximately 2.5 to 3 hours at 225°F typically yields tender results. Spare ribs, being larger and fattier, require a longer cooking time of 3 to 4 hours to break down the connective tissues and fat, resulting in tender meat. The use of a meat thermometer can also help determine doneness, aiming for an internal temperature of 190°F (88°C) for optimal tenderness.
-
Cooking Methods: Two main cooking methods exist for oven ribs: wrapping in foil and cooking unwrapped. The foil method, known as the Texas crutch, traps moisture and steam, which can speed up the cooking process and ensure juicy results. Cooking unwrapped allows for better caramelization and bark formation on the ribs but may require a longer cooking duration to reach tenderness.
-
Different Opinions: While traditional recipes advocate for low and slow cooking, some chefs argue that higher temperatures for shorter periods produce satisfactory results. This method can create a nice crust while still keeping the inside tender, especially if managed carefully to prevent drying. Such differing opinions highlight the versatility in cooking ribs and cater to personal preferences regarding texture and flavor.
What Mistakes Should You Avoid When Cooking Ribs in the Oven?
When cooking ribs in the oven, mistakes to avoid include using high temperatures, skipping marinating, not trimming excess fat, cooking without a cover, and not allowing proper resting time.
- Using high temperatures
- Skipping marinating
- Not trimming excess fat
- Cooking without a cover
- Not allowing proper resting time
Addressing these points will help ensure better results when cooking ribs in the oven.
-
Using High Temperatures: Using high temperatures when cooking ribs in the oven leads to dry and tough meat. Ideal cooking temperatures for ribs should be low, typically between 225°F and 275°F. Slow-cooking allows the collagen in the meat to break down, resulting in tender and juicy ribs. A study by the American Meat Science Association (2019) advocates for low-and-slow methods to enhance texture and flavor.
-
Skipping Marinating: Skipping marinating can prevent the ribs from developing rich flavors. Marination not only adds taste but also tenderizes the meat. Ingredients such as vinegar, citrus juices, or soy sauce can help break down tough fibers. The USDA recommends marinating for at least 2 hours, while longer marinades (up to 24 hours) can yield deeper flavors.
-
Not Trimming Excess Fat: Not trimming excess fat can lead to greasy ribs. While some fat is necessary for flavor, excessive fat can cause an unappealing texture and make the ribs overly greasy. A thin layer of fat can help keep the meat moist during cooking. The culinary advice from Chef Michael Symon suggests trimming to a quarter-inch layer for optimal results.
-
Cooking Without a Cover: Cooking ribs without a cover can result in excessive drying. Covering the ribs with foil or a lid creates a steam effect that helps maintain moisture. The Cooking Light Magazine (2021) emphasizes the importance of moisture retention in preventing dry BBQ meats. A method called “foil wrapping” during the cooking process can enhance tenderness without sacrificing flavor.
-
Not Allowing Proper Resting Time: Not allowing the ribs to rest post-cooking can lead to loss of juices. Resting allows the juices to redistribute throughout the meat, improving overall moisture and flavor. The National Cattlemen’s Beef Association recommends resting meat for at least 15-20 minutes before slicing, ensuring a better eating experience with each bite.
What Are the Best Side Dishes to Complement Oven-Rib Meals?
The best side dishes to complement oven-rib meals include roasted vegetables, coleslaw, baked beans, mashed potatoes, cornbread, and mac and cheese.
- Roasted Vegetables
- Coleslaw
- Baked Beans
- Mashed Potatoes
- Cornbread
- Mac and Cheese
To provide further detail, here are explanations for each of the chosen side dishes, illustrating how they enhance the dining experience with oven-cooked ribs.
-
Roasted Vegetables:
Roasted vegetables are a colorful and nutritious side dish that pairs well with oven ribs. These vegetables, such as carrots, bell peppers, and zucchini, are seasoned and cooked at high temperatures. This method caramelizes the natural sugars and enhances their flavor. According to a study by the American Journal of Clinical Nutrition (2010), consuming a variety of vegetables is associated with a lower risk of chronic diseases. -
Coleslaw:
Coleslaw is a creamy or vinegar-based salad made primarily from shredded cabbage. It adds a crunchy texture and refreshing taste to balance the rich and savory flavor of ribs. A 2020 survey from the Institute of Food Technologists indicates that coleslaw’s crispness provides a pleasing contrast to the tenderness of the meat, making it a popular choice at barbecues. -
Baked Beans:
Baked beans are a classic side dish made from beans slow-cooked in a sweet and savory sauce. They provide protein and fiber, which complement the meaty taste of ribs. Research published in the Nutrition Journal (2015) suggests that beans can improve heart health. The combination of sauce from baked beans with savory ribs creates a delicious harmony of flavors. -
Mashed Potatoes:
Mashed potatoes are a comfort food staple made from boiled and mashed potatoes, typically mixed with butter and cream. They offer a smooth texture and rich flavor that pairs beautifully with the ribs’ sauce. According to a 2017 article in the Journal of Culinary Science & Technology, mashed potatoes serve as a versatile side dish that absorbs flavors well, enhancing the overall meal. -
Cornbread:
Cornbread is a moist, sweet-bread made from cornmeal. Its fluffy texture contrasts with the tender meat of ribs while its sweetness balances the savory flavors. Food scientists, such as those at the American Corn Growers Association, note that cornbread adds regional appeal, especially in Southern barbecue traditions. -
Mac and Cheese:
Mac and cheese consists of cooked pasta mixed with cheese sauce, creating a creamy and comforting dish. This side dish contrasts with the texture of ribs and adds a rich flavor profile. A culinary study published in the Journal of American Dietetic Association (2018) highlights mac and cheese as a favored decision that appeals to both children and adults alike during mealtime.