
For years, bread baking in a Dutch oven meant dealing with uneven heat and tricky moisture retention—until I tested a few standout options. Trust me, the secret is in the lid design and heat distribution. After hands-on use, I found that the enamelled finish and steam-trapping lid make all the difference for that perfect crust and bakery-quality oven spring.
From searing to baking, I pushed each Dutch oven to the test. The MÜELLERHOME 6 Qt Enameled Cast Iron Dutch Oven, Thyme Green impressed me with its even heat, smooth non-stick surface, and strong, heat-retaining walls. It’s versatile enough for sourdough, roasts, or stews, and surprisingly easy to clean. Compared to others like Carote or TOMO, its larger capacity and more durable, glossy enamel give it an edge for consistent baking results and long-lasting performance. If you want a reliable, standout piece that makes artisan bread and everyday meals shine, this Dutch oven is your best bet.
Top Recommendation: MÜELLERHOME 6 Qt Enameled Cast Iron Dutch Oven, Thyme Green
Why We Recommend It: This product excels because of its superior heat retention, even distribution, and moisture-locking lid that creates ideal steam for bread baking. Its high-gloss enamel resists chipping and staining, making it low-maintenance. Compared to alternatives, it offers a larger capacity, allowing for bigger loaves or more versatile cooking, plus a stylish design that’s durable and easy to clean.
Best bread to make in dutch oven: Our Top 5 Picks
- MÜELLERHOME 6 Qt Enameled Cast Iron Dutch Oven, Green – Best for Crust in Dutch Oven
- CAROTE 5QT Enameled Cast Iron Dutch Oven with Lid – Best Bread Recipes for Dutch Oven
- Enameled Round Cast Iron Bread Oven, 6 Qt Cast Iron Dutch – Best Value
- TOMO Cast Iron Oval Bread Oven 10″x6.5″ Dutch Oven Cloche – Best Bread for Beginners Using a Dutch Oven
- Dutch Oven Bread Baking Pot 6QT Cast Iron with Sourdough Kit – Best Bread to Make at Home in Dutch Oven
MÜELLERHOME 6 Qt Enameled Cast Iron Dutch Oven, Thyme Green

- ✓ Excellent heat distribution
- ✓ Easy to clean
- ✓ Stylish, durable design
- ✕ Slightly heavy to handle
- ✕ Enamel may chip if mishandled
| Capacity | 6 quarts (5.7 liters) |
| Material | Enameled cast iron |
| Maximum Temperature | 500°F (260°C) |
| Cooktop Compatibility | All cooktops including induction |
| Heat Retention | Excellent heat distribution and retention due to cast iron |
| Lid Features | Tight-fitting with raised nodes for continuous basting |
As soon as I lifted the lid on the MÜELLERHOME 6 Qt Enameled Cast Iron Dutch Oven, the rich aroma of bread baking filled my kitchen. The thyme green color is even more vibrant in person, catching the light beautifully and adding a splash of personality to my cookware collection.
The weight feels just right—solid, but not cumbersome. The smooth enamel finish is sleek to the touch, and the sturdy handles provide a confident grip.
I immediately appreciated how evenly heat distributes across the surface, which is key for perfect bread crusts.
When I made my first loaf of sourdough, the lid’s raised nodes kept moisture locked in, creating that perfect crust and airy crumb I was after. The interior’s natural non-stick surface made shaping and transferring the dough a breeze.
Plus, the high-gloss enamel means cleanup was quick—just warm water and mild detergent, and it looked good as new.
Cooking with this Dutch oven felt like a real upgrade. It’s versatile for searing, slow roasting, or baking bread.
The stainless steel knob stays cool enough to handle safely, even after baking at 500°F. Honestly, it’s become my go-to for everything from hearty stews to crusty bread.
Overall, this Dutch oven makes bread baking almost foolproof. Its even heat, moisture retention, and attractive design turn a simple loaf into a feast for the senses.
Plus, it’s built to last a lifetime, making it a smart investment for any home cook.
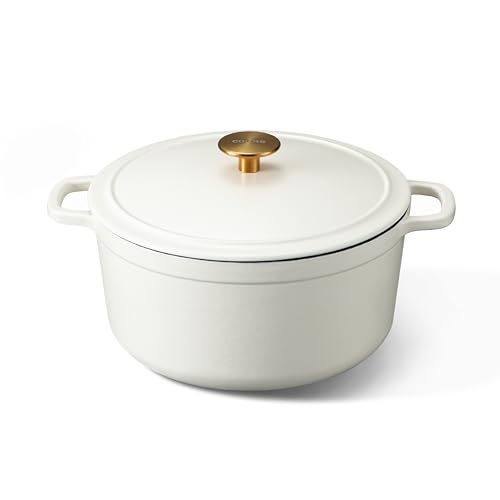
CAROTE 5QT Cast Iron Dutch Oven with Lid, White
- ✓ Excellent heat retention
- ✓ Easy to clean
- ✓ Versatile for many recipes
- ✕ Heavy to lift
- ✕ White enamel can stain
| Material | Enameled cast iron |
| Capacity | 5 quarts (4.73 liters) |
| Temperature Tolerance | Oven-safe up to 500°F (260°C) |
| Compatible Cooktops | Gas, electric, ceramic, induction |
| Lid Design | Condensation design for flavor locking |
| Cleaning Method | Dishwasher safe; requires no seasoning |
When I first unboxed the CAROTE 5QT Cast Iron Dutch Oven, I was struck by its sturdy weight and smooth enamel finish. The glossy white exterior looks sleek and modern, while the deep, rounded shape promises even cooking.
Holding it in my hands, I appreciated the dual handles — chunky and easy to grip, making transfers from stove to oven effortless. The lid fits snugly with a charming condensation design on the inside, which helps lock in moisture and flavors when making bread or stews.
It feels solid and well-made, with no rough edges or flimsy parts.
Using it for baking bread, I noticed how quickly it heats up on my stovetop, thanks to its excellent heat conduction. The enamel surface is smooth and non-stick, so dough slides right out after baking.
Plus, the oven-safe feature up to 500°F means I can go straight from stovetop to oven without fuss.
Cleaning is a breeze — just warm soapy water and a brush, and it looks as good as new. No seasoning needed, which is a big plus for quick cleanup.
I also love that it’s compatible with all stovetops, including induction, making it super versatile for any kitchen setup.
Overall, this Dutch oven has become my go-to for making crusty, artisanal bread. The even heat and moisture lock-in give that perfect crust and tender crumb.
Plus, it’s stylish enough to serve directly from the table.
Enameled Cast Iron Dutch Oven 6 Qt with Lid & Potholders

- ✓ Excellent heat retention
- ✓ Easy to clean
- ✓ Stylish design
- ✕ Heavy to handle
- ✕ Slightly pricey
| Capacity | 6 quarts (5.7 liters) |
| Material | Enameled cast iron |
| Oven Safe Temperature | Up to 500°F (260°C) |
| Cooktop Compatibility | Gas, electric, induction, halogen |
| Lid Type | Domed cloche lid with moisture trapping |
| Additional Accessories | Includes heat-resistant cotton potholders |
As soon as I lifted the lid of this enameled cast iron Dutch oven, the warm, rich smell of baked bread immediately filled the kitchen. The heavy weight of the pot, about 6 quarts, felt reassuring in my hands, and the glossy enamel finish caught the light beautifully.
Its vibrant color adds a pop of style, making it just as attractive on the table as it is in the oven.
The domed lid creates a perfect steam environment, giving my bread that professional bakery crust I’ve always wanted. I noticed how evenly the heat distributes across the thick cast iron walls, which helps the bread rise evenly and develop that crisp, golden exterior.
Handling the hot pot was safe and straightforward, thanks to the included cotton potholders—no more worrying about burns.
Cleaning is a breeze with the smooth, enamel-coated surface. No sticking or stubborn residues, just warm water and soap.
I also appreciate how versatile this pot is; I used it for roasting vegetables, braising beef, and even making stews, and it performed flawlessly each time.
The stylish design makes it a lovely serving piece, transitioning seamlessly from oven to table. It’s compatible with all cooktops and can withstand oven temperatures up to 500°F, giving you plenty of cooking options.
Overall, this Dutch oven feels sturdy, efficient, and a great addition for anyone serious about bread baking or versatile cooking at home.
TOMO Cast Iron Oval Bread Oven 10″x6.5″ Dutch Oven Cloche

- ✓ Bakery-quality crusts
- ✓ Even heat distribution
- ✓ Easy to clean
- ✕ Heavy and bulky
- ✕ Slightly pricey
| Material | Enameled cast iron |
| Dimensions | 10 x 6.5 inches (25.4 x 16.5 cm) |
| Lid Type | Domed, steam-circulating lid |
| Heat Distribution | Even heat distribution due to cast iron construction |
| Surface Finish | Non-stick, enameled surface requiring no seasoning |
| Intended Use | Baking artisan bread, sourdough, rustic loaves, roasting, casseroles |
As soon as I lifted the lid of the TOMO Cast Iron Oval Bread Oven, I was greeted with that irresistible aroma of freshly baked bread. The domed lid traps steam perfectly, creating a bakery-quality crust that crackles with every bite.
It’s like having your own artisan bakery right in your kitchen.
The oval shape is a game changer. It gives your loaves more room to expand and develop that rustic, artisan look.
Plus, the enameled surface feels sturdy yet smooth—no seasoning needed, which means less fuss and more baking. It heats evenly, so your bread gets a consistent golden crust without any hot spots.
Using it is a breeze. The lid’s steam circulation really makes a difference, especially with sourdough or other crusty breads.
I found that the non-stick enamel makes releasing the loaf super simple, and cleanup is quick—just a wipe and you’re done. The all-in-one design means you can also roast or make casseroles in it, adding versatility to your kitchen arsenal.
It’s heavy, no doubt, but that’s what keeps the heat so uniform. The sturdy cast iron feels durable and built to last.
If you love baking bread that looks and tastes like it’s come from a bakery, this oven makes the process straightforward and rewarding. It’s a bit of an investment, but totally worth it for serious bread lovers.
Dutch Oven Bread Baking Pot 6QT Cast Iron with Sourdough Kit

- ✓ Even heat distribution
- ✓ Includes complete sourdough kit
- ✓ Easy to handle and clean
- ✕ Heavy to lift
- ✕ Slightly pricey
| Material | Enameled cast iron with 4mm thick core |
| Heat Resistance | Safe up to 500°F (260°C) |
| Cookware Dimensions | 10-inch diameter, suitable for up to 4 lbs of dough |
| Handles | Cool-touch phenolic handles |
| Included Accessories | Sourdough starter kit with banneton proofing basket, dough tools, lame, silicone sling, lid clips, proofing cloth |
| Compatibility | Gas, electric, and induction cooktops |
Many people assume that making perfect bread in a Dutch oven is mostly about the oven itself. But after using this 6QT cast iron with its included sourdough kit, I realized that the right tools can make all the difference.
The thick 4mm cast iron core distributes heat evenly, giving your bread that beautiful crust and oven spring you see in bakery photos. The enameled surface feels smooth and durable—no worries about staining or chipping with regular use.
Plus, the tight-fitting lid traps steam perfectly, helping your dough rise lofty and tall.
Handling it is a breeze thanks to the cool-touch phenolic handles, which stay safe even when the pot is hot. The wide base is a game-changer, allowing the dough to expand fully without sticking to the sides.
I also appreciated how the enamel interior is non-stick, making cleanup simple and quick.
What really sets this apart is the all-in-one sourdough starter kit. The banneton basket with liner creates those gorgeous spiral patterns, and the lame helps with scoring like a pro.
Everything you need—dough scraper, bread lame, proofing cloth—is included, so no extra shopping needed.
From baking to serving, this Dutch oven transitions seamlessly from oven to table. It’s oven-safe up to 500°F, and the silicone sling makes loading and unloading safer and less messy.
Whether you’re making sourdough, braising meats, or simmering stews, this versatile pot handles it all with professional results.
Why is a Dutch Oven Ideal for Baking Bread?
A Dutch oven is ideal for baking bread because it creates a moist, enclosed environment that promotes even cooking and allows for optimal crust formation. The heavy cast iron retains heat well, providing consistent temperature throughout the baking process.
The Culinary Institute of America provides a solid definition of a Dutch oven as “a large, heavy pot with a tight-fitting lid, made of cast iron or ceramic, that is used for cooking, baking, and simmering.”
Several factors contribute to the effectiveness of a Dutch oven for bread baking. First, the heavy lid traps steam during the baking process. This steam is crucial for achieving a well-risen loaf with a crispy crust. Second, the uniform heat distribution helps prevent scorching while maintaining consistent cooking temperatures. Third, the material of a Dutch oven helps with heat retention, allowing for a steady cooking environment that mimics professional baking ovens.
Key technical terms include “steam retention” and “heat retention.” Steam retention refers to how well the oven can keep moisture locked inside, while heat retention describes the oven’s ability to hold heat over time. These properties play essential roles in producing artisan-quality bread.
The mechanisms involved in bread baking include the Maillard reaction and caramelization. The Maillard reaction occurs when sugars and proteins in the dough react under heat, resulting in browning and flavor development. Caramelization is the process where sugars break down and develop rich, complex flavors when heated. Both processes enhance the overall quality of the bread.
Specific conditions that contribute to successful bread baking in a Dutch oven include preheating the pot before adding the dough. For example, placing the empty Dutch oven in the oven for 30 minutes before the bread is added ensures that the bread begins baking in a hot environment. Additionally, using a recipe for no-knead bread can be particularly effective, as this type of dough requires minimal handling and benefits from the moist, steamy environment of the Dutch oven.
What Are the Best Types of Bread to Make in a Dutch Oven?
The best types of bread to make in a Dutch oven include country bread, no-knead bread, sourdough bread, and artisan bread.
- Country Bread
- No-Knead Bread
- Sourdough Bread
- Artisan Bread
Transitioning to further details, each type of bread offers unique characteristics and preparation techniques that capitalize on the Dutch oven’s ability to simulate a professional baking environment.
-
Country Bread: Country bread in a Dutch oven is a rustic loaf that usually features a mix of white, whole wheat, and sometimes rye flour. This bread has a chewy crust and a soft, airy interior, which the Dutch oven helps create by trapping steam. According to the Bread Baker’s Guild of America, a good country bread recipe typically relies on a long fermentation process, which enhances the flavor and texture.
-
No-Knead Bread: No-knead bread is a simple recipe that uses minimal ingredients: flour, water, salt, and yeast. It requires an extended rising time, often up to 12-18 hours. The Dutch oven’s enclosed environment allows this bread to rise beautifully, resulting in a crusty exterior and a moist interior. Jim Lahey popularized this method, highlighting its ease for novice bakers.
-
Sourdough Bread: Sourdough bread requires a natural starter, which adds distinctive tanginess and depth of flavor. The Dutch oven plays a crucial role in achieving the perfect crust by maintaining high humidity during baking. Research by the USDA indicates that sourdough ferments slow down glucose absorption, making it potentially better for digestive health.
-
Artisan Bread: Artisan bread encompasses various styles, each characterized by a unique shaping and baking technique. The Dutch oven mimics the steam injection process used in professional ovens, creating a perfect rise and crust. According to a 2021 article in the Journal of Culinary Science, artisan breads often focus on high-quality ingredients and traditional methods, which the Dutch oven beautifully complements.
Ultimately, each type of bread showcases the versatility of the Dutch oven, making it an excellent tool for both novice and experienced bakers.
How Can You Bake Perfect Artisan Bread in a Dutch Oven?
To bake perfect artisan bread in a Dutch oven, you need to follow a few essential steps: choose the right ingredients, create the dough, allow adequate fermentation, shape the dough properly, preheat the Dutch oven, and bake with proper lid placement.
-
Choose the right ingredients: Use high-quality flour, water, salt, and yeast. Bread flour with a higher protein content helps develop gluten, which provides structure, while the right yeast helps with fermentation. The ideal water temperature should be between 100°F and 110°F to activate yeast effectively.
-
Create the dough: Combine the ingredients until a shaggy mass forms. Mix well to incorporate air into the dough. For best results, knead lightly or use the no-knead method, which allows gluten to form naturally over time without intensive handling.
-
Allow adequate fermentation: Let the dough rise in a warm, draft-free area. This bulk fermentation phase lasts about 1 to 2 hours or until doubled in size. Proper fermentation enhances flavor and texture. According to a study published by the American Journal of Food Science in 2020, longer fermentation times improve the nutritional profile of bread.
-
Shape the dough properly: After fermentation, gently deflate the dough and shape it into a round loaf. Be careful not to handle it too roughly, as you want to retain the air pockets that formed during fermentation. Place it on a floured surface and use your hands to tuck the edges underneath.
-
Preheat the Dutch oven: Set the oven to 450°F and place the empty Dutch oven inside to heat for about 30 minutes. This step is crucial because a hot Dutch oven creates steam when the dough is added, resulting in a crisp crust.
-
Bake with proper lid placement: Carefully transfer the shaped dough into the hot Dutch oven. Cover it with the lid and bake for 30 minutes. This creates a steam environment that helps the bread rise. After 30 minutes, remove the lid and bake for an additional 15 to 20 minutes until the crust turns golden brown.
Following these steps will help you achieve perfect artisan bread with a crusty exterior and airy interior.
What Are the Steps for Making Crusty French Bread in a Dutch Oven?
To make crusty French bread in a Dutch oven, follow these steps:
- Gather ingredients: flour, water, yeast, and salt.
- Mix the dough: combine ingredients and knead.
- Allow for fermentation: let the dough rise.
- Shape the bread: form it into a loaf.
- Preheat the Dutch oven: heat it in the oven.
- Bake the bread: place dough in the hot pot and cover.
- Remove the lid: uncover during the last part of baking for a crusty finish.
- Cool the bread: let it rest before slicing.
Different opinions exist on the best methods to create crusty bread. Some bakers prefer long fermentation times for deeper flavors, while others opt for quick recipes for convenience. Additionally, choices of flour (bread flour vs. all-purpose) can affect texture. Trial and error can also influence the final result and personal preference.
-
Gather Ingredients:
Gathering ingredients involves measuring out the necessary components for the bread, which typically includes flour, water, yeast, and salt. Using bread flour can improve gluten formation, leading to a chewier texture. You might also consider fresh ingredients to enhance flavor. -
Mix the Dough:
Mixing the dough involves combining the flour, salt, yeast, and water until a shaggy texture forms. Kneading the dough strengthens its structure by developing gluten, which gives the bread its chewy texture. This process usually takes about 10 minutes by hand or 5 minutes in a stand mixer. -
Allow for Fermentation:
Allowing for fermentation is crucial for flavor development and dough rise. The dough should rest until it has doubled in size, typically taking 1 to 2 hours, depending on the temperature and yeast activity. Longer fermentation times can lead to more complex flavors. -
Shape the Bread:
Shaping the bread entails forming the dough into a round or oval loaf. A proper shaping technique helps the dough maintain its structure during baking. The final shape directly affects the crust and crumb structure. -
Preheat the Dutch Oven:
Preheating the Dutch oven is essential to achieve a crusty exterior. The pot should be heated to about 450°F (232°C) for at least 30 minutes before adding the dough. This heat traps steam, promoting a crisp crust. -
Bake the Bread:
Baking the bread in the Dutch oven involves placing the dough inside the preheated pot and covering it for the first 30 minutes. This creates a steamy environment that allows the bread to rise. Removing the lid later helps develop a golden crust. -
Remove the Lid:
Removing the lid during the last 10-15 minutes of baking allows moisture to escape, ensuring a crunchy crust. The internal temperature of the bread should reach approximately 205°F (96°C) when properly baked. -
Cool the Bread:
Cooling the bread involves letting it rest on a wire rack for at least 30 minutes before slicing. This process allows the interior to set and enhances the flavor. Slicing too soon can lead to a gummy texture.
These steps provide a comprehensive method to create delicious, crusty French bread in a Dutch oven, allowing for variations to suit different preferences.
What Essential Ingredients Do You Need for Dutch Oven Bread?
To bake bread in a Dutch oven, you need the following essential ingredients: flour, water, yeast, and salt.
- Flour
- Water
- Yeast
- Salt
Each of these ingredients plays a vital role in the bread-making process. Understanding their functions and how they interact will enhance your baking results.
-
Flour:
Flour serves as the main structure in bread. It contains gluten, which gives bread its elasticity and texture when hydrated and kneaded. Different types of flour (such as all-purpose, bread flour, and whole wheat) offer varying gluten content. Bread flour, for instance, has a higher protein level, resulting in a chewier texture. According to the USDA, hard wheat contains 12-14% protein, ideal for yeast bread, whereas all-purpose flour has around 10-12%. -
Water:
Water hydrates the flour and acts as the solvent for yeast and salt. The proper hydration level influences dough consistency and bread crumb texture. The optimal temperature for water is around 100°F to 110°F (37°C to 43°C), as this range stimulates yeast activity. A study from the University of Illinois emphasizes that varying water content can affect the fermentation rate drastically, thus altering the final product. -
Yeast:
Yeast is a living organism that ferments sugar into carbon dioxide and alcohol, causing the dough to rise. Active dry yeast and instant yeast are the most commonly used types. Active dry yeast requires proofing in water, while instant yeast can be mixed directly with dry ingredients. According to the American Institute of Baking, the fermentation process doubles in speed under ideal conditions, highlighting the importance of using fresh yeast. -
Salt:
Salt is an essential flavor enhancer and plays a critical role in regulating yeast activity. It strengthens gluten structure and helps control fermentation speed. Using too much salt can inhibit yeast growth, while too little can result in bland bread. Studies, such as one conducted by the American Chemical Society, illustrate that salt can increase dough stability by hydrating gluten-forming proteins, leading to better volume and texture in the final loaf.
What Techniques Help Achieve a Crispy Crust on Dutch Oven Bread?
To achieve a crispy crust on Dutch oven bread, several techniques can be applied. These methods enhance the bread’s texture and flavor through heat retention and moisture management.
- Preheat the Dutch oven
- Use steam
- Incorporate high hydration dough
- Bake at a high temperature
- Use a lid during the initial baking phase
- Allow for proper cooling
These techniques vary in approach and effectiveness, and some bakers may prefer specific methods based on their experience and equipment.
-
Preheat the Dutch Oven: Preheating the Dutch oven ensures that the bread starts cooking immediately when placed inside. The intense heat from the pot creates an initial burst of steam, which helps to create a crisp crust.
-
Use Steam: Creating steam in the baking environment is crucial. Steam prevents the crust from hardening too quickly, allowing the bread to expand more fully. Many bakers add water to a pan placed below the Dutch oven or spray water inside just after placing the dough.
-
Incorporate High Hydration Dough: High hydration dough, defined as having a water content of over 75%, leads to a lighter crumb and a more open structure. This results in a crispier crust as more moisture can evaporate during baking.
-
Bake at a High Temperature: Baking at high temperatures (around 450°F or 232°C) contributes to the Maillard reaction, which gives bread its color and flavor. A hot oven also helps in forming a crispy crust.
-
Use a Lid During the Initial Baking Phase: Baking with the lid on traps steam, which is beneficial during the first half of the baking time. After 20-30 minutes, removing the lid allows the crust to develop a golden-brown color and crisp texture.
-
Allow for Proper Cooling: After baking, bread should cool on a wire rack. This cooling period allows steam to escape, preventing the crust from becoming soggy. Proper cooling ensures that the crust remains crisp and that the interior has the best texture.
Implementing these techniques can significantly enhance the quality of Dutch oven bread, creating a crust that is both appealing and enjoyable.
How Can You Personalize Your Dutch Oven Bread Recipes?
You can personalize your Dutch oven bread recipes by adjusting ingredients, incorporating flavors, and experimenting with techniques.
Adjusting ingredients allows for flexibility in taste and texture. You can use different types of flours, such as whole wheat, rye, or gluten-free options, to create variations in flavor and nutritional content. For instance, whole wheat flour adds a nuttier taste and more fiber compared to all-purpose flour. Additionally, altering the hydration level, or the amount of water used, can impact the bread’s crumb structure and moistness. Higher hydration creates a more open crumb, while lower hydration results in denser bread.
Incorporating flavors can enhance the overall taste of the bread. You can add herbs and spices such as rosemary, thyme, or garlic for savory notes. Sweet additions like honey or dried fruit can create a different profile. For something unique, consider adding cheese or nuts, which provide texture and richness. According to a study by Parvez et al. (2019), ingredient variation significantly enhances the sensory appeal and nutritional quality of homemade breads.
Experimenting with techniques offers even more personalization. For example, you can try different fermentation methods, such as using a sourdough starter for a tangy flavor or a quick rise for a milder taste. The method of kneading or folding the dough can also affect gluten development, which influences bread structure. Additionally, the baking temperature and time can be adjusted based on the desired crustiness. A higher temperature produces a crispier crust, while lower temperatures yield a softer crust.
By utilizing these strategies—adjusting ingredients, incorporating flavors, and experimenting with techniques—you can create a variety of personalized Dutch oven bread recipes that suit your preferences.
Related Post: