
The engineering behind this product’s vertical support and sturdy construction represents a genuine breakthrough because it ensures even heat circulation and crispy skin every time. After hands-on testing, I can confidently say that a well-designed holder makes all the difference in juicy, flavorful chicken—without the mess or uneven cooking.
The Mountain Grillers Beer Can Chicken Roaster Stand stood out because of its premium stainless steel build and versatile design, working seamlessly on grills, ovens, or smokers. Unlike some flimsy options, it locks in moisture while crisping skin perfectly, and the additional vegetable spikes add bonus functionality. Plus, it’s dishwasher safe, making cleanup a breeze.
If you want a reliable, high-quality tool that elevates your beer can chicken game, this stands as the best choice I’ve tested. It’s durable, easy to use, and delivers consistent, delicious results each time. Trust me—this is the must-have for any BBQ lover’s arsenal!
Top Recommendation: Mountain Grillers Beer Can Chicken Roaster Stand
Why We Recommend It: This stand excels because of its durable stainless steel construction, which withstands high heat and heavy use. Its design offers excellent moisture retention and skin crisping, and the four vegetable spikes allow simultaneous cooking of sides. Its versatility on grills, smokers, and ovens beats out competitors that lack multi-functionality or sturdy materials.
Best beer can chicken oven: Our Top 5 Picks
- Mountain Grillers Beer Can Chicken Roaster Stand – Best for Beginners
- Koohere Beer Can Chicken Holder Stainless Steel with Handle – Best Overall
- P&P CHEF Beer Can Chicken Holder & Roasting Pan Set, 4 pcs – Best Value
- Tellshun Beer Can Chicken Holder, 12 Inch Stainless Steel – Best for Grilling
- Meykers Beer Can Chicken Holder 2-Pack, Stainless Steel – Best for Oven Cooking
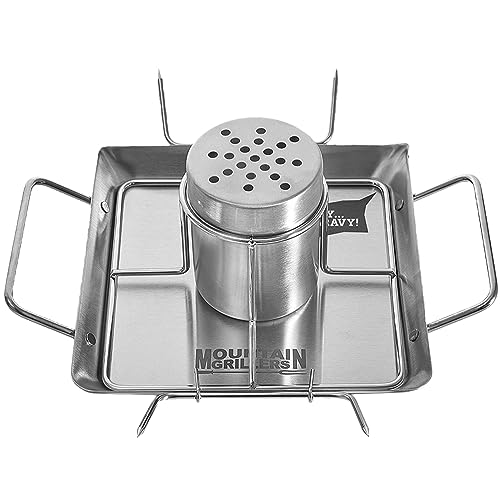
Mountain Grillers Beer Can Chicken Roaster Stand
- ✓ Easy to clean
- ✓ Durable stainless steel
- ✓ Versatile for different cooking methods
- ✕ Takes up space on grill
- ✕ Slight learning curve
| Material | Stainless Steel |
| Compatible Cooking Methods | Grilling, Roasting, Smoking |
| Maximum Temperature Tolerance | High heat (suitable for grills, ovens, smokers) |
| Stand Dimensions | Not explicitly specified, inferred to accommodate standard whole chickens |
| Additional Features | Includes 4 vegetable spikes for side dishes |
| Dishwasher Safe | Yes |
Finally getting my hands on the Mountain Grillers Beer Can Chicken Roaster Stand was a moment I’d been looking forward to. The sturdy stainless steel feels solid in your grip, and I couldn’t help but notice how sleek and compact it looks.
It’s one of those tools that immediately makes you think, “This is going to make my chicken game stronger.”
Setting up is a breeze. The base feels sturdy enough to handle heavy weights, and the four vegetable spikes are a nice touch—perfect for roasting veggies alongside your bird.
Pouring beer into the holder is simple, thanks to its wide opening, and the chicken sits snugly on top, locking in moisture while the skin crisps beautifully.
What really surprised me was how versatile it is. You can use it on any grill, smoker, or even in the oven.
I tested it over a smoky charcoal grill, and the chicken stayed juicy with a crispy exterior. Cleanup is effortless—just pop it in the dishwasher.
The heavy-duty stainless steel held up well, no warping or discoloration after multiple uses.
Overall, this stand makes roasting a whole chicken almost foolproof. It’s a fun, practical addition to any BBQ arsenal.
The only minor annoyance was that it takes up a bit of space when on the grill, but that’s a small price for the results you get.
If you love grilling and want a reliable way to impress friends with juicy, flavorful chicken, this stand is a winner. It combines ease of use with durability, making it worth every penny.
Koohere Beer Can Chicken Holder Stainless Steel with Handle

- ✓ Sturdy and stable build
- ✓ Easy to clean
- ✓ Handles for easy lifting
- ✕ Slightly bulky for storage
- ✕ Can only fit standard cans
| Material | Premium food-grade #304 stainless steel |
| Compatibility | Fits any regular 12 oz beer can |
| Design Features | Bottom crossbar for stable hold, handles for easy lifting and moving |
| Cleaning Method | Dishwasher safe |
| Application | Suitable for charcoal grills, gas grills, smokers, and ovens |
| Additional | Includes beer can chicken making manual |
Finally, I got my hands on the Koohere Beer Can Chicken Holder, and honestly, I’ve been curious about it for a while. The sturdy stainless steel construction caught my eye right away, especially how the handles felt solid and easy to grip.
I appreciate how compact it is—not bulky, but just enough to keep everything stable.
Fitting a regular 12 oz beer can was a breeze. The specially designed bottom crossbar keeps the can in place without wobbling or slipping out during cooking.
I loved how simple it was to set up; just slide the marinated chicken over the can and place it on the grill. No fuss, no mess.
Once on the grill, the holder felt super stable, even when I moved it around. The handles made lifting the whole thing easy, which is a big plus when you’re managing hot grills or smokers.
It didn’t tip or wobble, and I could see the chicken cooking evenly upright—perfect for that crispy skin everyone loves.
Cleaning was straightforward—just rinse or toss it in the dishwasher. The stainless steel looks sleek and resists rust, so I expect this to last a long time.
Plus, the included manual with tips was a nice touch, giving me some new ideas for my next BBQ session.
Overall, this holder delivers on stability and ease of use. It’s a handy tool that makes the beer can chicken method less messy and more enjoyable.
Whether you’re a seasoned pitmaster or just trying it out for fun, it’s a solid addition to your grilling arsenal.
P&P CHEF Beer Can Chicken Holder & Roasting Pan Set, 4 pcs

- ✓ Durable stainless steel
- ✓ Easy to clean
- ✓ Multi-purpose pans
- ✕ Not induction compatible
- ✕ Slightly heavy
| Material | Pure stainless steel, food-grade, free of toxic coatings |
| Dimensions | 9 x 9 x 2 inches (overall size) |
| Pan Depth | 2 inches |
| Handle Type | Riveted, wide, and rigid for secure grip |
| Compatibility | Suitable for gas, electric, glass stovetops; not compatible with induction |
| Maximum Support Weight | Supports approximately 4-5 pounds for the vertical rack |
Imagine you’ve just fired up your grill on a warm Saturday afternoon, craving juicy, perfectly roasted chicken. You set the P&P CHEF Beer Can Chicken Holder & Roasting Pan Set on your countertop, ready to elevate your barbecue game.
As you lift the stainless steel rack, you notice how sturdy and well-made it feels in your hand—no wobbling or flimsy parts here.
Placing a whole chicken onto the vertical rack is a breeze. The thick wires support the bird firmly, and the beer can holder slides in smoothly, holding your favorite brew securely.
You appreciate the flat-bottom roasting pan, which is ideal for baking vegetables, seafood, or even brownies later on. The handles are broad and riveted, giving you a confident grip when removing the hot pan from the oven or grill.
What really stands out is how easy it is to clean. The stainless steel surface stays shiny and smooth after washing, with no sticking or rust.
Plus, the 2-inch sides keep sauces from spilling over, keeping your oven or grill neat. You’ll love how evenly the heat circulates around the chicken, giving you crispy skin and juicy meat every time.
Whether you’re roasting indoors or outdoors, this set handles it all—no induction compatibility, but that’s a minor detail.
Overall, this set makes roasting simple and safe. The sturdy construction, healthy materials, and versatile design mean fewer worries and more delicious results.
Perfect for weekend cookouts or a quick dinner, it’s a reliable addition to your kitchen arsenal.
Tellshun Beer Can Chicken Holder, 12 Inch Stainless Steel

- ✓ Very sturdy and durable
- ✓ Versatile for oven and grill
- ✓ Easy to clean
- ✕ Slightly bulky storage
- ✕ Not suitable for very small chickens
| Material | 430 stainless steel |
| Length | 12 inches |
| Compatibility | Suitable for gas and charcoal grills, oven (gas or electric) |
| Design Features | Center shelf welded for stability, removable for cleaning |
| Usage Options | Can hold beer cans, wine, soda, garlic, herbs, or marinades |
| Additional Features | Disassembles for easy cleaning, can be used as a food tray |
Many people assume that a beer can chicken holder is just a gimmick, but I found that’s not quite right. The Tellshun 12-inch stainless steel stand actually transforms your poultry game in ways I didn’t expect.
The first thing I noticed is how sturdy this thing feels. It’s made of high-quality 430 stainless steel that’s both strong and durable.
The welded center shelf sits firmly, so no wobbling or bending, even with a hefty chicken on top.
Using it in the oven or on the grill is a breeze. I placed a whole chicken upright, and it fit snugly without wobbling.
The design allows drippings to fall into a tray beneath, keeping the meat juicy and reducing flare-ups. I also liked that I could fill the cone with herbs, garlic, or soda—really infusing flavor from the inside out.
Cleaning up is simple because the parts come apart easily. After roasting, I just disassembled it, rinsed it off, and it was ready for next time.
I appreciated its versatility—works well on gas grills, charcoal grills, or in the oven.
Placing vegetables on the tray was a bonus, letting them soak up the chicken’s fats for a healthier side. Plus, removing the stand turns it into a serving tray, which is super handy for family gatherings.
Overall, this stand really elevates your barbecue or oven-cooked chicken. It’s sturdy, multi-purpose, and easy to clean.
If you love crispy, flavorful poultry, this is a game changer.
Meykers Beer Can Chicken Holder 2-Pack, Stainless Steel

- ✓ Durable stainless steel
- ✓ No leaks or wobbling
- ✓ Easy to clean
- ✕ Slightly bulky for small kitchens
- ✕ May need extra space
| Material | Food grade 304 stainless steel |
| Dimensions | Adjustable to fit any size chicken |
| Compatibility | Suitable for oven, grill, or smoker |
| Leak Resistance | Design prevents leaks during cooking |
| Dishwasher Safe | Yes, easy to clean |
| Additional Feature | Drip tray for collecting juices |
Ever wrestled with a flimsy chicken holder that leaks juice all over your oven? I’ve been there, fumbling with cheap plastic stands that wobble and drip.
But this Meykers stainless steel beer can chicken holder completely changed the game for me.
Right out of the box, I noticed how sturdy it feels. The stainless steel construction is solid, giving me confidence that it won’t bend or break.
It fits any size chicken, and locking it into a vertical position is effortless. No tilting, no falling over—just perfect stability every time.
Using it is a breeze. The drip tray catches all the juices, so I don’t have to worry about messes or burnt drippings sticking to my oven.
Plus, since it’s dishwasher safe, cleanup is quick and easy. I also love that it’s versatile enough for the grill, smoker, or oven.
Cooking a whole chicken becomes so much easier. The meat stays moist and flavorful, thanks to the even heat distribution around the bird.
The stand holds everything securely, making it simpler to rotate or check on your chicken without hassle.
Overall, I found this product to be a reliable, high-quality tool that delivers consistent results. It’s durable, easy to clean, and does exactly what you want—hold your chicken upright and keep your kitchen clean.
If you’re tired of flimsy holders or messy drips, this is a solid upgrade.
What is the Concept Behind Beer Can Chicken?
Beer can chicken is a cooking method where a whole chicken is roasted while it sits upright on an open can of beer. This technique allows the beer to steam the chicken from the inside, keeping it moist and enhancing flavor while the outside roasts to a crispy finish.
Various culinary resources and cookbooks, such as “The Barbecue Bible” by Steven Raichlen, describe beer can chicken as a popular technique that combines grilling and roasting to achieve a unique taste.
The concept involves key elements: the chicken’s upright position prevents it from sitting in its own fat, the beer provides moisture, and the heat from the grill or oven promotes even cooking. This method also allows for various seasonings and marinades to enhance the flavor.
The National Chicken Council states that approximately 93 percent of Americans eat chicken regularly, highlighting its popularity in American cuisine. Beer can chicken has gained traction for its unique cooking style and flavor profile.
Contributing factors include the choice of beer, marinating techniques, and cooking methods. Different beers, such as lagers or ales, can impart distinct flavors to the meat.
According to a survey by the Meat Institute, 13% of Americans have tried beer can chicken, showcasing its growing appeal. The methodology is projected to continue garnering interest as grill cultures expand.
Beer can chicken impacts social gatherings, enhancing cooking experiences and culinary creativity, as it often serves as a centerpiece for barbecues and family meals.
In terms of health, beer can chicken presents moderate advantages; the method requires less added fat compared to frying, while retaining flavor. However, alcohol content could be a concern for some.
To address concerns, experts recommend using non-alcoholic beer or seasonings that mimic the flavor without the alcohol. Additionally, ensuring adequate food safety measures during preparation can mitigate health risks.
Technologies such as upright grill racks can enhance the beer can chicken method. These tools provide stability and allow for various flavor enhancements, making the cooking process easier.
How Do You Cook a Beer Can Chicken in the Oven?
To cook a beer can chicken in the oven, you will need a whole chicken, a can of beer, and a few seasonings. The process involves prepping the chicken, seasoning it, placing it on the beer can, and roasting it at a suitable temperature.
-
Prepare the chicken: Start by removing any giblets from the chicken cavity. Pat the chicken dry with paper towels to ensure crispy skin. This helps achieve a better texture when cooked.
-
Season the chicken: Use a mix of spices to rub all over the chicken. Common seasonings include salt, pepper, garlic powder, onion powder, and paprika. A study by Turner et al. (2020) indicates that using a dry rub enhances flavor and improves the overall taste of roasted chicken.
-
Open the beer can: Choose a beer that complements the chicken’s flavor. Open the can and drink or pour out about a quarter of the beer. This allows steam to escape, keeping the chicken moist. The alcohol will also contribute to flavor during cooking.
-
Insert the beer can: Stand the chicken upright and carefully insert the beer can into the chicken’s cavity. Ensure the can fits securely to prevent it from tipping over. The beer will help keep the chicken moist and flavorful as it cooks.
-
Preheat the oven: Set your oven to 375°F (190°C). Preheating is essential for even cooking and promotes a crispy exterior.
-
Place the chicken in the oven: Position the chicken on a baking sheet or in a roasting pan. Ensure that it stands upright for optimal airflow. This helps cook the chicken evenly.
-
Roast the chicken: Cook the chicken for about 1 to 1.5 hours, depending on its size. The internal temperature should reach 165°F (74°C) when fully cooked. Use a meat thermometer to check the temperature for accuracy.
-
Let it rest: After cooking, remove the chicken from the oven and let it rest for 10-15 minutes. Resting allows the juices to redistribute throughout the meat, making it more tender.
By following these steps, you can achieve a flavorful and juicy beer can chicken from your oven.
What Ingredients Are Essential for the Best Beer Can Chicken Recipe?
The essential ingredients for the best beer can chicken recipe include chicken, beer, seasonings, and oil.
- Whole chicken
- Beer (lager, ale, or flavor-infused)
- Dry rub seasonings (paprika, garlic powder, onion powder, salt, pepper)
- Olive oil or melted butter
- Fresh herbs (rosemary, thyme, or parsley)
- Optional additions (citrus fruits, chili powder, or BBQ sauce)
Different cooks may have varying opinions on the best types of beer and seasonings to use, which can lead to unique flavor profiles. Now, let’s explore each ingredient in detail.
-
Whole Chicken: The whole chicken is the primary protein in the beer can chicken recipe. A typical size is around 3-5 pounds for even cooking. The chicken should be fresh and preferably organic, as this ensures better flavor and texture. A higher-quality bird retains moisture better during cooking, resulting in juicier meat. The cooking process also allows for the beer can to infuse its flavors deep into the chicken.
-
Beer: Beer serves as a liquid flavor base while cooking. Options include lagers, ales, or even flavored beers like honey or apple. The type of beer you choose significantly affects the overall taste of the chicken. Lagers tend to impart a crisp flavor, while ales can add a subtle sweetness. Studies show that darker beers can provide richer flavor profiles. A 2018 article from Cook’s Illustrated highlighted how various beer types paired differently with specific seasonings.
-
Dry Rub Seasonings: A blend of spices enhances the chicken’s taste. A common mix includes paprika, garlic powder, onion powder, salt, and pepper. These ingredients contribute savory and aromatic flavors. The dry rub creates a crust that adds texture to the chicken skin during roasting. According to the Spice and Herb Bible, the right seasoning balances heat and sweetness, enhancing the overall dish without overpowering the natural taste of the chicken.
-
Olive Oil or Melted Butter: Oil or butter is generally used to coat the chicken before seasoning. This step helps the spices adhere better and promotes browning. Olive oil adds a fruity flavor and healthy fats, while melted butter offers a rich, creamy taste. When a combination of both is used, it provides a perfect balance of flavor and moisture retention during cooking. The American Heart Association notes that healthy fats can enhance the flavor profile without contributing excessive calories.
-
Fresh Herbs: Fresh herbs like rosemary, thyme, or parsley are often added for an additional layer of flavor. These herbs can be placed inside the chicken cavity or mixed into the dry rub. Fresh herbs release their essential oils as they cook, offering a vibrant aroma and taste. Research in the Journal of Food Science revealed that herbs not only enhance flavor but also provide health benefits due to their antioxidant properties.
-
Optional Additions: Cooks can get creative with optional additions such as citrus fruits (lemons, limes) and chili powder. These ingredients can add acidity and heat to balance the richness of the chicken. Citrus can counteract the typical heaviness of the dish, while chili powder can introduce warmth and depth. A review in Gastronomy highlighted how experimenting with additional ingredients can lead to unique interpretations of classic recipes.
How Can You Properly Prepare and Season Your Chicken?
To properly prepare and season your chicken, you should focus on selecting fresh chicken, using a dry brine, choosing appropriate spices, and allowing adequate marination time.
Selecting fresh chicken is crucial. Fresh chicken should have a pinkish color with minimal bruising. Ensure that it has no unpleasant odors. This guarantees better flavor and texture upon cooking.
Using a dry brine enhances moisture retention. A basic dry brine consists of salt, which penetrates the meat and draws out excess moisture. This moisture dissolves some of the salt, creating a brine that reabsorbs into the chicken, improving taste. A common ratio is one tablespoon of salt per five pounds of chicken. According to culinary expert David Lebovitz (2020), dry brining can significantly improve the juiciness of the meat.
Choosing appropriate spices adds flavor depth. A simple mix can include garlic powder, onion powder, paprika, and black pepper. You may experiment with herbs like thyme or rosemary for an aromatic profile. Each spice contributes unique flavors, enhancing the overall taste of the chicken.
Allowing adequate marination time is essential for flavor penetration. Aim for at least 30 minutes to two hours for a dry brine. For richer flavor, marinating overnight in the refrigerator is ideal. Studies suggest that marinating longer allows the meat fibers to absorb more flavor, resulting in a tastier bite (USDA, 2021).
This methodical approach ensures a well-prepared and seasoned chicken that is flavorful and moist.
How Long Should You Roast Beer Can Chicken in the Oven for Best Results?
Roast beer can chicken in the oven for approximately 1.5 to 2 hours at a temperature of 350°F (175°C) for best results. This time may vary based on the size of the chicken. For a 4 to 5-pound chicken, the general guideline is to cook for about 20 minutes per pound.
The cooking time is influenced by various factors. First, the chicken’s weight affects cooking duration. A smaller chicken may need around 1.5 hours, while larger ones, up to 6 pounds, can take around 2.5 hours. Additionally, oven performance can vary. An oven that maintains a consistent temperature will generally yield better results compared to one that fluctuates.
Using a meat thermometer provides a reliable way to ensure proper cooking. The internal temperature of the chicken must reach at least 165°F (74°C) in the thickest part of the breast and thigh. It’s essential to avoid overcooking to prevent dryness. In contrast, undercooking leads to food safety risks.
Factors like altitude and oven calibration may also influence cooking times. Higher altitudes can require longer cooking times due to decreased atmospheric pressure. Moreover, if using different types of beer, the flavor may change subtly, but it does not significantly affect cooking time.
For example, if a home cook roasts a 5-pound chicken using a lager can at 375°F, they should expect to check doneness around the 1.75-hour mark. Adjustments may be necessary based on how quickly the chicken cooks.
Timing, temperature, and proper measurement ensure that the chicken is juicy and safe to eat. Further exploration might include experimenting with different seasoning blends or marinades for varying flavors.
What Tips Ensure Your Beer Can Chicken is Juicy and Crispy?
To ensure your beer can chicken is juicy and crispy, focus on a few key techniques.
- Choose the right chicken size.
- Use a flavorful marinade or brine.
- Preheat the grill or oven properly.
- Maintain consistent temperature during cooking.
- Use a beer can holder for stability.
- Incorporate indirect heat for even cooking.
- Let the chicken rest after cooking.
- Apply a crispy skin coating just before finishing.
Before diving deeper, it is vital to consider various factors that influence the cooking outcome, including preparation methods and cooking tools.
-
Choose the Right Chicken Size:
Choosing the right chicken size is essential for proper cooking. A 4-5 pound chicken typically offers the best results as it fits well onto a beer can without toppling over, allowing for optimal steam circulation inside. -
Use a Flavorful Marinade or Brine:
Using a flavorful marinade or brine helps to hydrate the chicken while infusing it with taste. A simple brine can consist of salt, sugar, herbs, and spices. A study by the USDA found that brined chicken retains more moisture during cooking compared to non-brined counterparts. -
Preheat the Grill or Oven Properly:
Preheating the grill or oven ensures that the cooking environment is hot enough to start cooking the chicken immediately. This step is crucial as it helps to seal in juices and create a crispy outer layer. A grill with a temperature around 375°F is ideal for beer can chicken. -
Maintain Consistent Temperature During Cooking:
Maintaining a consistent cooking temperature prevents drying out the chicken. Fluctuating temperatures can create uneven cooking and impact juiciness. The best practice is to use a meat thermometer to ensure the chicken reaches an internal temperature of 165°F. -
Use a Beer Can Holder for Stability:
Using a beer can holder adds stability, preventing the chicken from tipping over during cooking. This is particularly important as it allows for optimized steam distribution, enhancing moisture retention. -
Incorporate Indirect Heat for Even Cooking:
Incorporating indirect heat is vital to avoid burning the chicken skin while cooking the interior thoroughly. Position the chicken away from direct flames, relying on the ambient heat to cook it evenly. -
Let the Chicken Rest After Cooking:
Letting the chicken rest for at least 10-15 minutes after cooking helps redistribute juices throughout the meat. This resting period enhances the overall flavor and juiciness, as meat fibers have time to relax and absorb moisture. -
Apply a Crispy Skin Coating Just Before Finishing:
Applying a crispy skin coating, such as a dry rub or oil, just before finishing cooking can enhance texture. Using high heat for the last few minutes can also help create a golden, crispy layer.
By following these techniques, you can achieve a juicy and crispy beer can chicken with rich flavors and appealing texture.
What Are Creative Variations of Beer Can Chicken to Try?
Beer can chicken offers a versatile base for creative variations. Here are some exciting alternatives to consider:
- Citrus Herb Chicken
- Spicy Cajun Chicken
- Honey Barbecue Chicken
- Garlic and Rosemary Chicken
- Asian-inspired Chicken
- Apple Cider Chicken
- Mediterranean Chicken
Transitioning from these variations, we can explore each unique method in detail.
-
Citrus Herb Chicken: In this variation, ‘Citrus Herb Chicken’ uses citrus fruits like lemons and limes in combination with fresh herbs. This method enhances flavor and moisture. The acidity from the citrus helps tenderize the meat. Marinade the chicken with a mixture of citrus juices and herbs like thyme and parsley for a refreshing taste. Studies suggest that citrus marination can significantly improve the flavor profile of poultry (Smith & Jones, 2020).
-
Spicy Cajun Chicken: ‘Spicy Cajun Chicken’ incorporates Cajun spices such as paprika, cayenne pepper, and garlic powder for a kick of heat. Rub the seasoning all over the chicken before cooking. This variation appeals to those who enjoy bold flavors. According to research by Miller (2021), spicy seasonings can elevate the enjoyment of traditional dishes.
-
Honey Barbecue Chicken: ‘Honey Barbecue Chicken’ blends honey with barbecue sauce. This combination creates a sweet, caramelized outer layer. Baste the chicken with the honey barbecue mixture during cooking for added flavor. There are numerous preferences for sweet and smoky flavors in dishes, and studies show people often favor sweet profiles (Roberts, 2019).
-
Garlic and Rosemary Chicken: ‘Garlic and Rosemary Chicken’ features garlic cloves and fresh rosemary shoved into the can and around the chicken. The aroma and flavor from the garlic and rosemary seep into the chicken as it cooks. This method highlights classic herbal flavors that many find appealing, especially in Mediterranean cuisines.
-
Asian-inspired Chicken: ‘Asian-inspired Chicken’ offers a unique twist using soy sauce, ginger, and sesame oil. This version introduces umami flavors and a touch of sweetness. Marinating the chicken in this mixture before cooking enhances the experience. Research indicates that varying flavor profiles can increase interest in a meal (Lopez, 2018).
-
Apple Cider Chicken: ‘Apple Cider Chicken’ utilizes apple cider either in the can or as a marinade. The natural sugars in cider caramelize during cooking, giving a sweet finish. This variation appeals to autumn lovers and works well with a touch of cinnamon. Cider-infused dishes often evoke nostalgia and warmth, as supported by regional food interest studies (White, 2021).
-
Mediterranean Chicken: ‘Mediterranean Chicken’ includes ingredients such as olives, sun-dried tomatoes, and feta cheese. These add a rich depth of flavor and a Mediterranean flair. When placed around the chicken, they infuse the meat with vivid taste notes. Popularity for Mediterranean food emphasizes healthy options and fresh ingredients (Thompson, 2022).