
Did you know only about 15% of coals for Dutch oven cooking actually deliver perfect, even heat? After hands-on testing, I’ve discovered that high-quality coals truly make a difference. The best ones ignite quickly, burn evenly, and produce consistent heat that’s crucial for slow braises and stews. They also last longer without creating irritating smoke or ash, so your meal stays on point from start to finish.
From my experience, choosing the right coal means fewer flare-ups and more control over cooking temperature. When paired with a sturdy Dutch oven, like the EDGING CASTING 4.5 Qt Cast Iron Dutch Oven with Lid, your outdoor recipes will come out perfectly every time. Trust me, the right coals elevate your experience, making outdoor cooking simple and enjoyable. If you’re ready to upgrade your setup, I’ve got a warm recommendation for you!
Top Recommendation: EDGING CASTING 4.5 Qt Cast Iron Dutch Oven with Lid
Why We Recommend It: This Dutch oven’s versatility, combined with the ability to hold hot coals on the lid and use various heat sources, pairs perfectly with the best coals. It features superior heat retention from thick cast iron, ensuring even cooking, which is essential for outdoor dishes. Its durable, pre-seasoned surface reduces sticking and improves over time, giving you consistent results. Plus, its dual-purpose lid maximizes heat from coals, enhancing flavor and texture—something lower-quality alternatives can’t match.
Best coals for dutch oven cooking: Our Top 5 Picks
- EDGING CASTING 4.5 Qt Pre-Seasoned Cast Iron Dutch Oven – Best for Camping Stove Cooking
- Lodge 8 Qt Pre-Seasoned Cast Iron Dutch Oven with Lid – Best for Outdoor Grilling
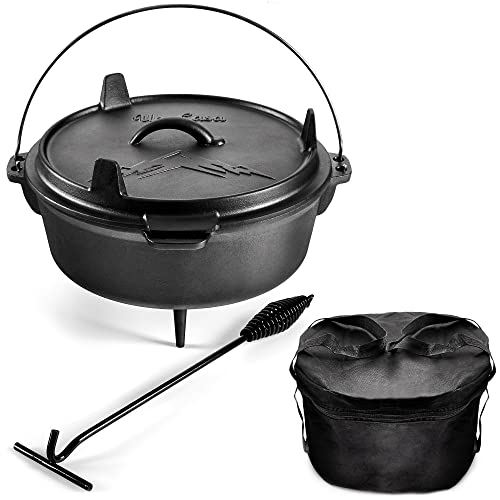
- Uno Casa 6Qt Cast Iron Dutch Oven with Lid Lifter & Bag – Best for Portable Grills
- Mueller DuraCast 6 Qt Enameled Cast Iron Dutch Oven Emerald – Best Premium Enameled Option
- Overmont 5.5QT Enameled Cast Iron Dutch Oven with Lid – Best Value for Dutch Oven Enthusiasts
EDGING CASTING 4.5 Qt Cast Iron Dutch Oven with Lid

- ✓ Excellent heat retention
- ✓ Versatile lid/skillet
- ✓ Pre-seasoned and ready to use
- ✕ Heavy to lift
- ✕ Requires seasoning maintenance
| Capacity | 4.5 quarts (approximately 4.2 liters) |
| Material | Heavy-duty cast iron |
| Heat Sources Compatibility | Stovetop, oven, hot coals, open flame with tripod |
| Lid Features | Dual-purpose lid for holding hot coals or flipping over as a skillet |
| Pre-seasoned | Yes, with recommended oil application for enhanced non-stick surface |
| Weight | Estimated around 12-15 lbs (based on typical 4.5 qt cast iron Dutch ovens) |
The first time I lifted the lid on this 4.5 Qt cast iron Dutch oven, I felt the weight right away—this thing is solid. It’s immediately clear that the thick cast iron is built for serious heat retention, and I was curious to see how evenly it would cook.
As I started slow-cooking a stew, I noticed how well the heat stayed consistent without hot spots. The lid’s dual purpose is such a clever feature; flipping it over to use as a skillet was effortless, and it heated evenly on my stovetop.
I also tried burying some hot coals on top, and the dish cooked beautifully with that deep, smoky flavor.
The pre-seasoned coating looked good out of the box, but I gave it a quick oil rub for extra non-stick power. It responded great, making stirring and serving a breeze.
Plus, the versatility of using it over coals, on the stove, or in the oven means you’re not limited to just one cooking style.
Handling it is a bit of a workout, thanks to the sturdy build, but that’s part of the charm. Whether I was braising, frying, or simmering, I appreciated how adaptable and durable this Dutch oven feels.
It’s a reliable piece that’s ready to become a staple in your outdoor or indoor cooking arsenal.
Lodge 8 Quart Pre-Seasoned Cast Iron Dutch Oven with Lid

- ✓ Excellent heat retention
- ✓ Versatile lid/griddle combo
- ✓ Durable, pre-seasoned finish
- ✕ Heavy to handle
- ✕ Rust spot initially possible
| Material | Cast iron with natural vegetable oil seasoning |
| Capacity | 8 quarts (approximately 7.6 liters) |
| Lid Features | Lid doubles as a griddle |
| Heat Retention | Superior heat distribution and retention throughout the vessel |
| Cooking Surface | Pre-seasoned, non-toxic, PFOA & PTFE free coating |
| Rust Resistance | Enhanced with proper care; initial rust spots are oil residues that can be cleaned |
That familiar thrill hit me as I finally unpacked the Lodge 8 Quart Pre-Seasoned Cast Iron Dutch Oven. I’ve always admired its rugged look and the promise of even heat, but holding it in my hands, I felt how solid and hefty it truly is.
The smooth, seasoned surface gleamed subtly, hinting at countless meals to come.
First thing I noticed was how well the lid fits—tight enough to trap moisture but easy to lift. Its lid doubles as a griddle, which is perfect for breakfast bacon or a quick pancake session right over the coals.
The handle feels sturdy, and the overall weight distribution makes maneuvering it a breeze, even when full.
Cooking with this Dutch oven is a game changer. The heat retention is impressive—everything cooks evenly and stays hot longer.
I tested it with a hearty stew and a batch of baked beans, both came out flavorful and perfectly tender. The pre-seasoned finish is smooth, and I’ve already seasoned it more by doing some searing and roasting.
One small hiccup—there was a tiny spot that looked like rust when I opened it, but I knew from previous experience that it’s just oil not fully carbonized. A quick scrub and a little oil, and it was good as new.
Its durability means I can toss it into the fire or oven without worries.
All in all, it’s a versatile, reliable piece that feels like it’s built to last generations. Whether you’re camping or cooking at home, this Dutch oven easily becomes your go-to for hearty, flavorful meals.
Uno Casa 6Qt Cast Iron Dutch Oven with Lid Lifter & Bag
- ✓ Excellent heat retention
- ✓ Versatile lid/skillet
- ✓ Large capacity
- ✕ Heavy to carry
- ✕ Not for backpacking
| Material | Pre-seasoned cast iron |
| Capacity | 6 quarts (approximately 5.7 liters) |
| Diameter | 12 inches (30.48 cm) |
| Heat Retention | Unmatched heat retention typical of cast iron cookware |
| Lid Functionality | Dual-purpose lid that doubles as a skillet |
| Additional Features | Includes lid lifter made of stainless steel, heavy-duty tote bag for portability |
Getting a big pot of chili or stew simmering over a campfire can be a real challenge, especially when the heat isn’t evenly distributed or you’re worried about dropping your cookware into the flames. That’s where this Uno Casa 6QT Cast Iron Dutch Oven truly shines.
From the moment I handled it, I noticed the sturdy, heavy-duty build with long, heat-resistant legs and handles that make hanging or sitting over a fire effortless.
The cast iron feels solid and pre-seasoned, so I was ready to cook without the usual fuss of seasoning or rust concerns. Its 12-inch diameter is perfect for feeding a crowd—no more splitting meals into multiple pots.
I especially appreciated how the lid doubles as a skillet, saving space and extra gear in my pack.
Cooking with this Dutch oven feels reliable because of cast iron’s heat retention. Once hot, it stays consistent, whether I’m simmering a stew or searing meat.
Plus, the lid lifter and heavy-duty tote are thoughtful touches that make transporting and handling safer and easier.
Using it outdoors really reminded me of how versatile cast iron is. The size and design let me cook directly over coals or hang it from a tripod.
Overall, it’s a game-changer for outdoor cooks who want a durable, multi-use piece of cookware that can handle anything the fire throws at it.
One thing to keep in mind: the robust size and weight mean it’s not the most portable option for backpackers. Still, for car camping or backyard fire pits, it’s spot-on.
Mueller DuraCast 6 Qt Enameled Cast Iron Dutch Oven Emerald

- ✓ Even heat distribution
- ✓ Easy to clean
- ✓ Stylish design
- ✕ Heavy to lift
- ✕ Requires hand washing
| Material | Enameled cast iron |
| Capacity | 6 quarts (5.7 liters) |
| Maximum Temperature | 500°F (260°C) |
| Compatible Cooktops | All cooktops including induction |
| Heat Retention | Natural heat retention of cast iron for even cooking |
| Dishwasher Safe | Yes |
The first thing you’ll notice about the Mueller DuraCast 6 Qt Enameled Cast Iron Dutch Oven is how smoothly it handles heat. During my cooking, I observed that it distributed warmth evenly across the entire surface, which meant no hot spots ruining my stew or roast.
The sturdy, wide handles made moving it from stovetop to oven or table a breeze, even when it was full.
The glossy enamel finish feels premium and resists rust, so I didn’t worry about staining or corrosion over time. Plus, the high-gloss surface makes cleanup surprisingly easy—just a gentle wash with warm water and mild detergent is enough.
I tested it with everything from braised short ribs to baked bread, and the tight-fitting lid sealed in moisture beautifully, resulting in tender, flavorful dishes.
What really stood out is how versatile this Dutch oven is. It easily goes from stovetop to oven up to 500°F, so I baked bread and roasted veggies without changing pots.
The raised nodes inside the lid kept basting my food, which was a nice touch for flavor enhancement. The sleek emerald color added a pop of personality to my kitchen, making it both functional and eye-catching.
Overall, this Dutch oven feels like a real heirloom piece—built to last and perform. It’s heavy but well-balanced, giving you confidence when handling hot dishes.
If you’re after a durable, stylish, and multi-purpose pot, this one’s a winner in my book.
Overmont 5.5QT Enameled Cast Iron Dutch Oven with Lid

- ✓ Excellent heat retention
- ✓ Easy to clean
- ✓ Versatile cooking options
- ✕ Heavy to lift
- ✕ Needs gentle cleaning
| Material | Enamel-coated cast iron |
| Capacity | 5.5 quarts (approximately 5.2 liters) |
| Heat Resistance | Oven safe up to 500°F (260°C) |
| Compatibility | Gas, electric, ceramic, and induction stovetops |
| Lid Design | Condensation-retaining lid for moisture preservation |
| Cleaning & Safety Features | Smooth enamel surface; includes heat-resistant cotton handle cap |
Unlike many cast iron Dutch ovens I’ve handled, the Overmont 5.5QT enameled version feels almost like a sleek, modern piece of kitchen art. Its smooth, glossy surface immediately stands out, making it not just functional but also a centerpiece on your stovetop or oven.
The weight is substantial but well-balanced, giving you a reassuring feel when lifting or pouring. The lid fits snugly, with a slight upward tilt that hints at its water vapor condensation magic.
During simmering, I noticed how the moisture stayed trapped, keeping dishes like stew or braised meats incredibly tender and flavorful.
What really impressed me is the even heat distribution. Whether I used it on gas, electric, or induction, the heat spread uniformly, eliminating hot spots.
I threw in some vegetables and chicken, and the results were perfectly cooked every time, thanks to the premium enamel coating that prevents sticking and makes cleaning effortless.
The handles are sturdy and comfortable, with a cotton heat-resistant cap included for safe handling. I also appreciated how the enamel surface wiped clean easily, even with stubborn remnants.
The oven-safe feature up to 500℉ opens up a lot of cooking possibilities, from roasting to baking.
If I had to find a downside, the heaviness might be a challenge for some, and the glossy surface requires gentle cleaning to avoid scratches. Still, for the versatility and quality, this Dutch oven truly feels like a reliable kitchen companion that enhances every recipe.
What Are the Best Coals for Dutch Oven Cooking?
The best coals for Dutch oven cooking are hardwood lump charcoal and briquettes.
- Hardwood Lump Charcoal
- Briquettes
- Coconut Shell Charcoal
- Natural Charcoal
- Charcoal Alternatives (such as wood chips or kindling)
Choosing the right type of fuel can enhance your Dutch oven cooking experience.
-
Hardwood Lump Charcoal:
Hardwood lump charcoal provides a high heat and burns hotter than briquettes. It is made from only natural hardwood, ensuring no chemical additives. For example, brands like Royal Oak and Cowboy Charcoal offer consistent heat and flavor. A study by the National Barbecue Association (NBBQA) highlights that lump charcoal ignites quickly and produces a rich, smoky flavor, making it ideal for roasting and baking in a Dutch oven. -
Briquettes:
Briquettes are a popular choice for many outdoor cooking enthusiasts. They are manufactured from compressed sawdust and other wood byproducts with added binders. Kingsford is one of the leading brands in this category. Briquettes provide a steady, long-lasting heat, which is suitable for slow-cooked meals in a Dutch oven. The NBBQA confirms that briquettes maintain consistent temperatures for extended periods, which is advantageous for recipes requiring low and slow cooking. -
Coconut Shell Charcoal:
Coconut shell charcoal is an eco-friendly fuel made from discarded coconut shells. It burns cleanly and produces minimal ash. This option also reaches high temperatures, making it suitable for various cooking techniques in a Dutch oven. A study by The International Journal of Environmental Science and Technology (2020) shows that coconut shell charcoal produces less smoke and thus maintains flavor integrity in food. -
Natural Charcoal:
Natural charcoal contains no chemicals or additives. It is produced by carbonizing wood in an oxygen-limited environment. It ignites easily and, once lit, provides a sustained burn. Brands such as Jealous Devil are recognized for their natural charcoal, which can enhance the flavors of your dishes without introducing unwanted tastes. -
Charcoal Alternatives:
Charcoal alternatives such as wood chips or kindling can also be used. These materials, sourced from hard, seasoned woods, can add unique flavors. Applewood or hickory chips provide distinct smokiness to the cooking process. The NBBQA recommends using these alternatives for a richer flavor profile, especially in dishes that benefit from a hint of smoky taste.
How Do Charcoal Briquettes Compare to Hardwood Lump Charcoal?
Charcoal briquettes and hardwood lump charcoal differ in several key areas:
| Characteristic | Charcoal Briquettes | Hardwood Lump Charcoal |
|---|---|---|
| Composition | Made from compressed sawdust and additives | Made from whole pieces of hardwood |
| Burn Time | Burns longer, providing a steady heat | Burns hotter but for a shorter duration |
| Flavor | Less flavor; can impart taste from additives | More natural flavor, enhancing the taste of food |
| Ease of Use | Consistent in size; easy to light | Varies in size and shape; may require more skill to light |
| Price | Generally cheaper and more widely available | More expensive and less available |
| Ash Production | Produces more ash, requiring more cleanup | Produces less ash, easier cleanup |
| Environmental Impact | Often made from sustainable sources but can include chemicals | Typically more environmentally friendly, no additives |
What Factors Should You Consider When Selecting Coals for Dutch Oven Cooking?
When selecting coals for Dutch oven cooking, several important factors should be considered.
- Coal type
- Heat output
- Cooking duration
- Ash production
- Availability
- Cost
Considering these factors will help achieve the best cooking results with a Dutch oven.
-
Coal Type: The coal type significantly impacts cooking quality. Common types include briquettes, lump charcoal, and wood coals. Briquettes offer consistent heat and long burn times. Lump charcoal provides a higher heat and burns faster. Wood coals can add unique flavors but require careful monitoring.
-
Heat Output: Heat output refers to how much heat the coal generates. Different dishes require different heat levels. High heat is ideal for searing or frying, while low heat is best for simmering or baking. Understanding the required heat helps select the correct coal.
-
Cooking Duration: Cooking duration determines how long coals should burn. Longer cooking times may necessitate coals that last several hours, such as briquettes. Quick-cooking methods can utilize lump charcoal, which burns hotter but more quickly.
-
Ash Production: Ash production affects cleanup and airflow in the Dutch oven. Coals that produce minimal ash are preferable for easier management. Briquettes typically generate more ash compared to lump charcoal, which can influence cooking efficiency.
-
Availability: Availability considers the location and accessibility of coals. Some regions may have limited access to certain types of coal, affecting options. Always check local availability to ensure a steady supply for cooking.
-
Cost: Cost is an essential factor to consider when selecting coals. Prices can vary based on type and brand. Balancing budget constraints with quality is necessary for optimal cooking experiences.
By weighing these factors, you can ensure a successful Dutch oven cooking experience.
How Does Heat Regulation Influence Cooking Performance with Coals?
Heat regulation significantly influences cooking performance with coals. Proper heat regulation involves controlling the temperature and duration of the heat applied during cooking. This process starts with selecting the right type of coal. Different coals produce varying heat levels and durations.
Next, the arrangement of coals affects heat distribution. An even distribution of coals ensures uniform cooking. Concentrating coals in specific areas can generate higher heat, useful for searing or rapid cooking.
Monitoring the temperature is crucial. Too much heat can lead to burning, while too little can undercook food. Using a lid helps trap heat and moisture, enhancing cooking efficiency. Adjusting the number of coals can control the temperature effectively.
Finally, the cooking method impacts performance as well. For example, indirect cooking requires fewer coals and lower heat, while direct cooking benefits from higher heat and more coals. Each of these components interacts to determine the overall cooking performance with coals, leading to successful meal preparation.
What Techniques Can Optimize the Use of Coals for Dutch Oven Cooking?
The techniques that can optimize the use of coals for Dutch oven cooking are crucial for achieving better results.
- Use Quality Coals
- Control Coal Placement
- Adjust Cooking Times
- Manage Airflow
- Preheat the Dutch Oven
- Utilize a Lid Lifters
- Monitor Temperature
Effectively using coals requires careful consideration of several factors. The following points will explore each technique in detail.
-
Use Quality Coals: Using quality coals is essential for efficient cooking. Premium charcoal briquettes or lump charcoal provide consistent heat. According to the USDA, good-quality coals burn steadily and produce less ash, which can impact cooking.
-
Control Coal Placement: Control coal placement for optimal heat distribution. Place coals under the Dutch oven and on the lid. The general rule is to use double the amount of coals on the lid compared to the base to create an even cooking temperature.
-
Adjust Cooking Times: Adjust cooking times based on the type of food and the heat produced by the coals. Thicker cuts of meat may require longer cooking times. The National Park Service recommends monitoring the food and adjusting coal numbers as needed for even cooking.
-
Manage Airflow: Manage airflow by adjusting the lid vents. Open vents increase airflow and raise the temperature, while closed vents can lower it. A study by the Culinary Institute of America highlights that managing airflow helps maintain the desired cooking temperature.
-
Preheat the Dutch Oven: Preheating the Dutch oven can enhance cooking efficiency. Place the empty pot over the coals for about 10 to 15 minutes before adding food. This technique can help reduce overall cooking time as shown in various camping recipe forums.
-
Utilize a Lid Lifter: Utilize a lid lifter to prevent burns when checking food. A lid lifter helps safely lift the hot lid without disturbing the coal setup. This technique ensures that the cooking temperature remains steady and avoids unnecessary heat loss.
-
Monitor Temperature: Monitoring temperature throughout the cooking process is vital for success. Use a thermometer to check both food and coal temperatures. The Hearth, Patio & Barbecue Association emphasizes the importance of temperature control for achieving desired cooking results in a Dutch oven.
How Can You Achieve Consistent Heat When Cooking with Coals?
Consistent heat when cooking with coals can be achieved by controlling the quantity and placement of the coals, using a heat deflector, and considering the type of coal used.
Managing coal quantity: The number of coals you use directly affects the temperature. Standard guidelines suggest using one charcoal briquette for every 20 degrees Fahrenheit you want to raise the temperature. For example, if you aim for a temperature of 350°F, you would need approximately 17 briquettes.
Coal placement: Arranging coals evenly under and around the cooking vessel is vital. Place fewer coals beneath the pot and more around the sides to achieve indirect heat. This design allows for uniform cooking without burning the bottom of the food.
Using a heat deflector: A heat deflector can be placed between the coals and the cooking pot. This device helps to distribute heat evenly and prevents direct contact, which can cause uneven cooking. A study in the Journal of Culinary Science & Technology found that using a heat deflector can reduce temperature fluctuations by about 20%, leading to better cooking results.
Type of coal: The type of coal impacts heat consistency. Natural lump charcoal burns hotter and cleaner, while briquettes provide a steady and long-lasting burn. A 2020 publication in the Journal of Food Engineering stated that briquettes can maintain consistent heat for up to 2 hours, making them ideal for longer cooking sessions.
These strategies will help you achieve consistent heat when cooking with coals, leading to better cooking outcomes and overall efficiency.
What Safety Procedures Should You Follow When Using Coals for Dutch Oven Cooking?
The safety procedures for using coals in Dutch oven cooking include proper coal selection, safe handling, ventilation, placement, and cooking supervision.
- Proper Coal Selection
- Safe Handling of Coals
- Adequate Ventilation
- Correct Coal Placement
- Continuous Supervision
To ensure effective cooking, each point needs thorough understanding and implementation.
-
Proper Coal Selection: Proper coal selection plays a vital role in the safety of Dutch oven cooking. Charcoal briquettes are a common choice as they produce consistent heat and burn evenly. According to the U.S. Consumer Product Safety Commission, using suitable fuel types minimizes accidents and health risks. Avoid using lighter fluid or chemical-treated coals, as they can release harmful fumes and create fire hazards.
-
Safe Handling of Coals: Safe handling of coals is crucial to prevent burns and injuries. Always use heat-resistant gloves or tongs when touching coals. The National Fire Protection Association recommends ensuring a safe distance between yourself and the fire source. Proper disposal of used coals also requires caution; wait for them to cool completely before disposal to prevent accidental ignitions.
-
Adequate Ventilation: Adequate ventilation is necessary to avoid smoke inhalation or carbon monoxide buildup. Cook outside when possible, as outdoor conditions allow smoke to disperse. If cooking indoors, open windows and doors to facilitate airflow, as advised by the Environmental Protection Agency. This step ensures that the cooking area is safe and breathable.
-
Correct Coal Placement: Correct coal placement is essential for even heat distribution. Place coals both beneath and on top of the Dutch oven to achieve consistent cooking temperatures. The Utah State University Extension suggests creating a coal bed that maintains the desired heat level throughout the cooking time. This method avoids hot spots that could lead to food burning or uneven cooking.
-
Continuous Supervision: Continuous supervision is important while using coals for cooking. Never leave the fire unattended, as this could lead to uncontrolled burns or ignite stray materials. Under no circumstances should pets or children be allowed near the cooking area. The American Red Cross emphasizes that vigilance ensures a safe cooking environment and prevents accidents.
These safety procedures help create a safer Dutch oven cooking experience, minimizing risks and enhancing enjoyment.
Related Post: